
Small Space, Big Impact: Our Kitchen’s Stunning Before and After

Do you love before and after stories as much as I do? Follow along as I reveal the before and after of a 100+-year-old kitchen that has not just been renovated, but reborn. You’ll see the results of a labor of love that spanned almost eight years.
This is a journey of transformation that has brought new life into the heart of our 1920 home. When we moved into our charming beach cottage, the kitchen was very tired and still living in the past.
Over eight years, our kitchen has undergone an amazing transition. This is a project that happened in phases due to a tight budget. We not only wanted to update this space, but add cottage charm while keeping the vintage feel.
As an Amazon affiliate, I earn from qualifying purchases at no extra cost to you. My blog contains other affiliate links as well for your convenience. Click here to read my privacy policy.
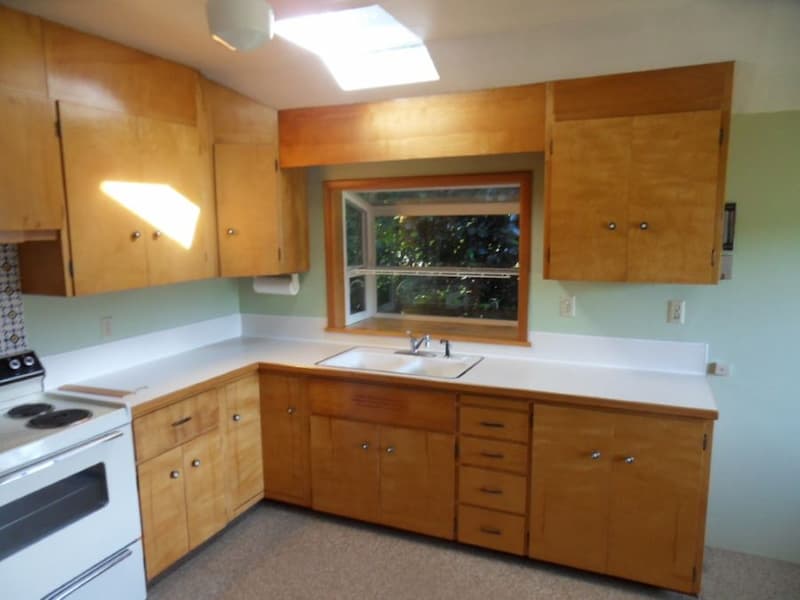
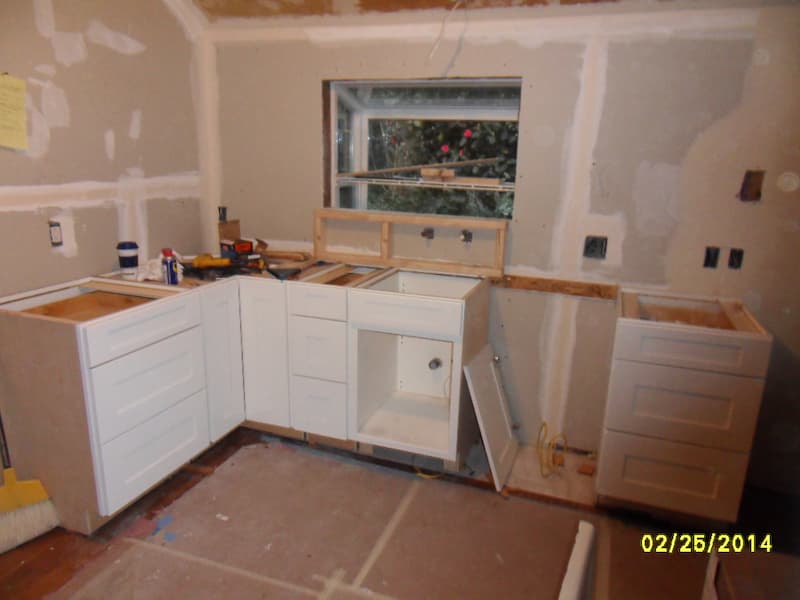
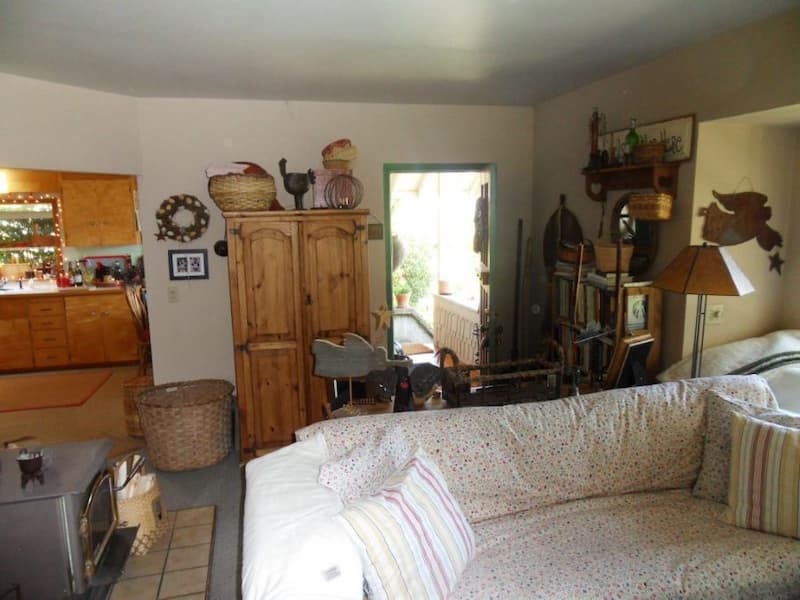
Let’s start with the views of our dated kitchen the day we moved in.
I have no idea when the kitchen cabinets were originally put in. The greenhouse window, laminate counters, sink, and appliances would eventually be replaced.
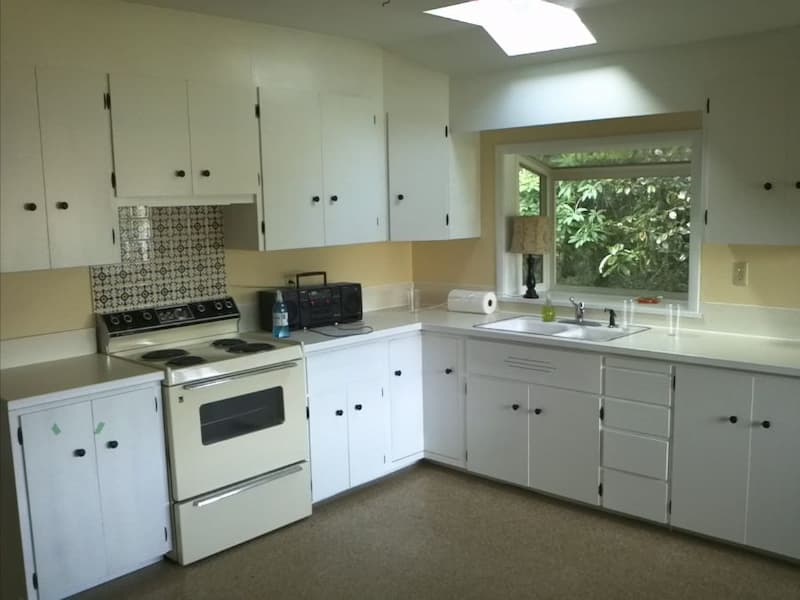
Phase 1 – Kitchen Cosmetic Changes and New Pantry
The first phase happened immediately.
We had the cabinets painted white, knowing it would be a few years before we would be in a financial position to install new ones.
Painting the walls was a quick fix. I was really into yellow walls back then. Isn’t it funny how our tastes change so often?
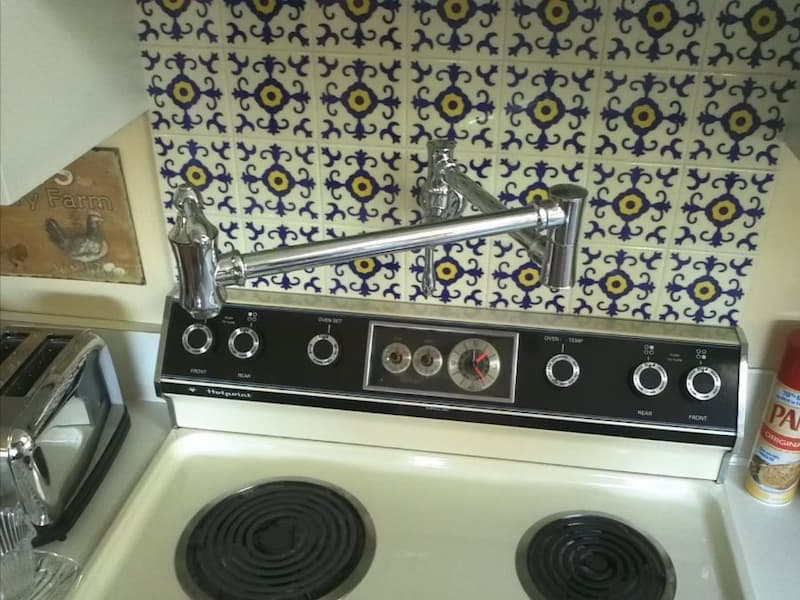
I had always wanted a pot filler so I was so excited when we had it put in.
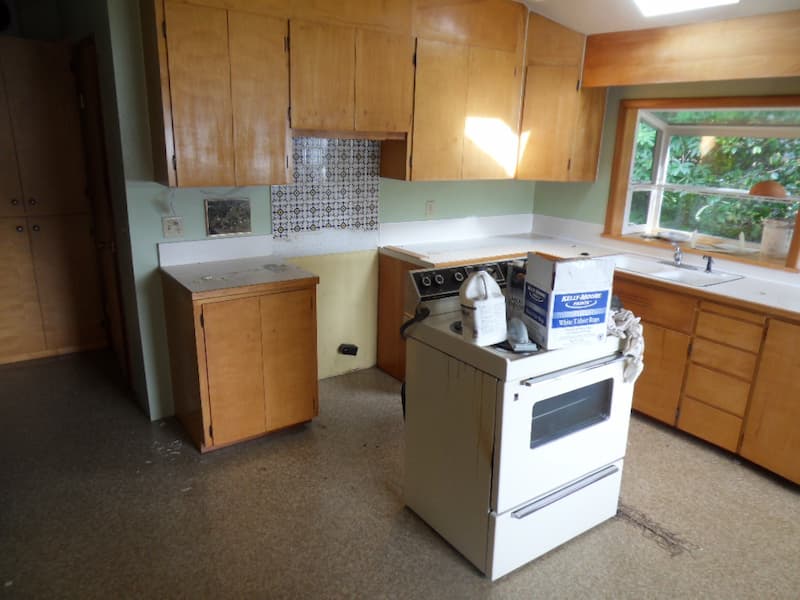
When we finally renovated the entire kitchen, we replaced the tile you see above the stove. We broke it into pieces, mixing it into a cement path we created in our backyard dog run.
I committed that I would try to reuse as many of the pieces from our old home’s past as possible.

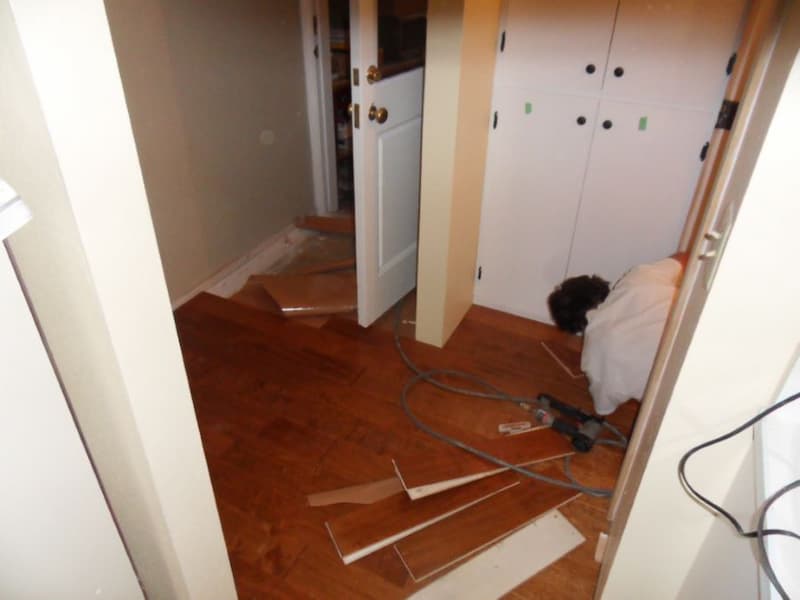
Here’s the hardwood flooring being put in.
Phase 2 – New Windows, Plumbing, and Hallway
- Install new windows
- Replace door and window trim
- Update plumbing
- Relocate the refrigerator and create a hallway
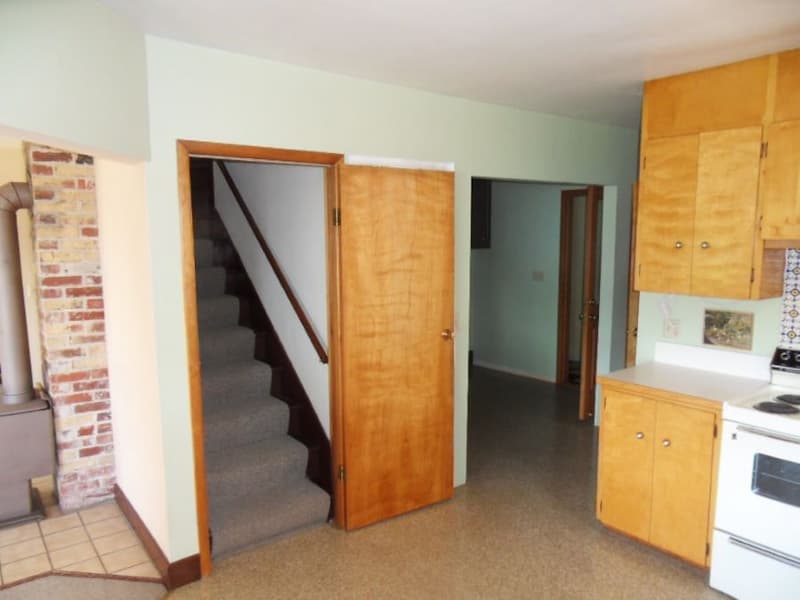
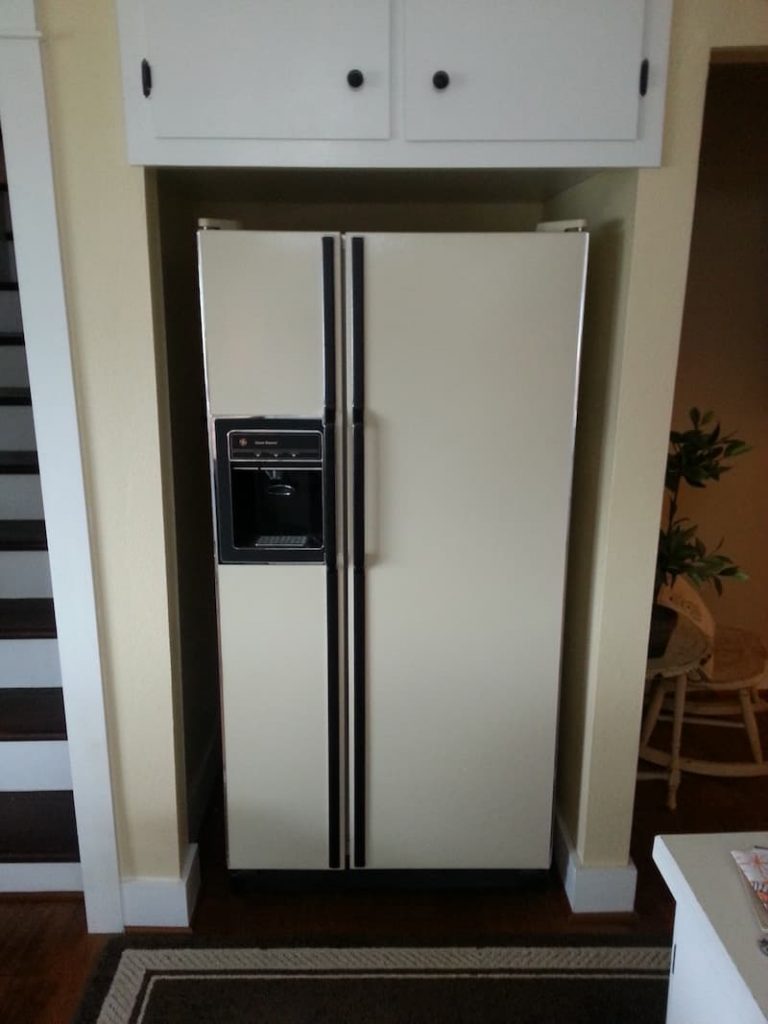
Moving the refrigerator into the actual kitchen area was a big project that really made an impact. The refrigerator was originally behind the wall where the hallway door was.
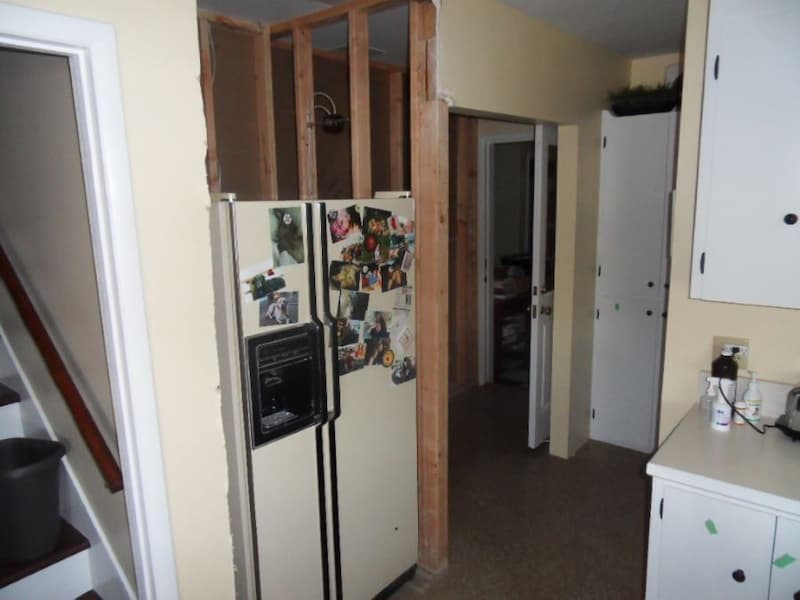
We removed the door to the stairs and reconfigured the space to bring the refrigerator into the kitchen. I’ll share more about the renovations we made to the rest of this space, including adding a walk-in closet to the bedroom by closing off that wasted space, next week.
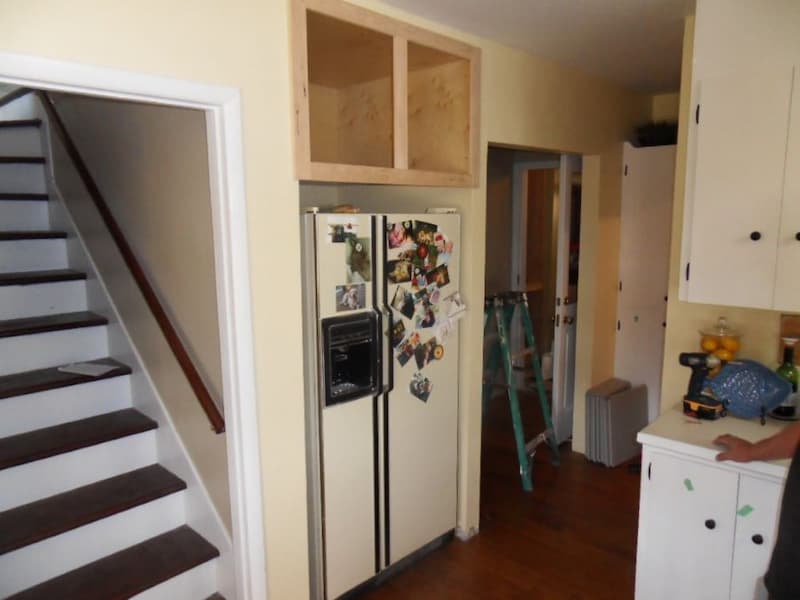
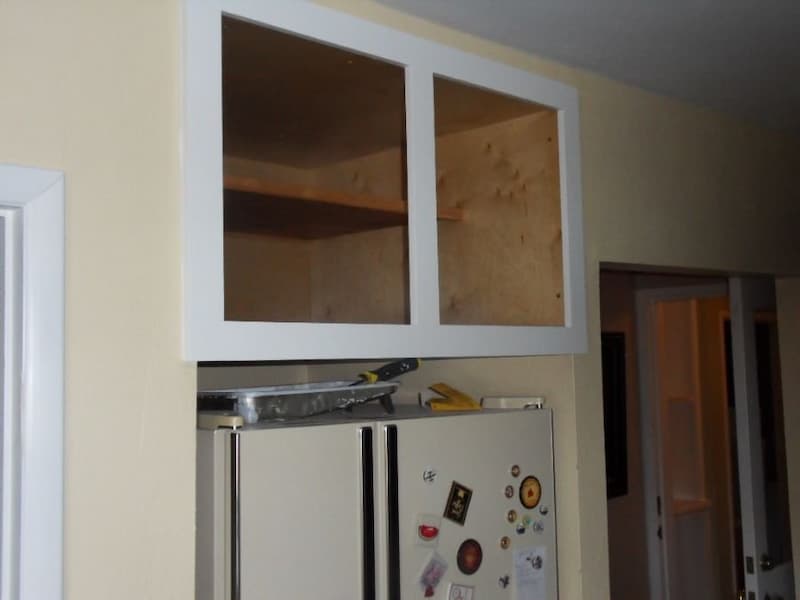
Have you ever wished for a double deep cabinet where you could store all the things that you only use once or twice a year? Holiday platters, those appliances that you received as a gift that are so complicated that you’ve never used them, cookbooks you never use? We built one of those cabinets above the new refrigerator space and I LOVE IT!
Getting new windows was the most fun of all. The windows we took out were original to our 1920 house. I remember every winter morning we would have to take a squeegee to them to get all the excess water off the window. And when the extra-wide trim was added, it really made a beautiful statement. (You can see the before and after window pics in the window seat section below).
Phase 3 – Full Kitchen Rennovation
- Complete renovation and tear the walls down to the studs
- Replace sink with a vintage farmhouse sink
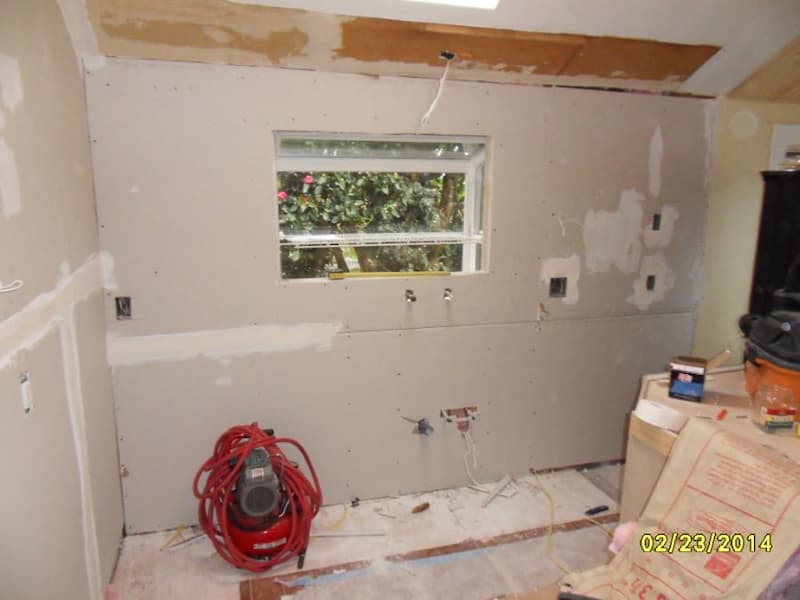
- Replace garden window with updated window
- Install subway tile
- Add new cabinetry
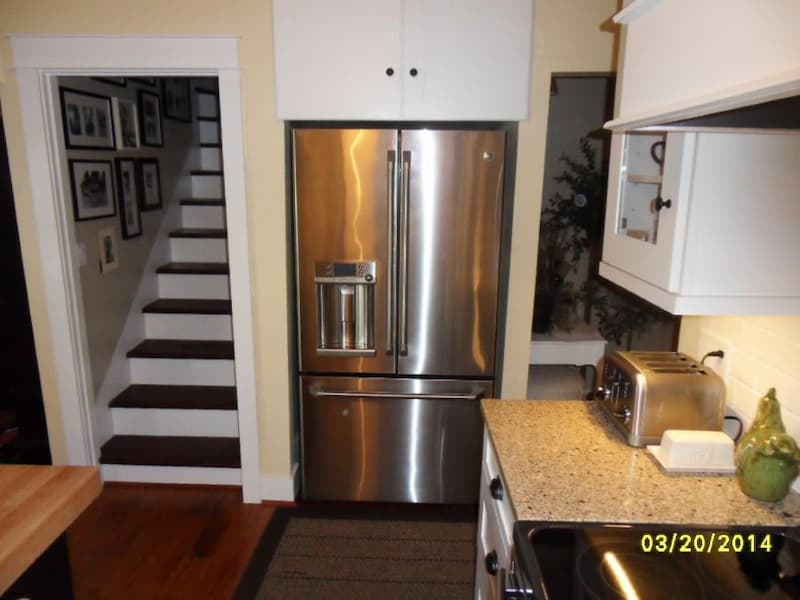
- Update all appliances
- Install tongue and groove ceiling
- Replace lighting fixture in the eating area
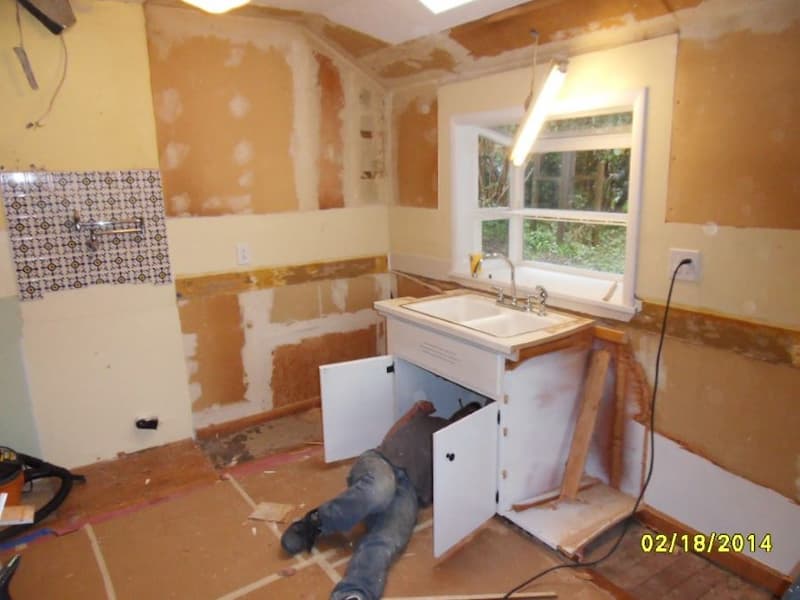
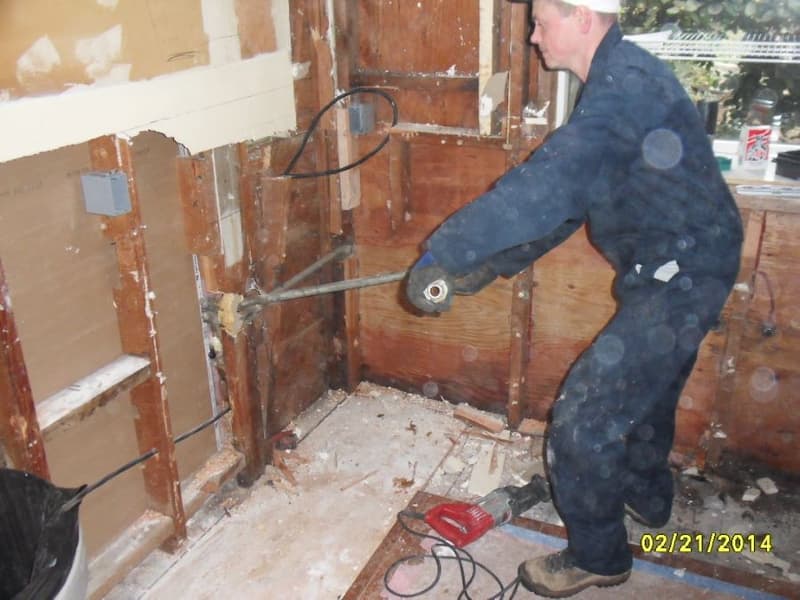
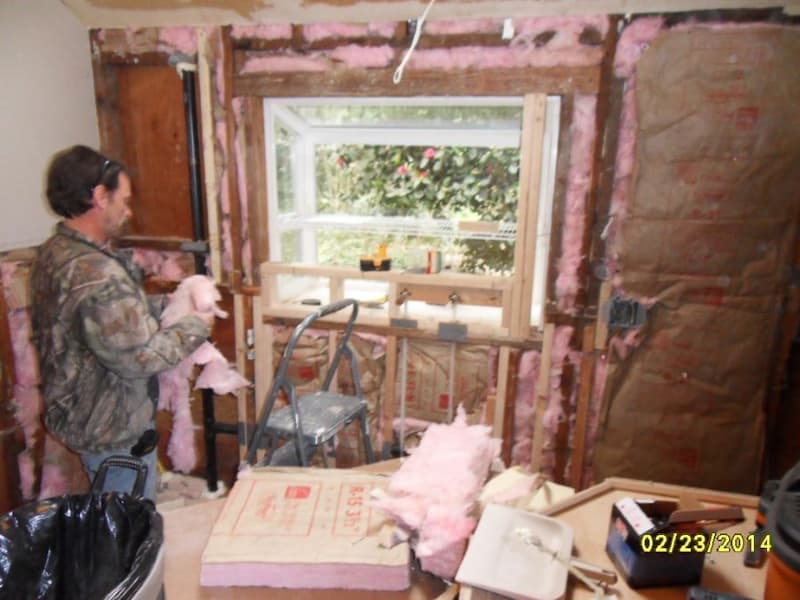
We had issues with water damage behind the walls and a lack of proper insulation, and although we never planned for it, we ended up tearing the kitchen down to the studs.
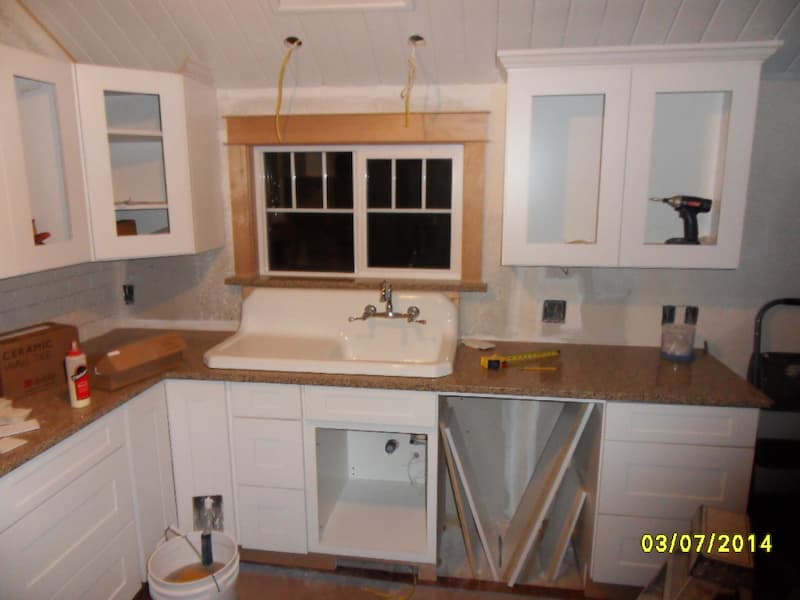
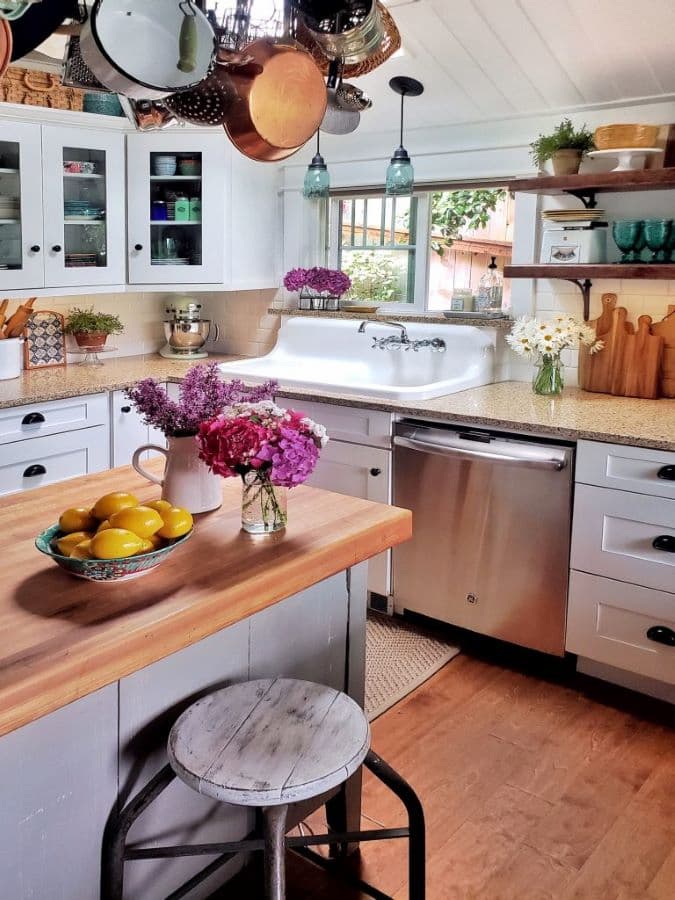
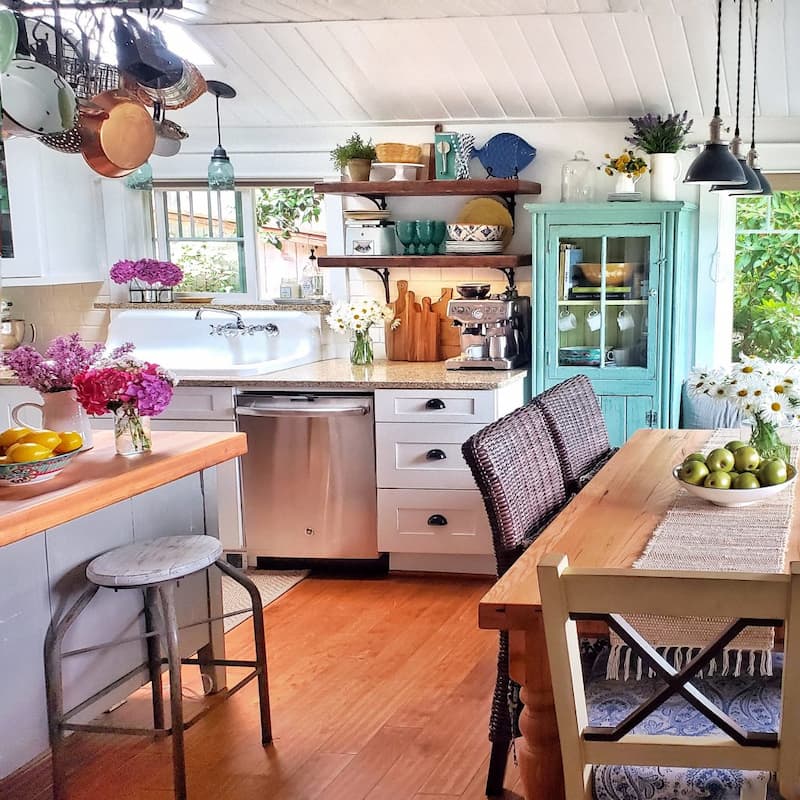
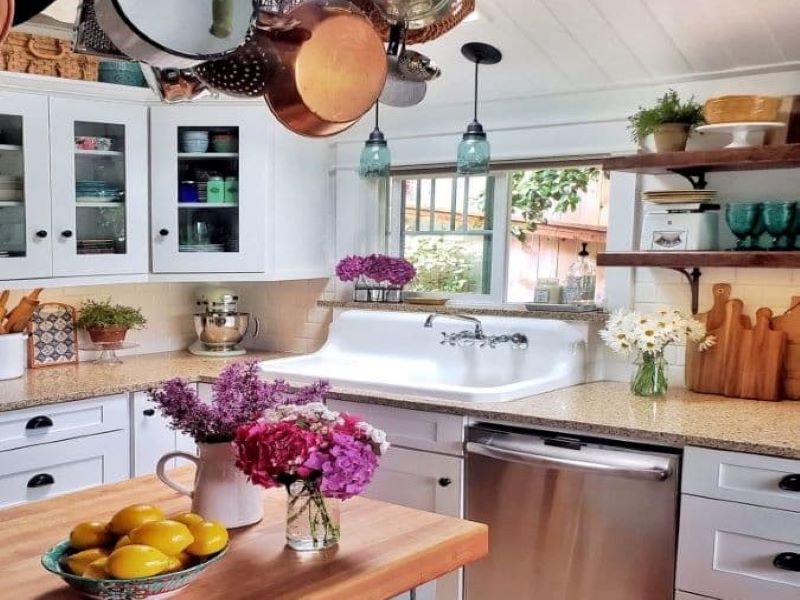
The vintage farm sink was our main inspiration for the kitchen. We basically built the rest of the kitchen around it.
We went with quartz countertops with a stone speckled color palette for a more beachy feel. White cabinets were installed. And I FINALLY got my dishwasher!
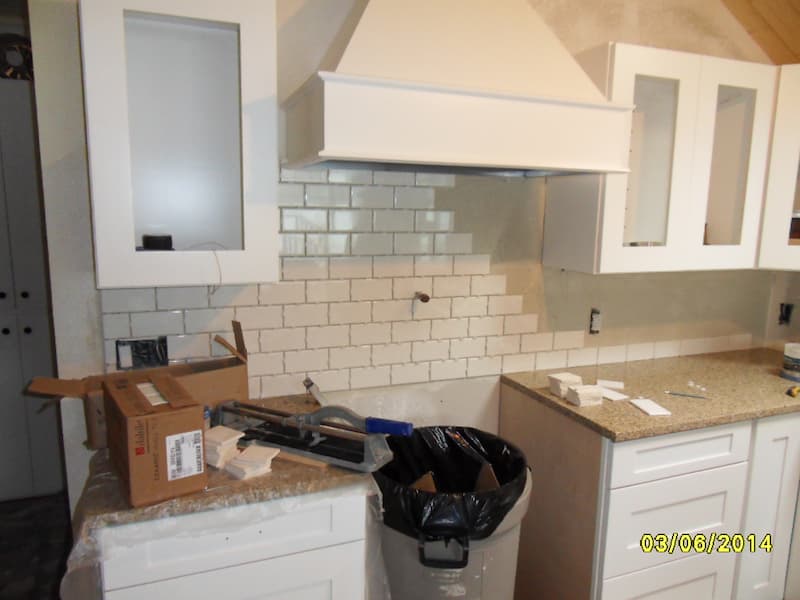
We wanted a classic and timeless look for our 1920 beach house, and felt that subway tile was the perfect choice.
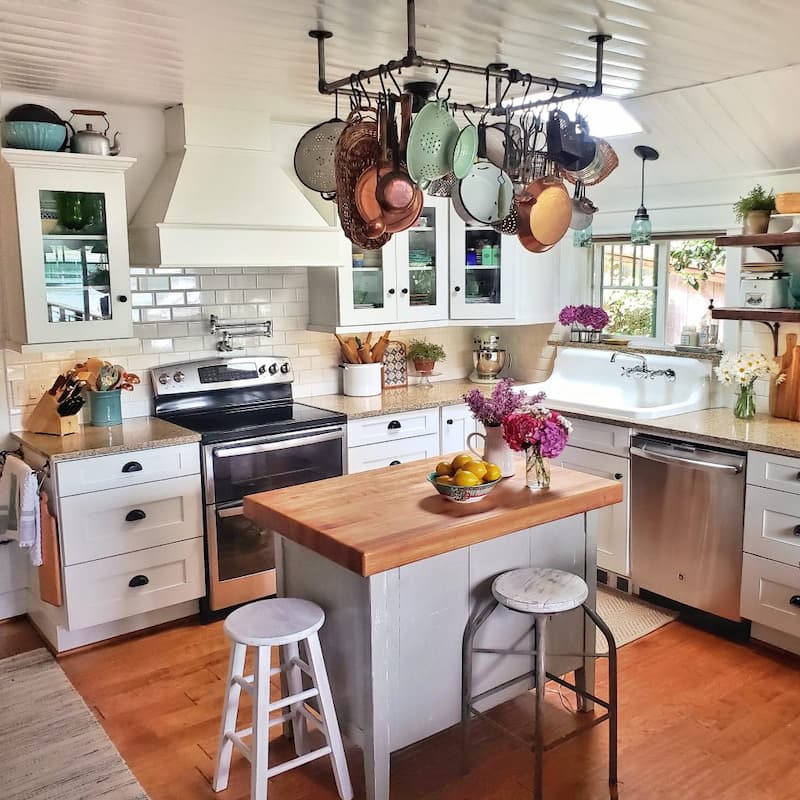
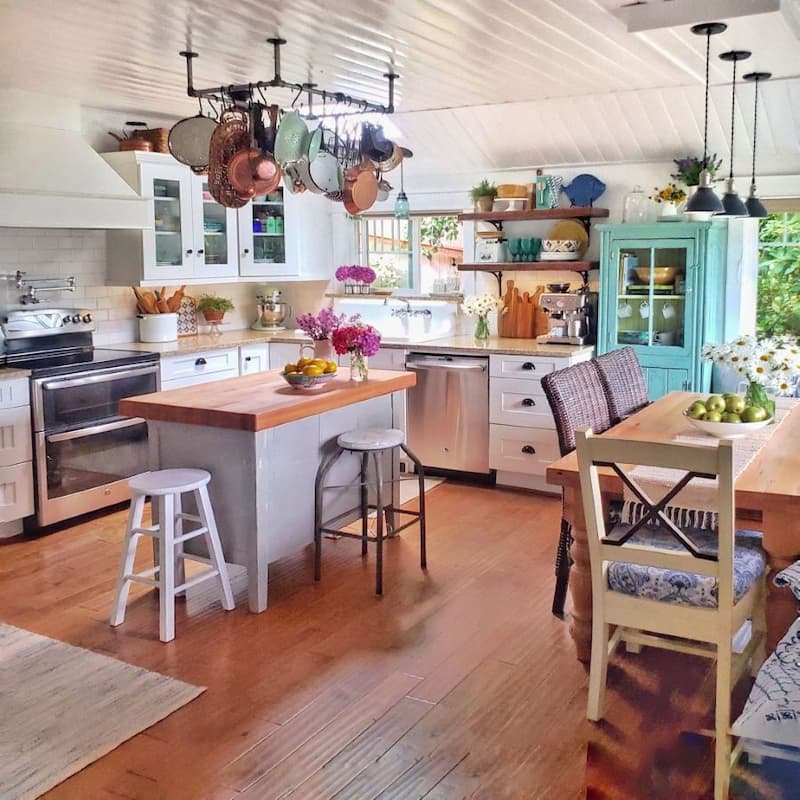
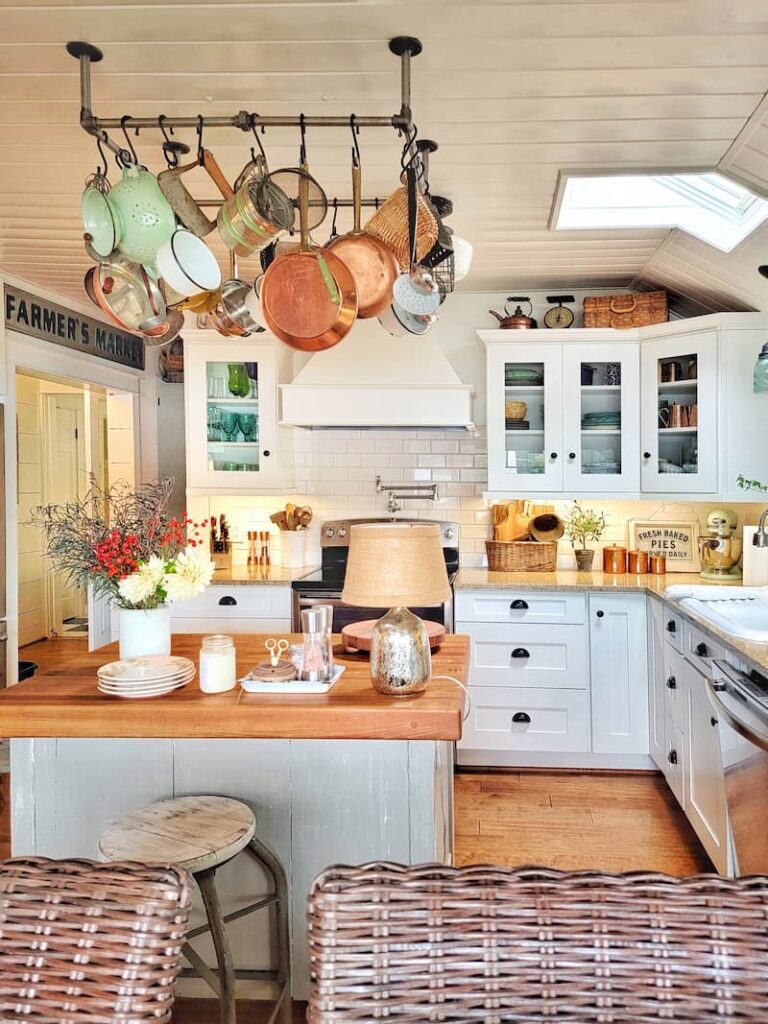
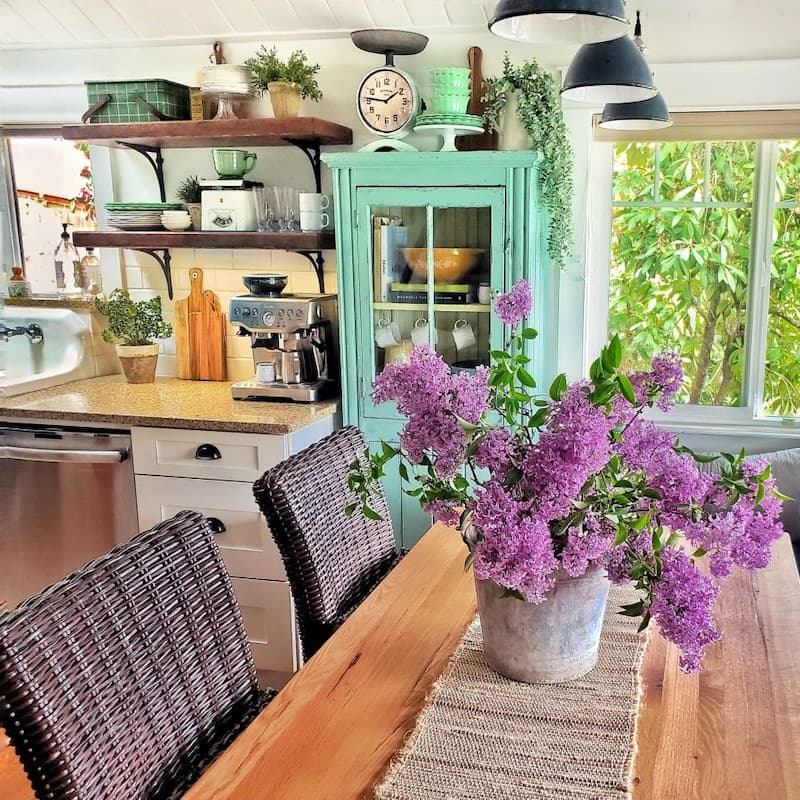
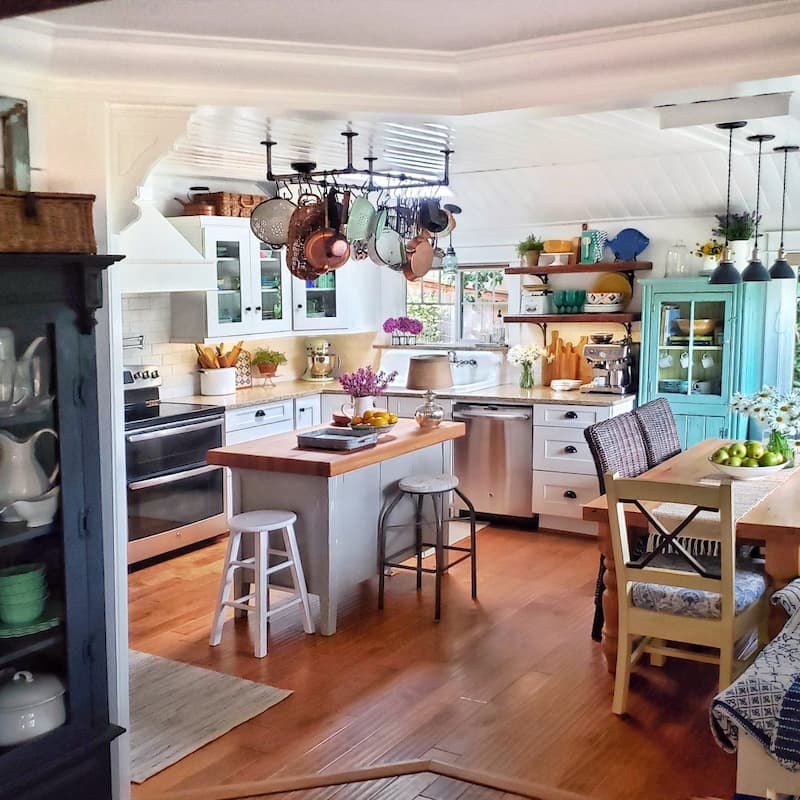
Here are some “after ” pics. The island was created from a dresser with a piece of butcher block from a Dunkin Donuts that was going out of business.
My husband and I made the iron pot rack last year.
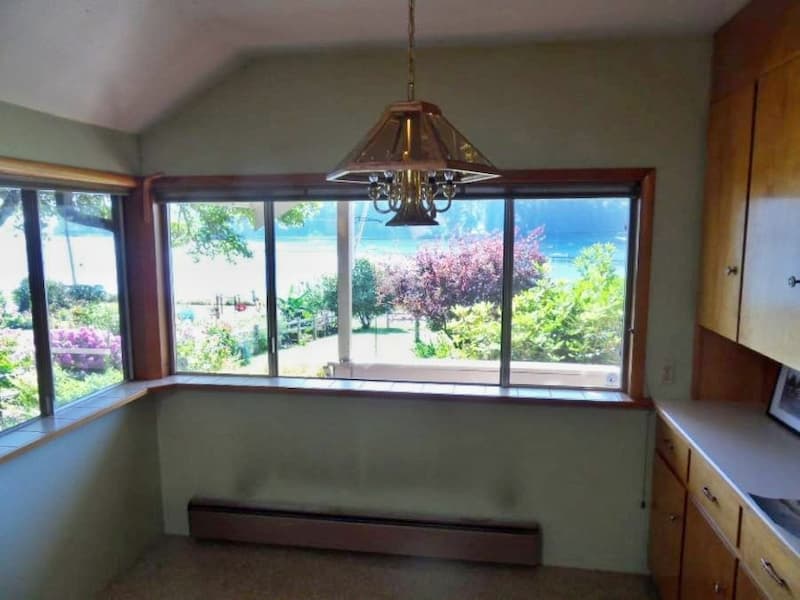
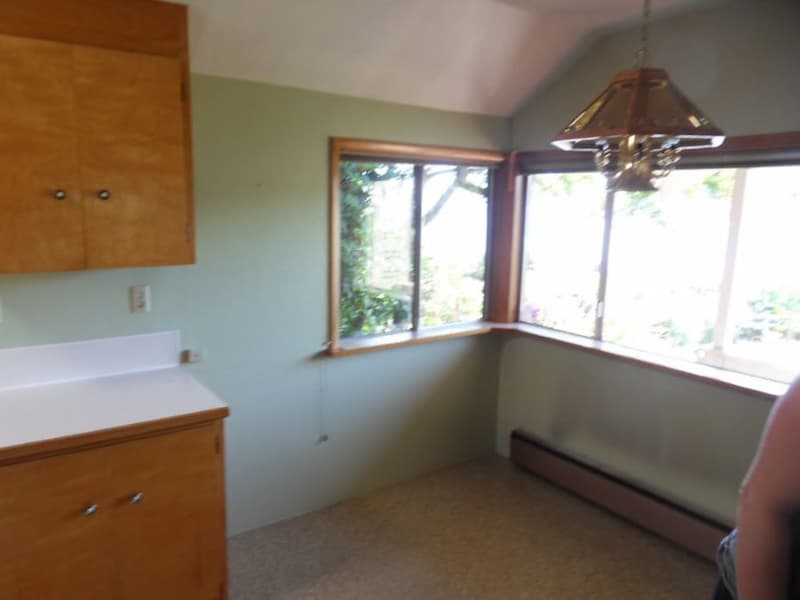
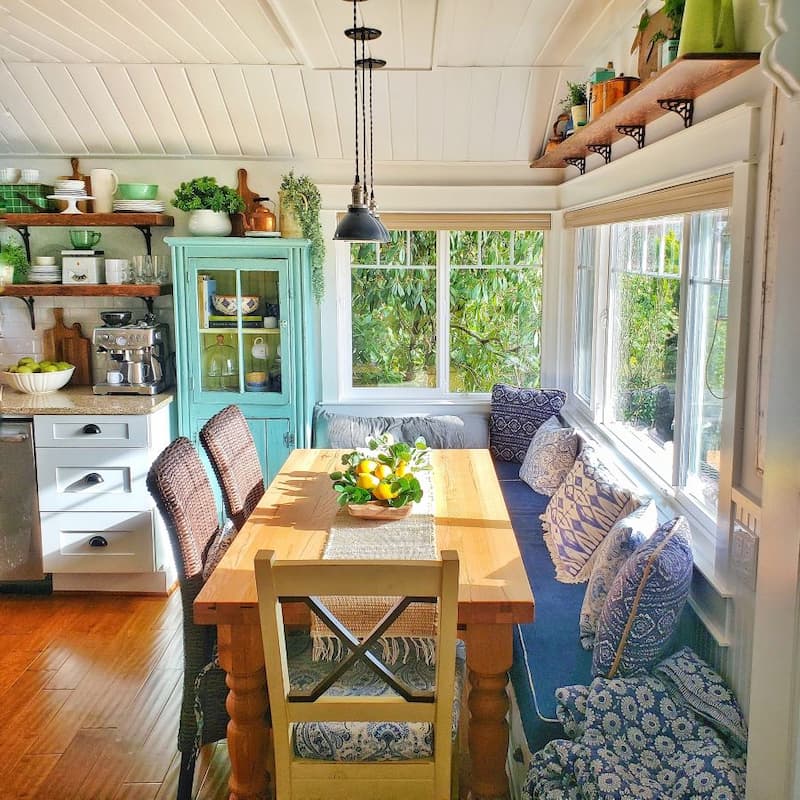
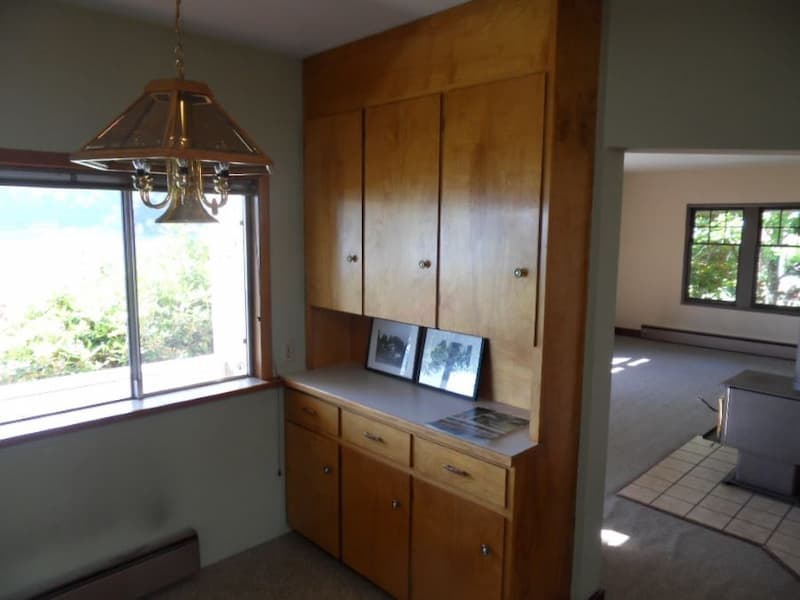
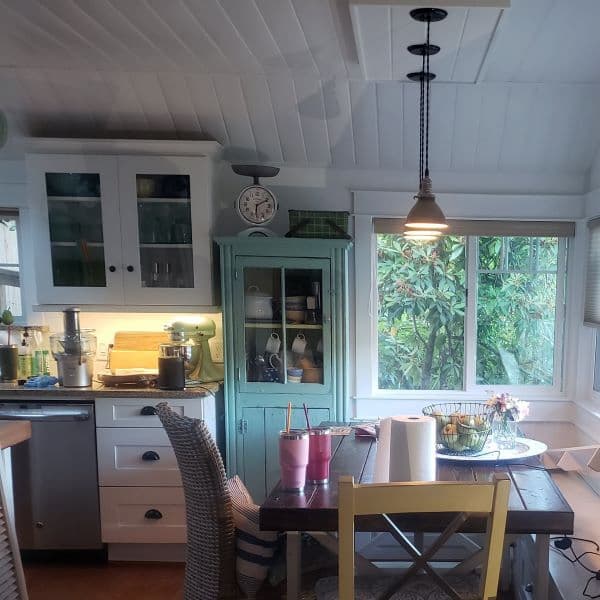
Here are the before pictures for our cozy little eating nook. The improvements we made to this area since these pictures were taken were …
- updated the windows and trim
- removed the baseboard heater
- installed tongue and groove to ceiling
- removed the cabinet to the right and the wall it was on
- installed hardwood floors
- installed updated pendant lights
- painted the walls
- installed new quartz countertops
- added open shelving above the window and above counters
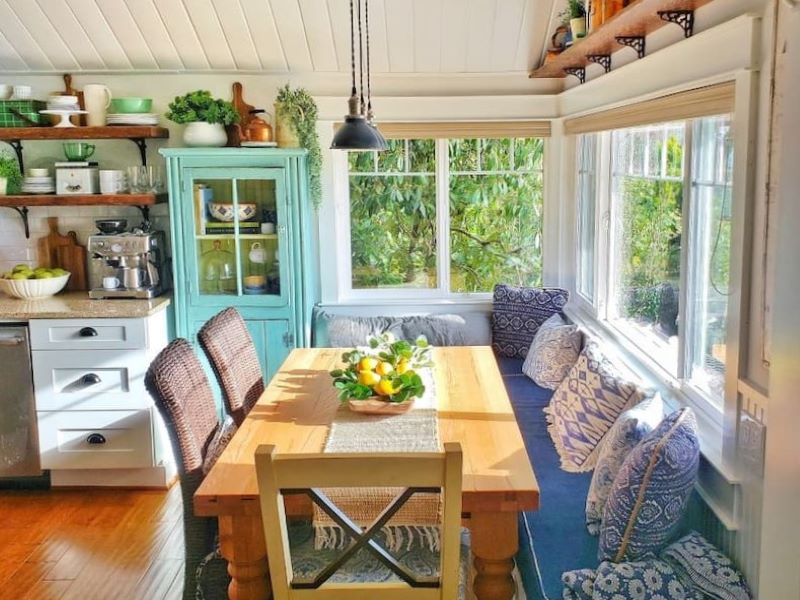
Phase 4 – New Window Seat
- Built window seating in eating area
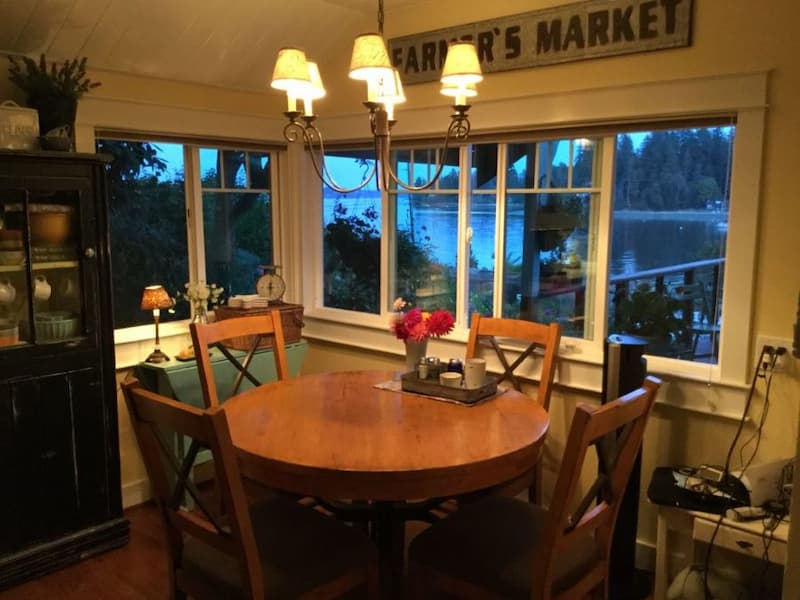
You can see the new windows and trim in the picture above, but we still hadn’t addressed the small space for entertaining. No more than 4 people could fit at the table so we decided to add window seating.
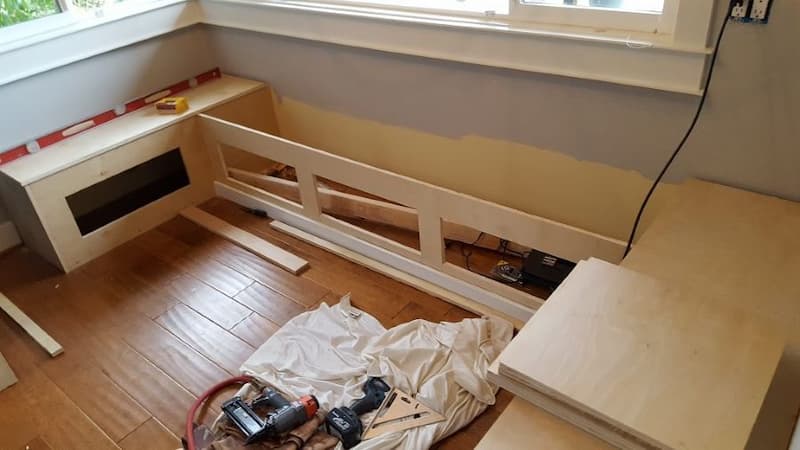
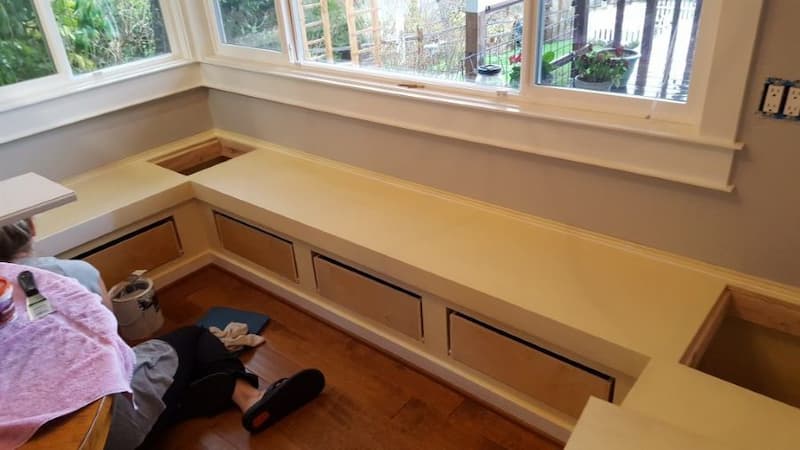
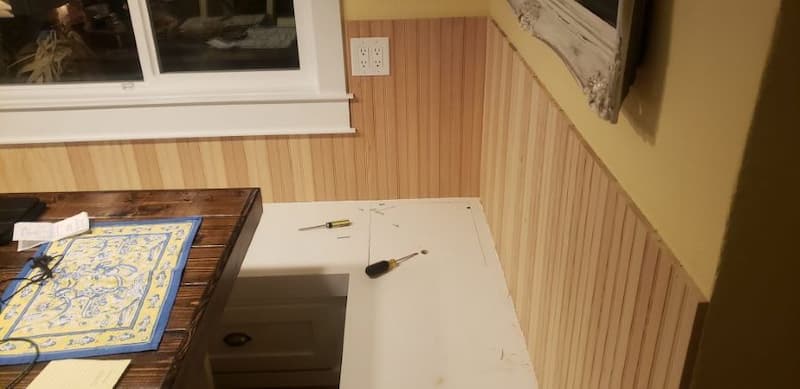
We installed bead board along the wall for a more cohesive look. As you can see at the time of construction, we hadn’t taken the wall out between the living room and kitchen so we built the seat all the way around the table for a “u” shape.
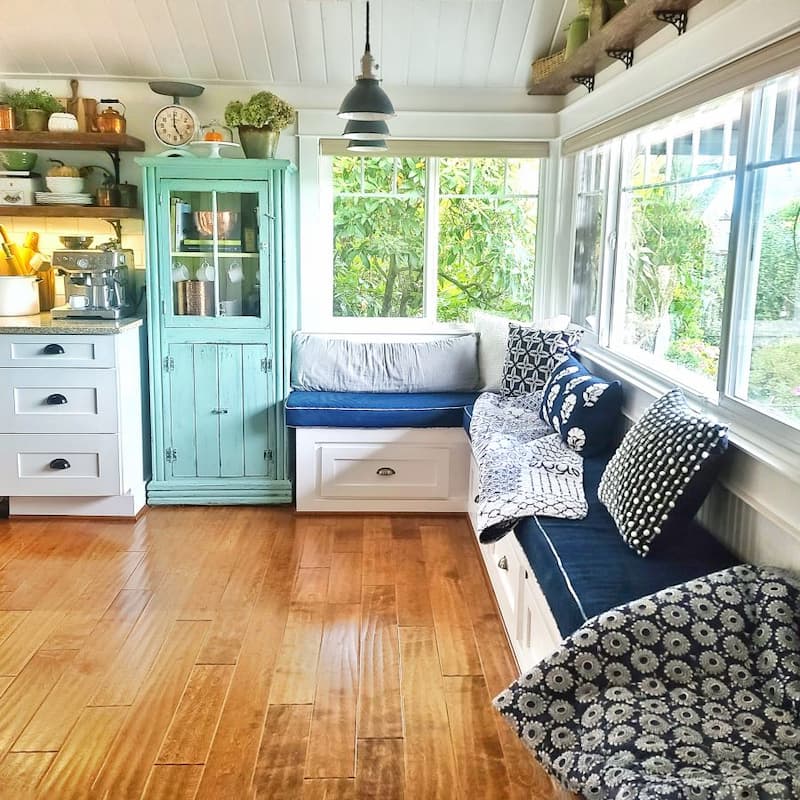
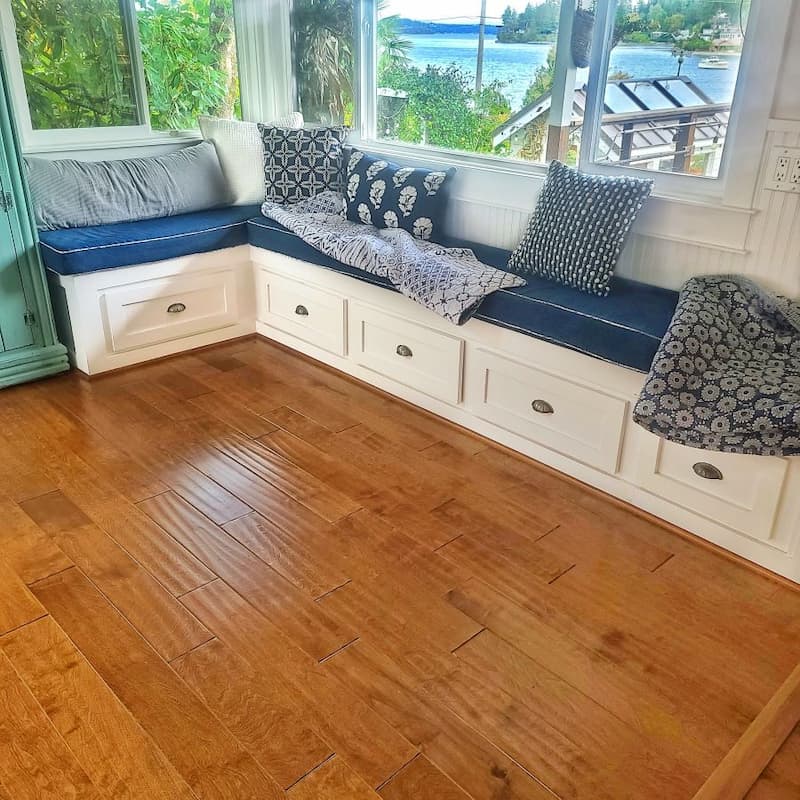
It gave us so much more space for entertaining!
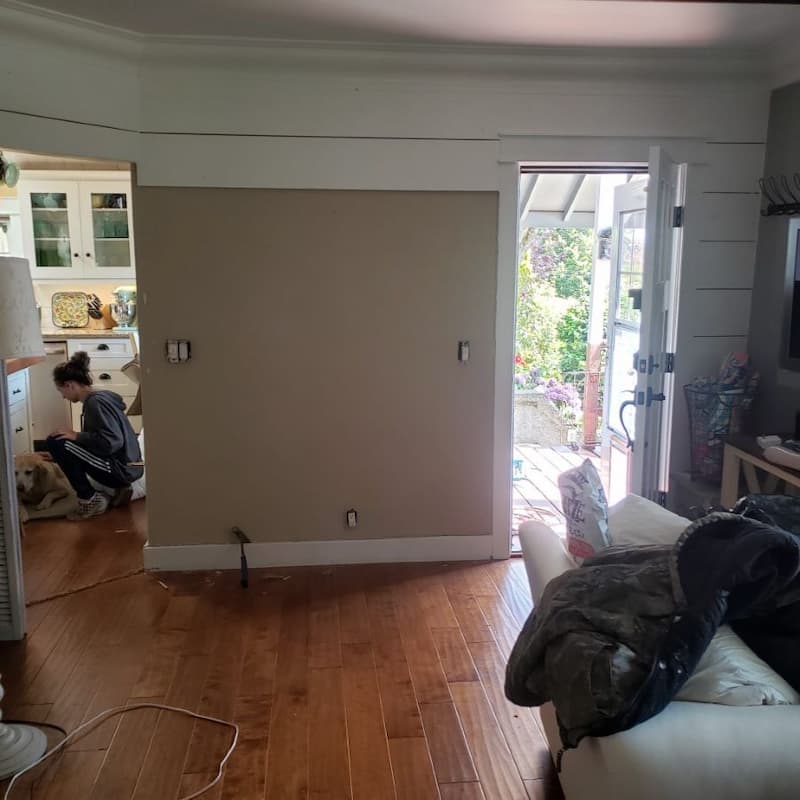
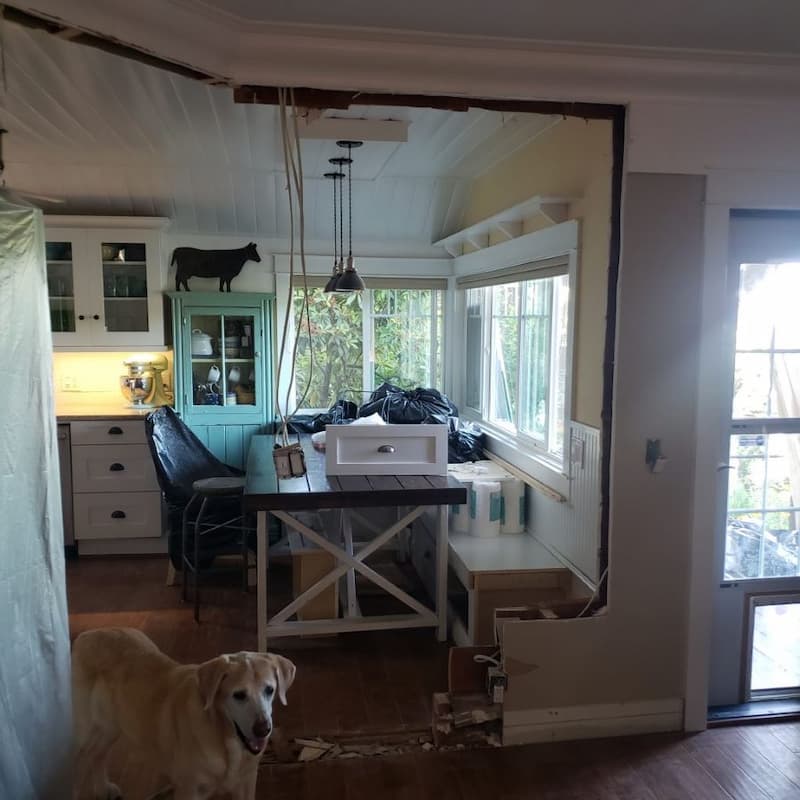
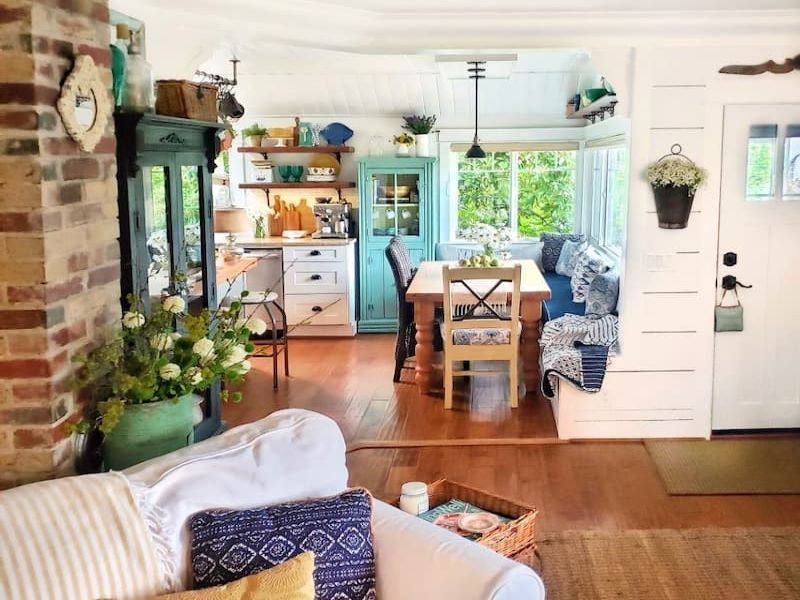
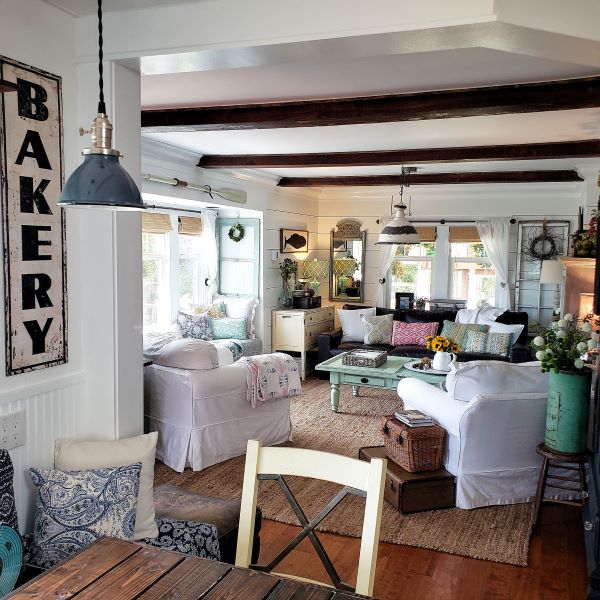
Phase 5 – Wall Tear Down
- Tore down the wall separating the living room and kitchen
- Replaced one kitchen cabinet with open shelving
- Repainted the walls
Tearing Down the Wall Between the Living Room and Kitchen
The cabinet was one of the first things we took out to make a little bit more room in the eating area.

The window seat was already in before we started this phase. We had never even thought about taking the wall out between the living room and the kitchen. So we felt terrible when we had to ask our contractor to tear out part of the window seat.
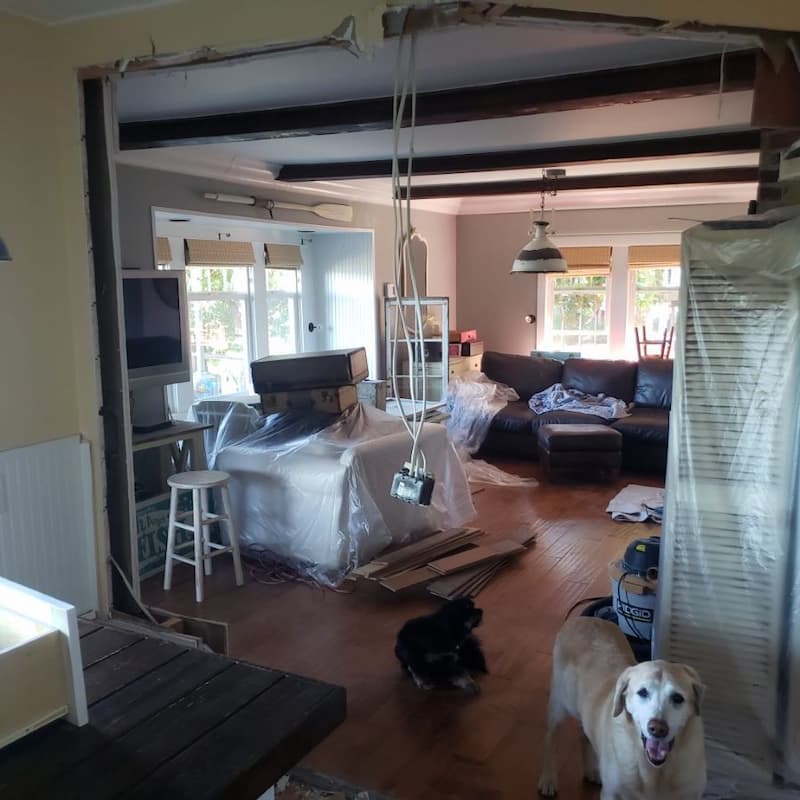
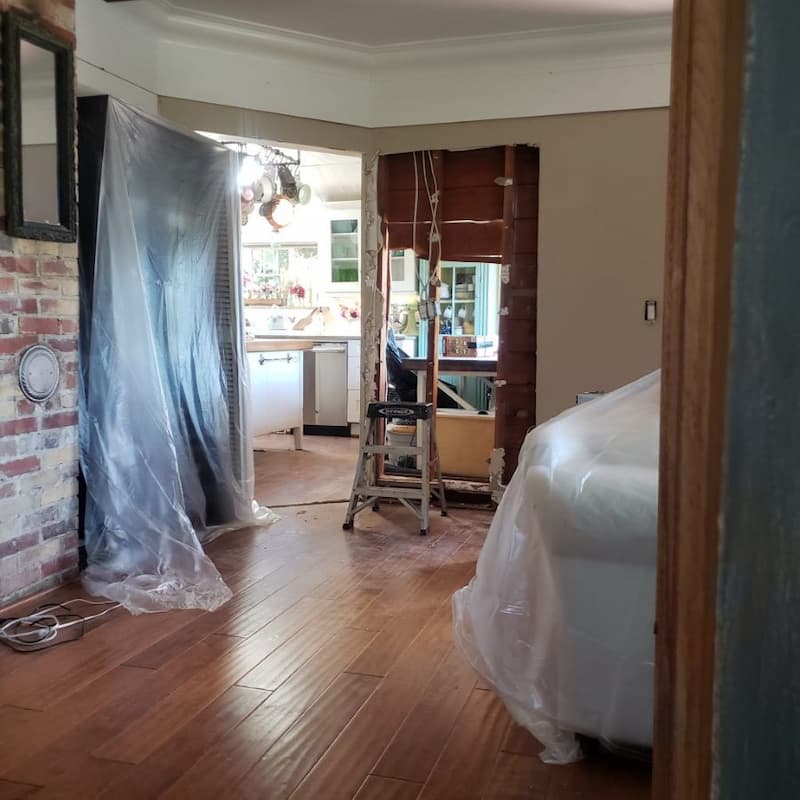
And the wall is down! Look at all that space.
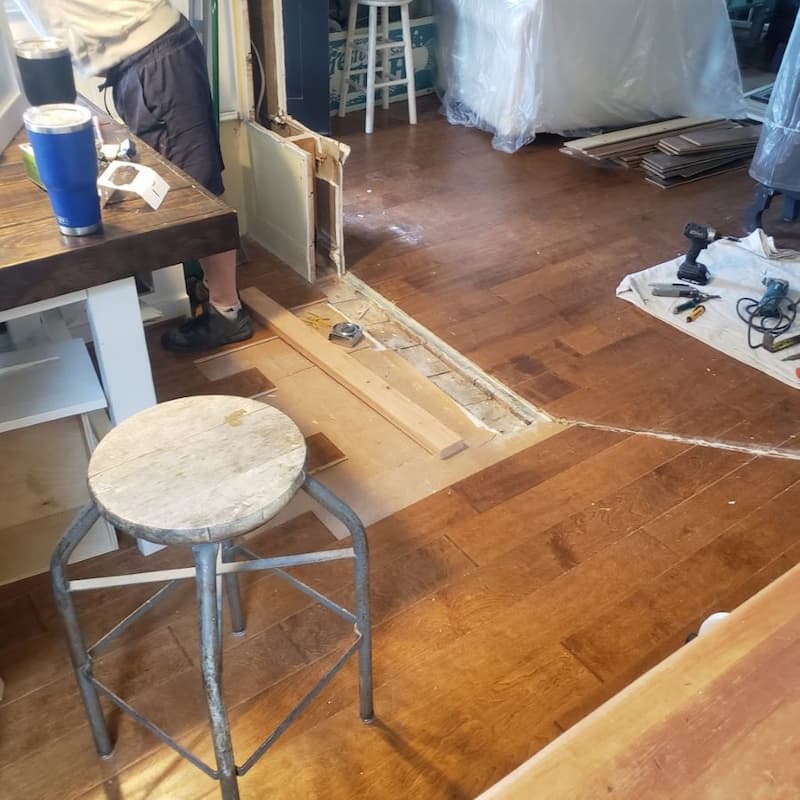
Finding extra hardwood flooring for this space was quite the challenge.
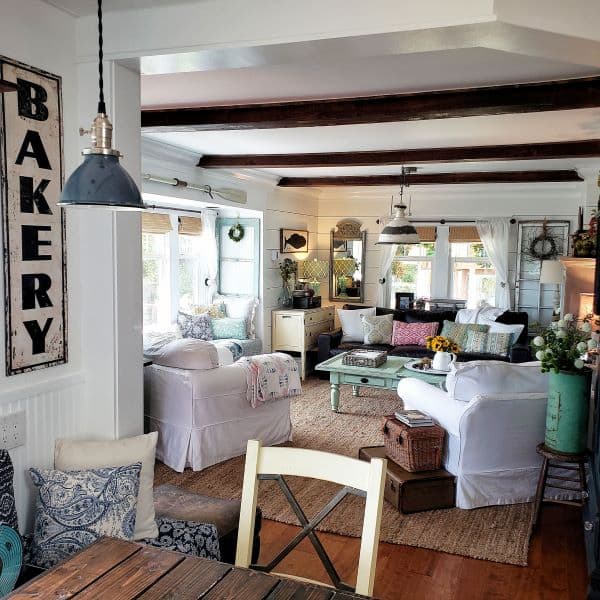
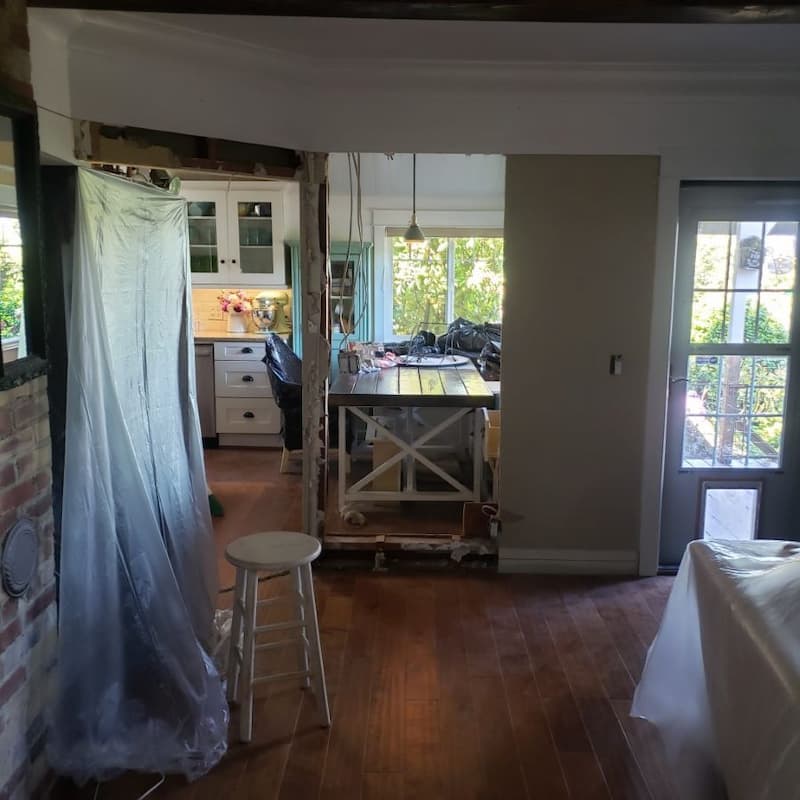
Here’s the new view from the living room
Let’s look at this wall project from the other side.
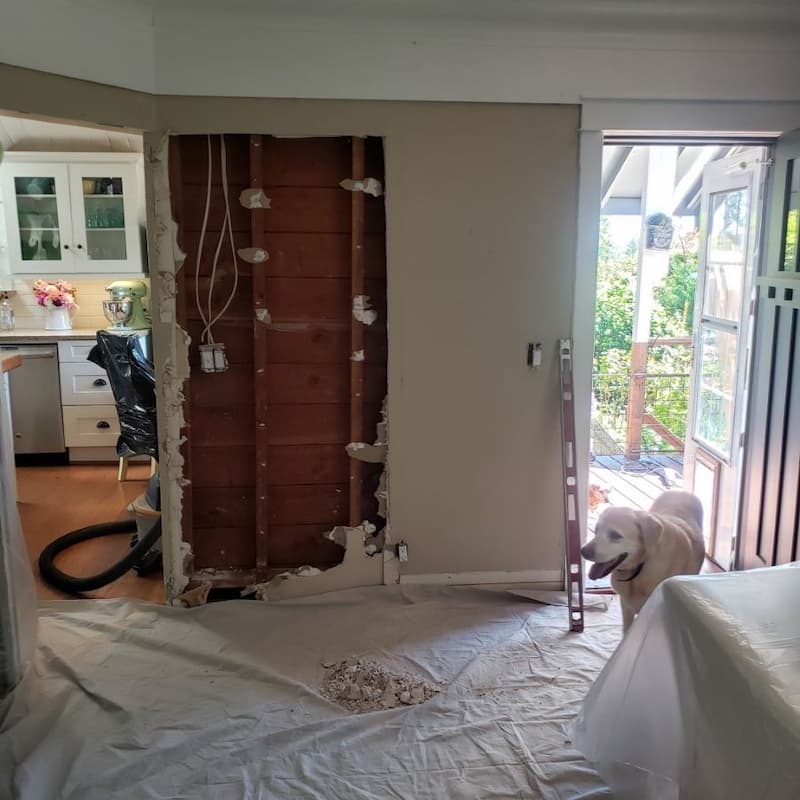
The dry wall is down and look what we found! The original shiplap walls from 100 years ago.
It was better than I could have ever hoped for.
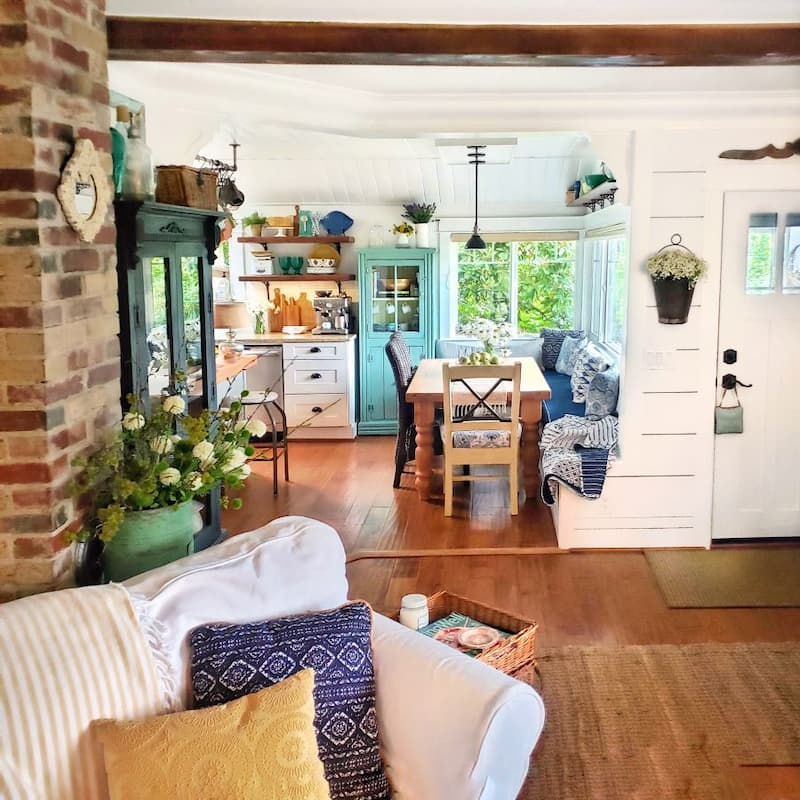
The final view. Taking this wall down was one of the biggest changes that we made to our home. We have so much more room for entertaining.
The above picture shows the white cabinet that we had originally installed. We decided to take the cabinet out and replacing it with open shelving.
Here’s the final view.
We lived through a lot of noise, mess, and chaos but I wouldn’t change a thing. We are so in love with our 100-year-old beach house, our “forever” home.
More Before & After Pictures

I hope you enjoyed our 100-year-old kitchen before, after & everything in between. What’s your favorite part of our kitchen? I’ll share the pantry and hallway renovation with you next. Here’s why we fell in love with our 100-year-old beach house.
If you have any questions or additional suggestions, feel free to share them in the comments below. And be sure to share this blog post link with anyone who may enjoy these before and afters.
Until next time,
Follow Me for More Inspiration
Shop my Amazon Storefront, my LTK sources, and my favorite home decor, garden, and lifestyle products. When you purchase from one of my links, I earn a small commission which helps me to continue sharing all the content you expect on my blog.
Be sure to follow me on Pinterest, Instagram, Facebook, TikTok and LIKEtoKNOW.it. Do you like gardening? Join my Facebook Gardening Tips & Tricks group.


Hi Kim,
I am in love with your home, garden and blog. It picks my mood up right away when I need to see beauty in the world. One question. how did you replace the baseboard heat? Or didn’t you? I have a kitchen radiator that i would love to get rid of- just because it’s taking up wall space that I could really use. Any suggestions?
I am so appreciative of your kind words Carol. Thank you for being here. As for the baseboard heat, we removed it and added a toe kick heater under the kitchen sink. It works but can really burn your toes if you’re doing dishes at the same time the heater is on. We wish we had installed radiant hit under the floors. We did that in the bathrooms and laundry room and it really works to heat up the entire room.
You have such amazing vision. You have such a beautiful warm and inviting home.
We live in the Columbia River Gorge. The fog has been so thick!
What an amazing transformation! I love that you showed us all the stages! What a difference taking down the wall made. You have such a beautiful “forever” home!
Thank you, Kim! I’m so glad you took a look. I agree, taking down that wall was huge!
What an amazing transformation. Kitchen renovations take such a long time and are hard, especially if you’re doing the work yourself. Your kitchen is just stunning, as is the rest of your house.
Wow – before and afters are so exciting and I agree with you and Kathy – I love seeing them from the same angles. You really had a fabulous vision Kim. It’s so gorgeous now, and totally you!!
Loved the before and after pix–especially the fact that you took the pix from similar angles. I hate it when magazines use such a different angle that you can tell it was the same space. I hate my tiny kitchen but am unsure what I would do differently. Your space looks so workable!
Thank you, Kathy! I’m the same way. I love seeing the exact angle to compare the view. Thank you for being here.
Love the before and afters. A blog story on boating the Puget Sound would be fun!
That would be fun, and I need to get one posted. Thank you for the feedback.
What a wonderful study in vision, flexibility and patience. Thanks for all the inspiration!!! Love the outcome!
Thank you, Diane! Now that you mention it, we did have to have a lot of patience during one of our remodeling phases. Thank you goodness it’s now just a distant memory.