
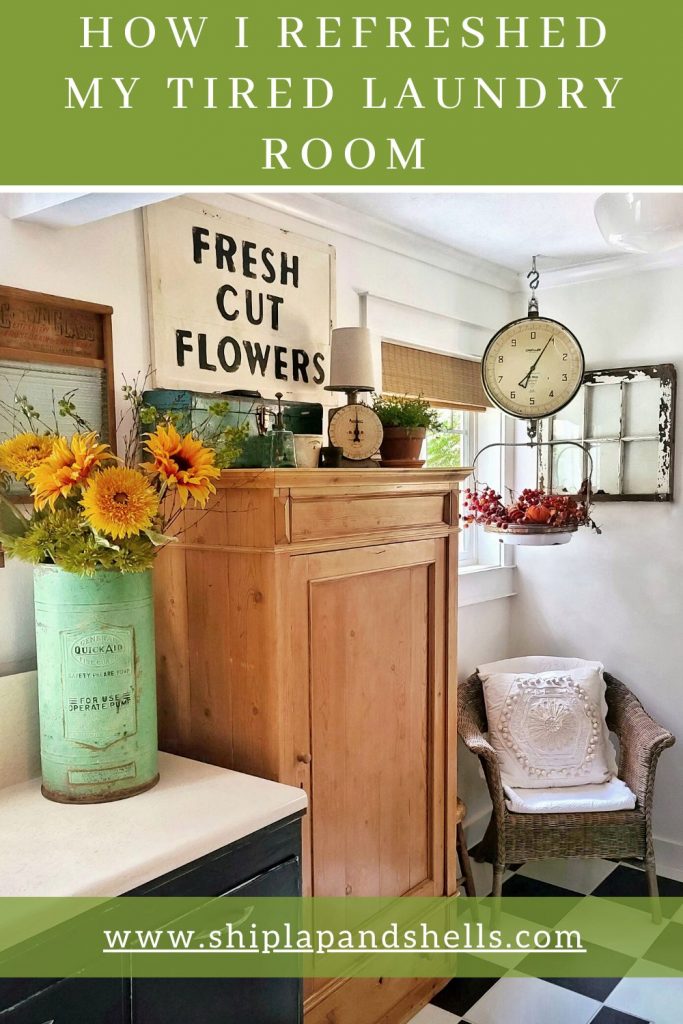
Before & After: How I Refreshed My Tired Laundry Room
Have you been wanting to update your laundry room, but are overwhelmed by the thought of taking on the project all at once? I’ll share how I refreshed my tired laundry room in phases, for 8 long years.
Welcome to my laundry room! I don’t show it very much. And that’s because it’s always been hard to take a good picture with the paint color I’ve had in here since we moved in 8 years ago.
So let me take you on a tour and show you how we refreshed this laundry room in phases, with just one more phase to go.
As an Amazon affiliate, I earn from qualifying purchases at no extra cost to you. My blog contains other affiliate links as well for your convenience. Click here to read my privacy policy.
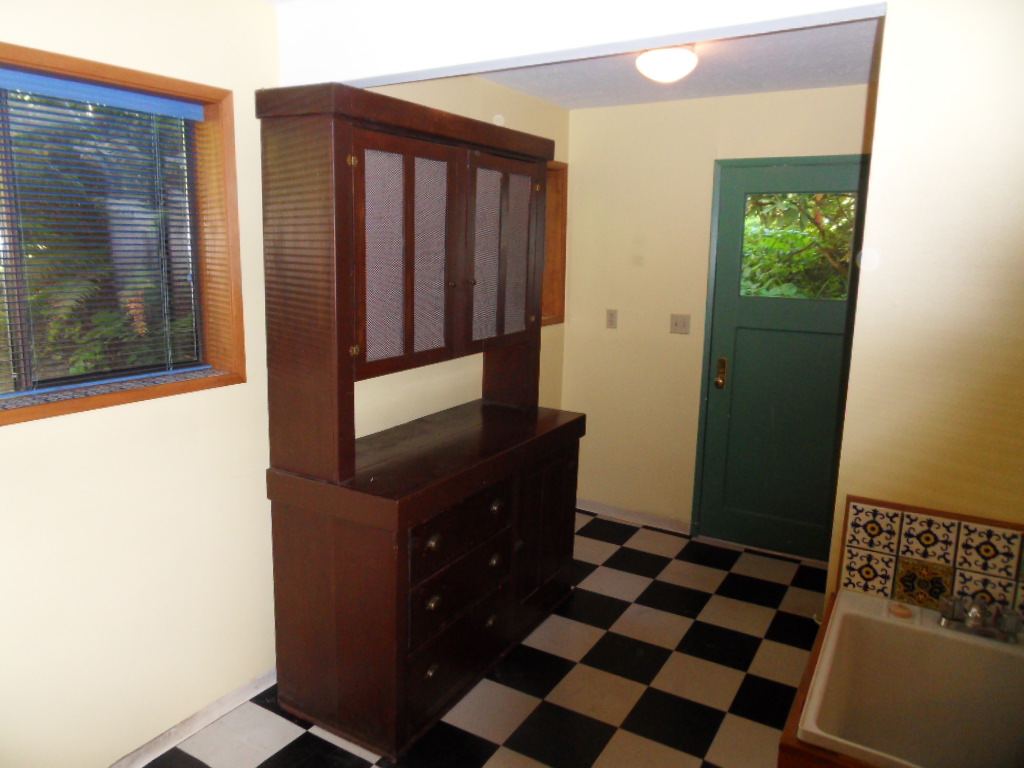
So here it is…this is our big and amazing laundry room the day we moved in. Does that cabinet look familiar? It’s now in our bedroom and built into the wall.
Here’s some history for you…this cabinet was built in 1920, at the same time they were building the house. And each owner who sold the house left it for the new owner. How sweet is that?
Laundry Room Refresh List – Painting the Walls and the Trim
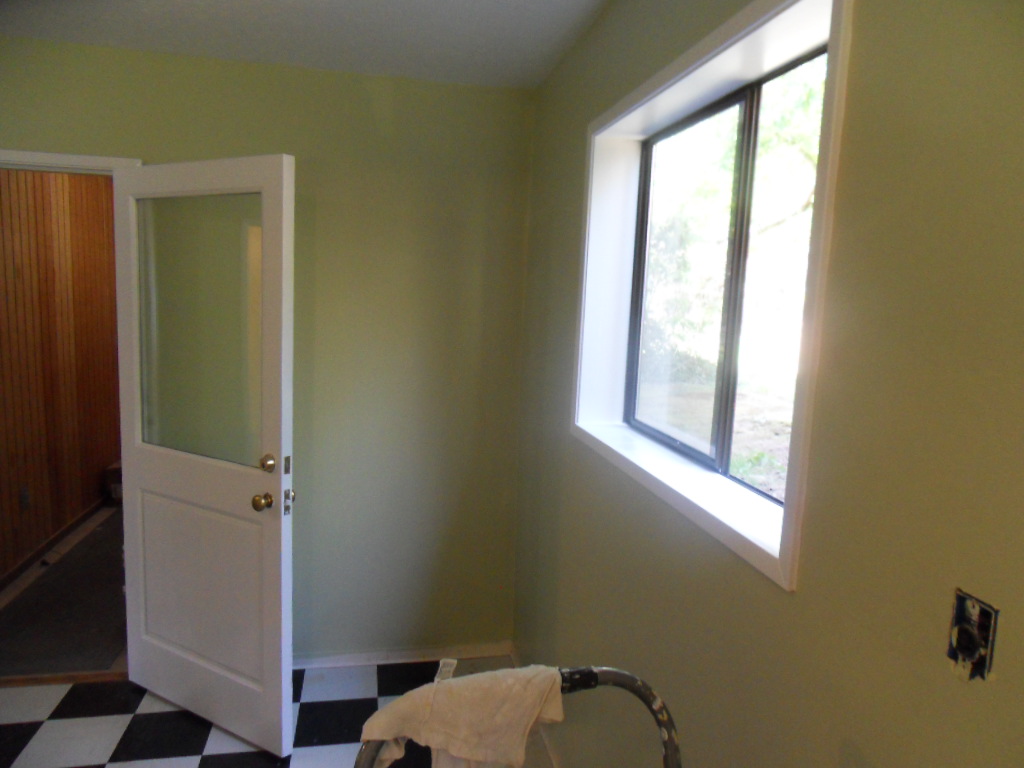
You’ll notice the very first thing that we did (after moving the cabinet) was take the bright cobalt blue blinds down. We then painted the wood trim and door white, and the walls a soothing green.
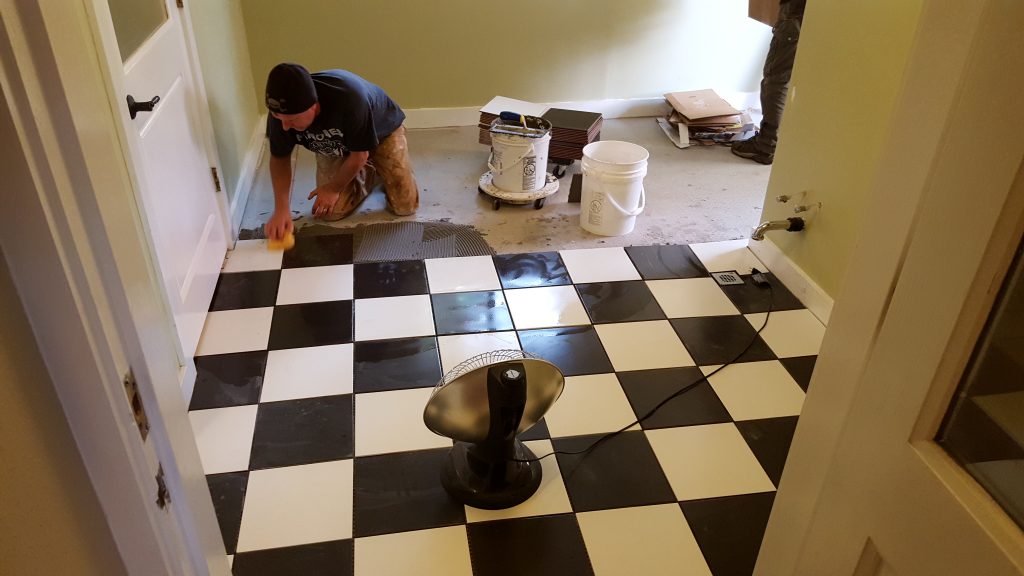
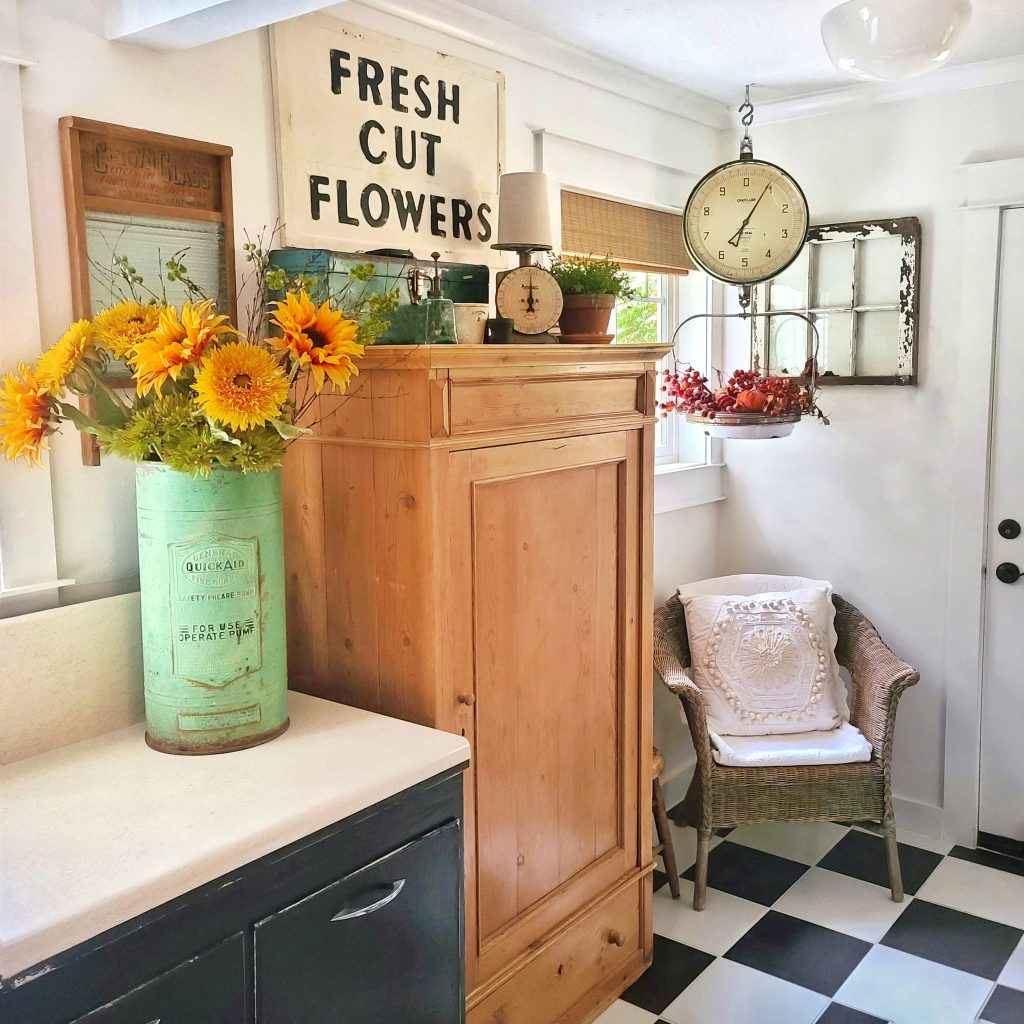
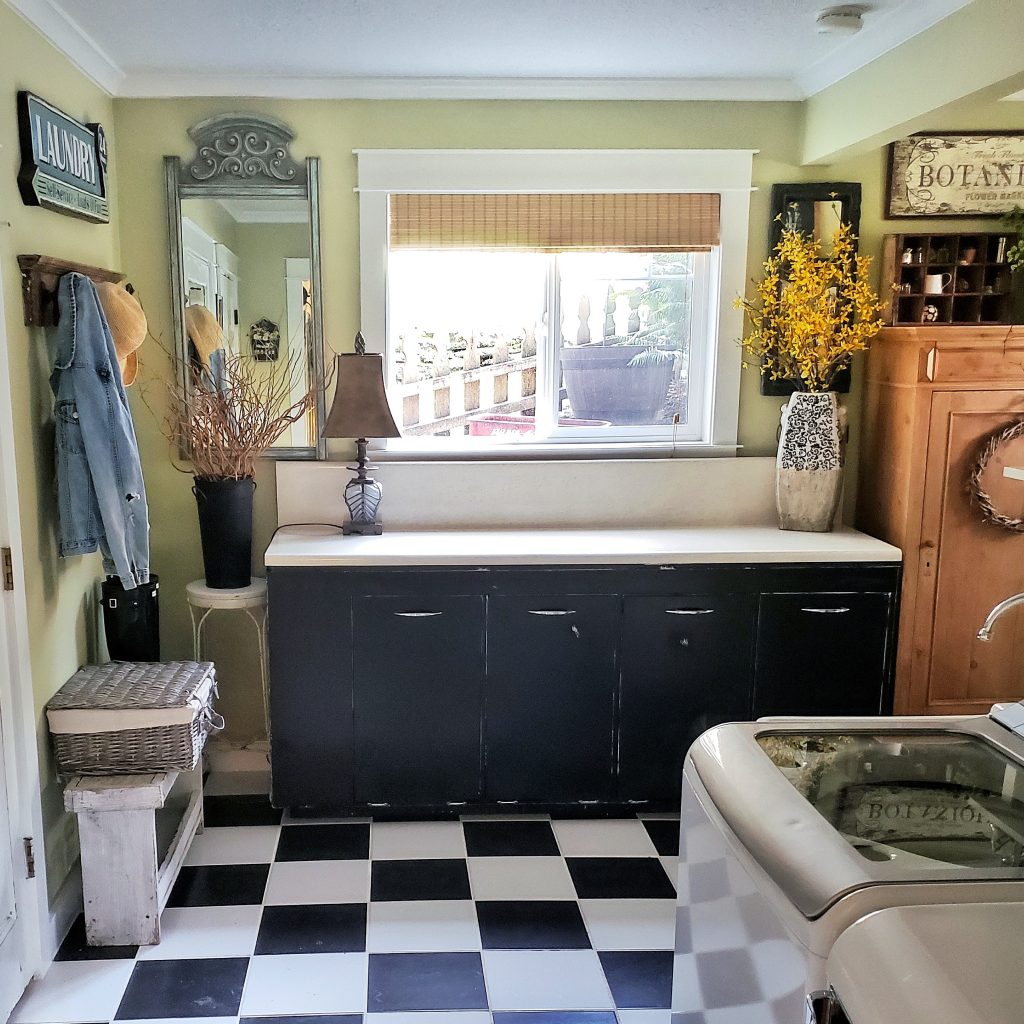
Black and White Tile Replaced the Linoleum
Those black and white floors got me when we first saw the house. I wanted to keep them because I thought they were so fun, but they were in pretty bad shape.
We eventually tiled the floor after living in our home for a few years. The only issue I have is that the white grout gets so dirty with the dogs bringing in dirt and mud after coming in through the doggy door. I’ve used tile grout sealer but nothing seems to last long.
For some reason, when the previous owners added this room to the back of the house, they did not put any heat in the laundry room. We decided to put in radiant tile heat when the floor was being added, and are so happy with our decision.
During phase 2, we replaced our windows and door and added 1′ X 4′ pine wood trim around them. We also had custom bamboo blinds made by Blinds Chalet.
As much as I love my shades, I’m thinking about having some wood shutters made to hide the view we have of the ground.
And here is phase 3 completed.
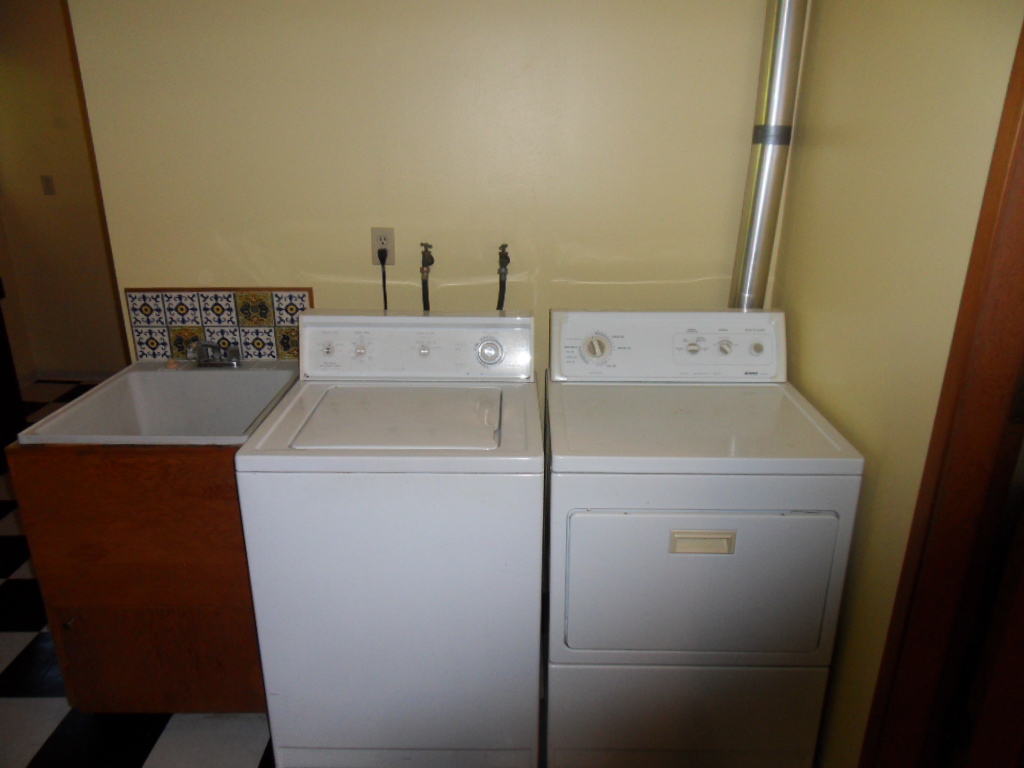
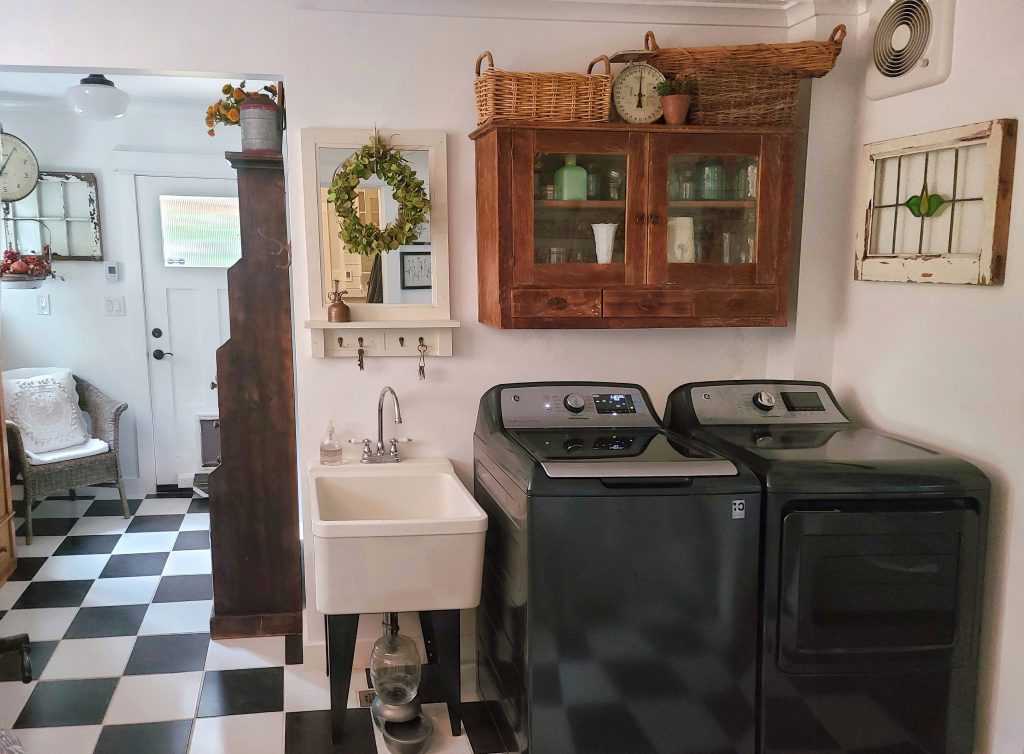
Washer and Dryer Space
The above view is on move-in day.
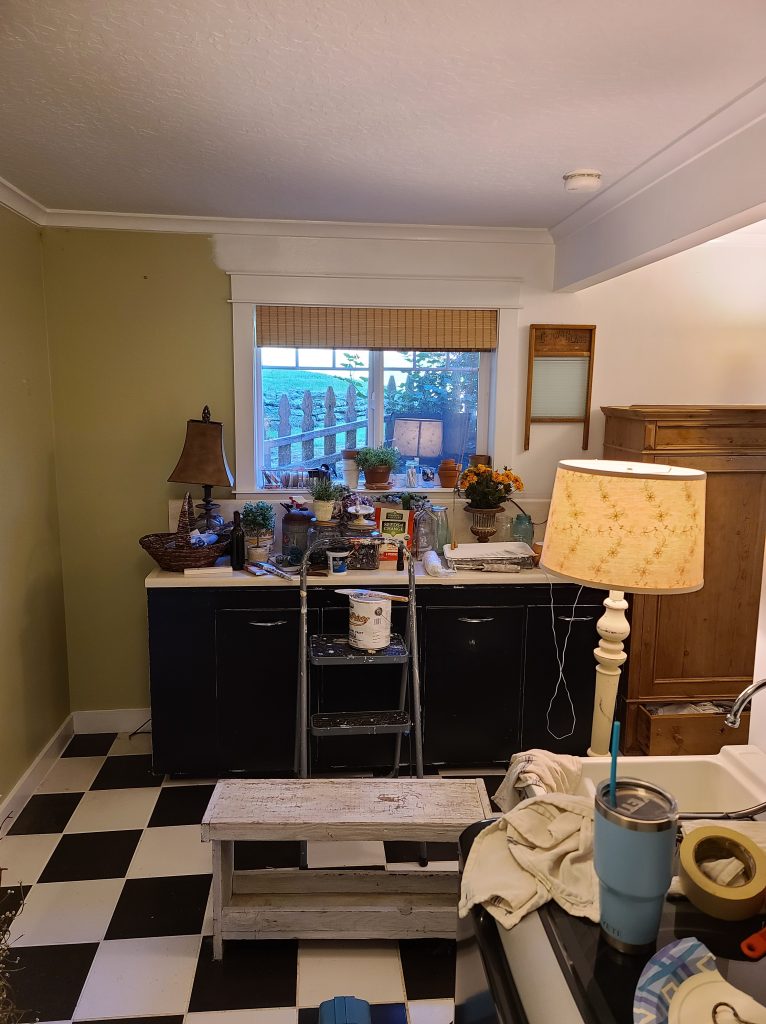
Here is the view after phase 2, when I decided a chalkboard wall would be fun. And it was! But not necessarily in this space next to the clean laundry. Oh well. It’s pretty cluttered here as well. I had too much “crap” on the shelves.
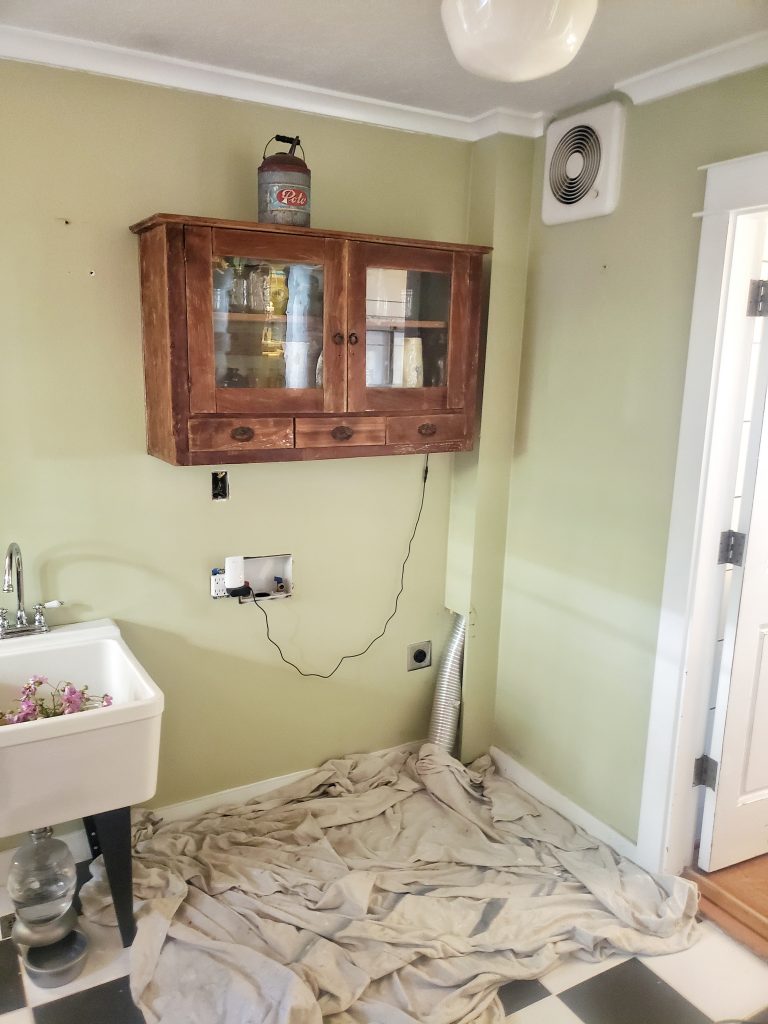
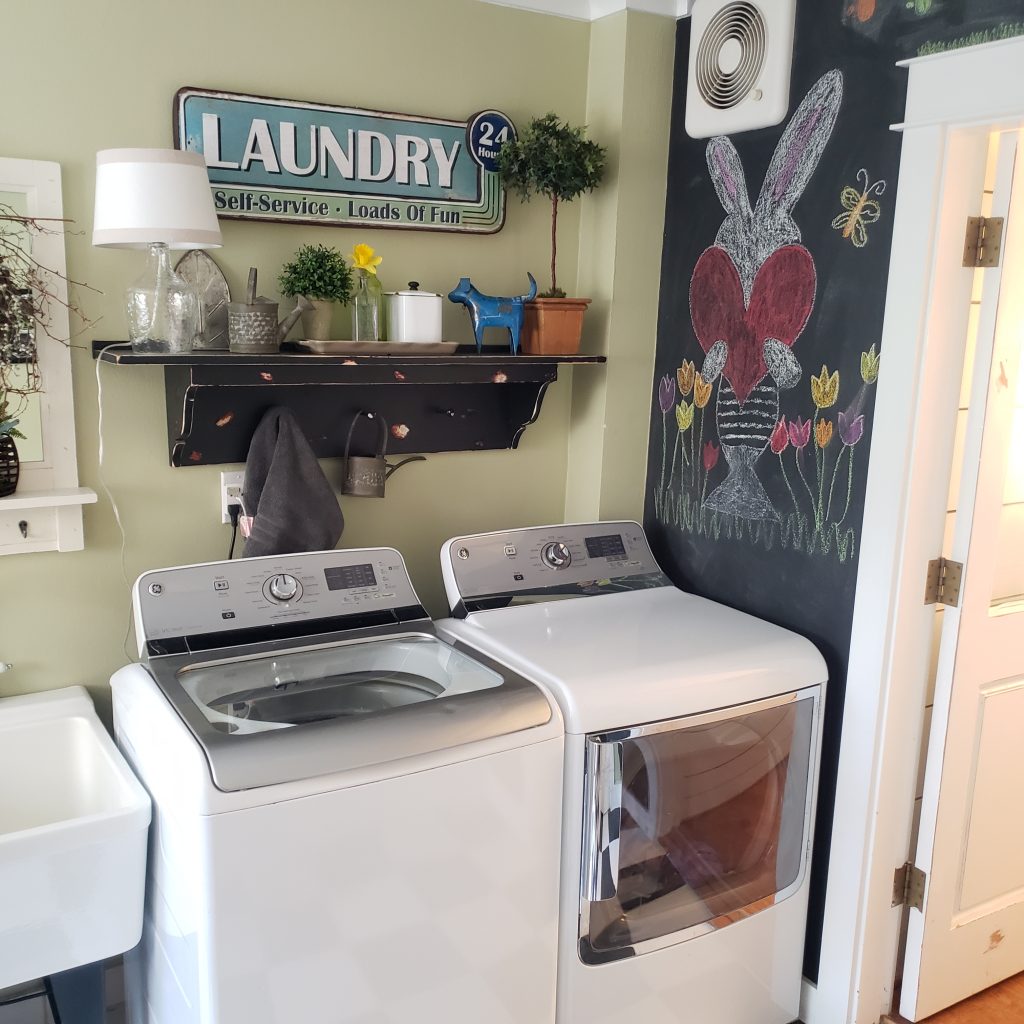
Our washing machine broke down last month, so I decided to paint the laundry room before the new set came.
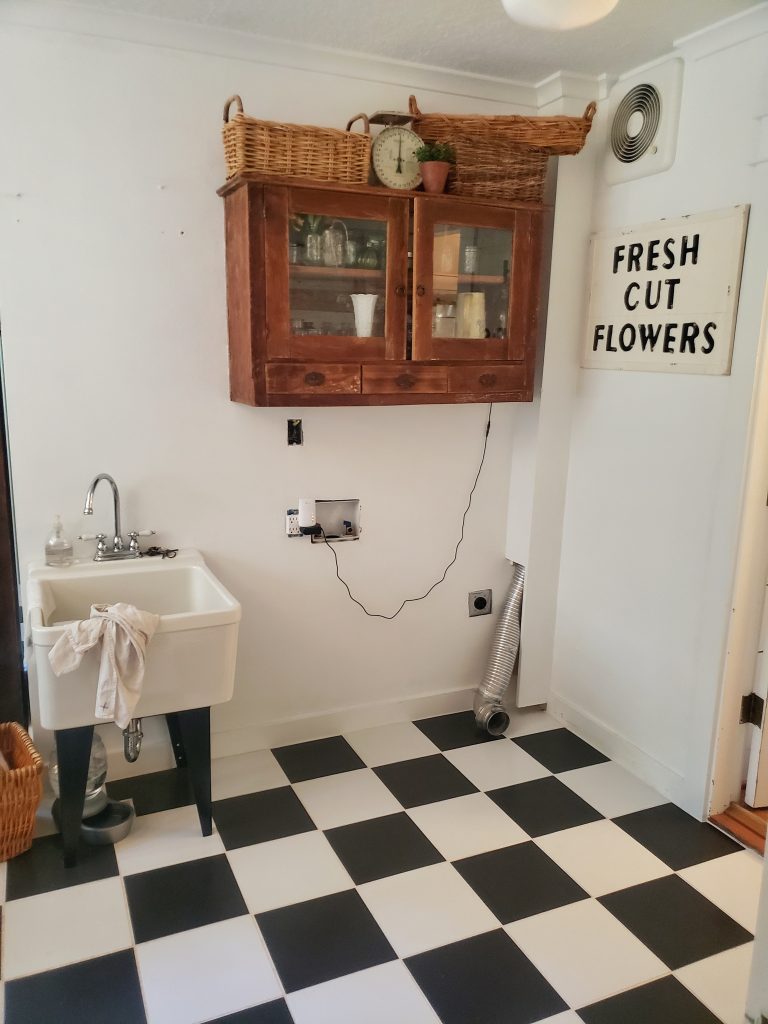
It’s all ready for my new washer and dryer.
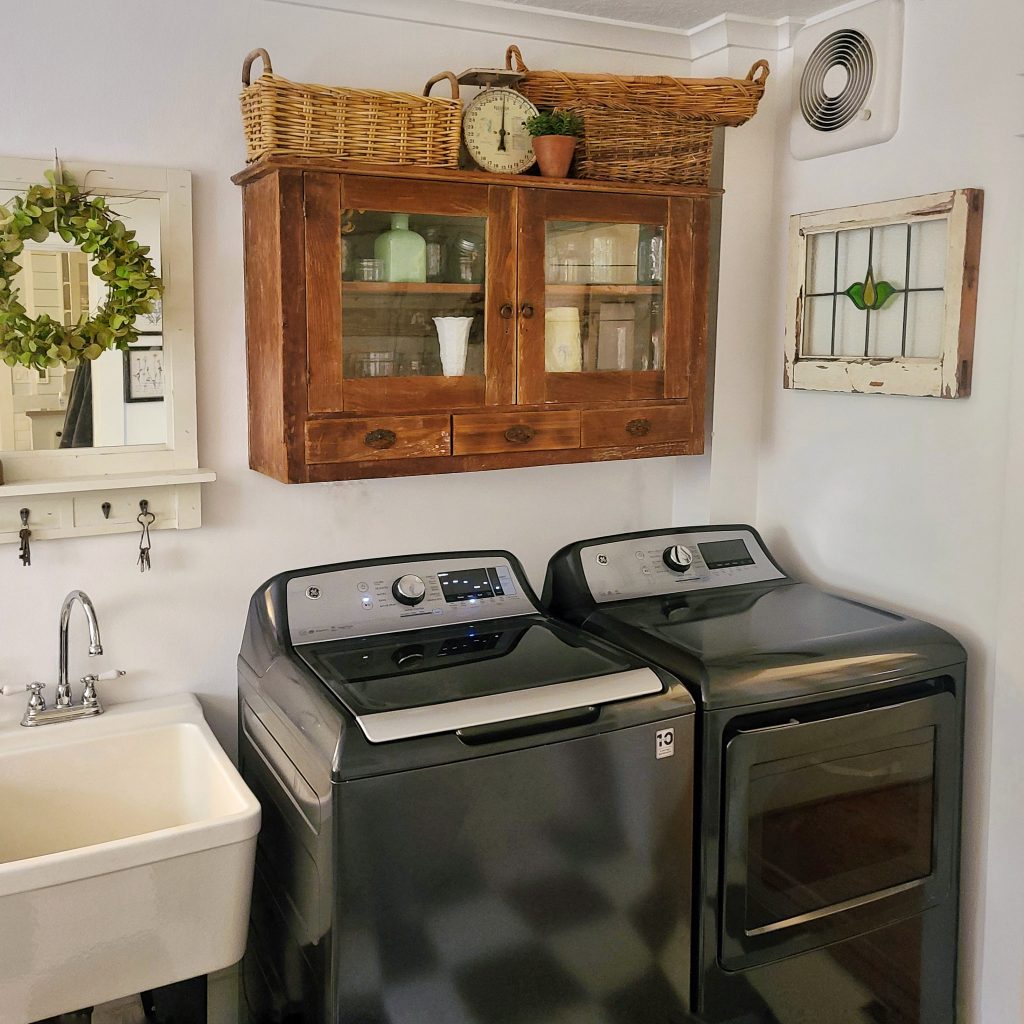
And here they are, my new washer and dryer. My vintage cabinet was a great find from the Bremerton Flea Market. It was missing a drawer when we bought it, so my hubby made a new one.
You almost can’t tell which one he created.
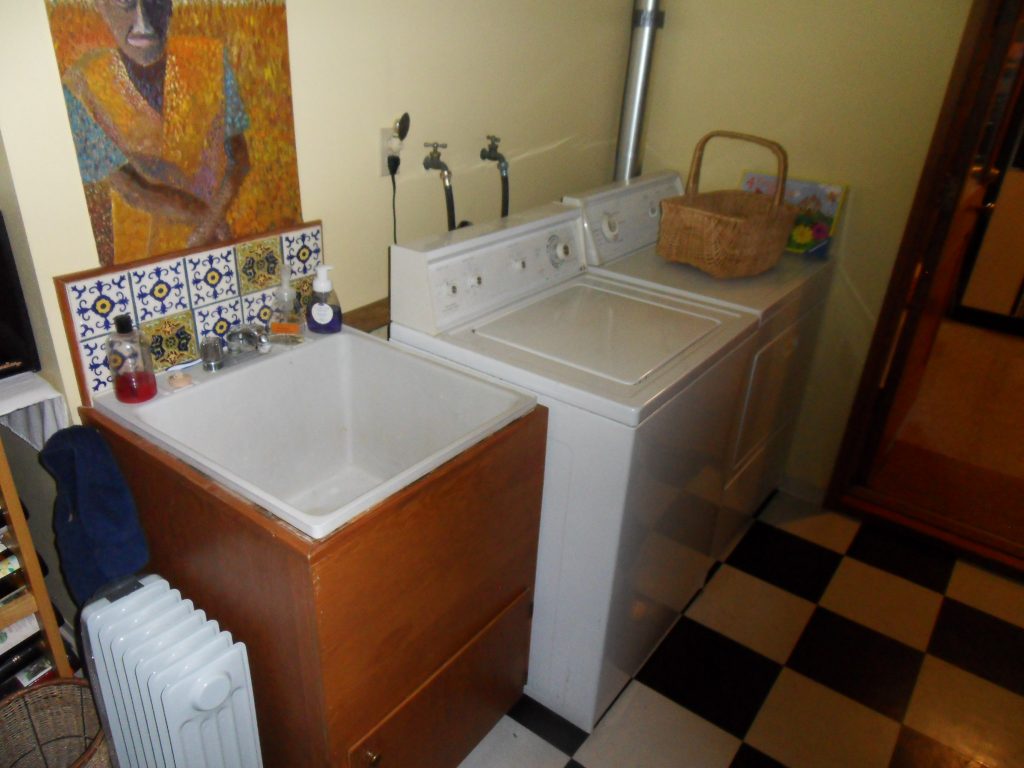
Replacing the Sink
This is seriously the most interesting sink I’ve ever seen in a laundry room. Do you see the little backsplash tiles? When we took the sink out, we broke the tiles up and pressed them into the wet cement, as we created our backyard pathway.
We did find the most perfect vintage utility sink off of Craigslist that I am head over heels in love with. The sink was one of my favorite laundry room refresh additions.
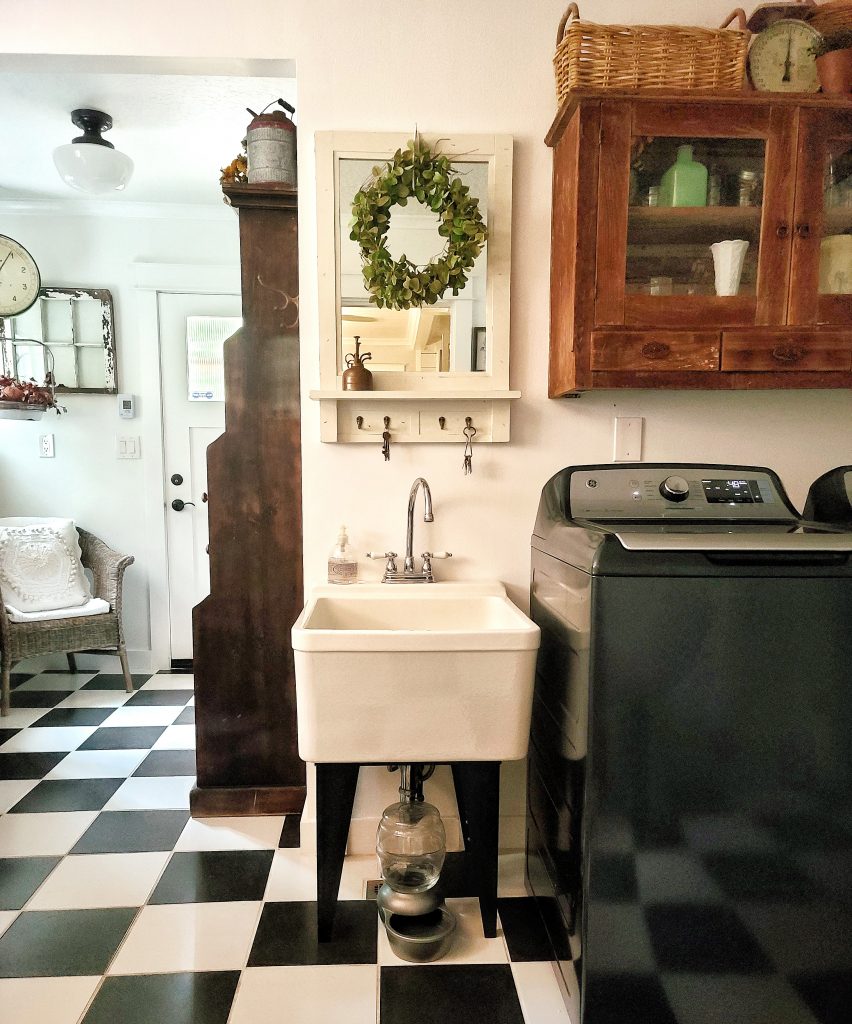
Check it out! Doesn’t it fit perfectly in this spot? I should have moved the dog water bowl before I took this picture, but you get the idea.
Do you see that vintage schoolhouse light fixture? We have 2 of them in the laundry room, and they came from a walk-in bank vault in Tacoma, WA.
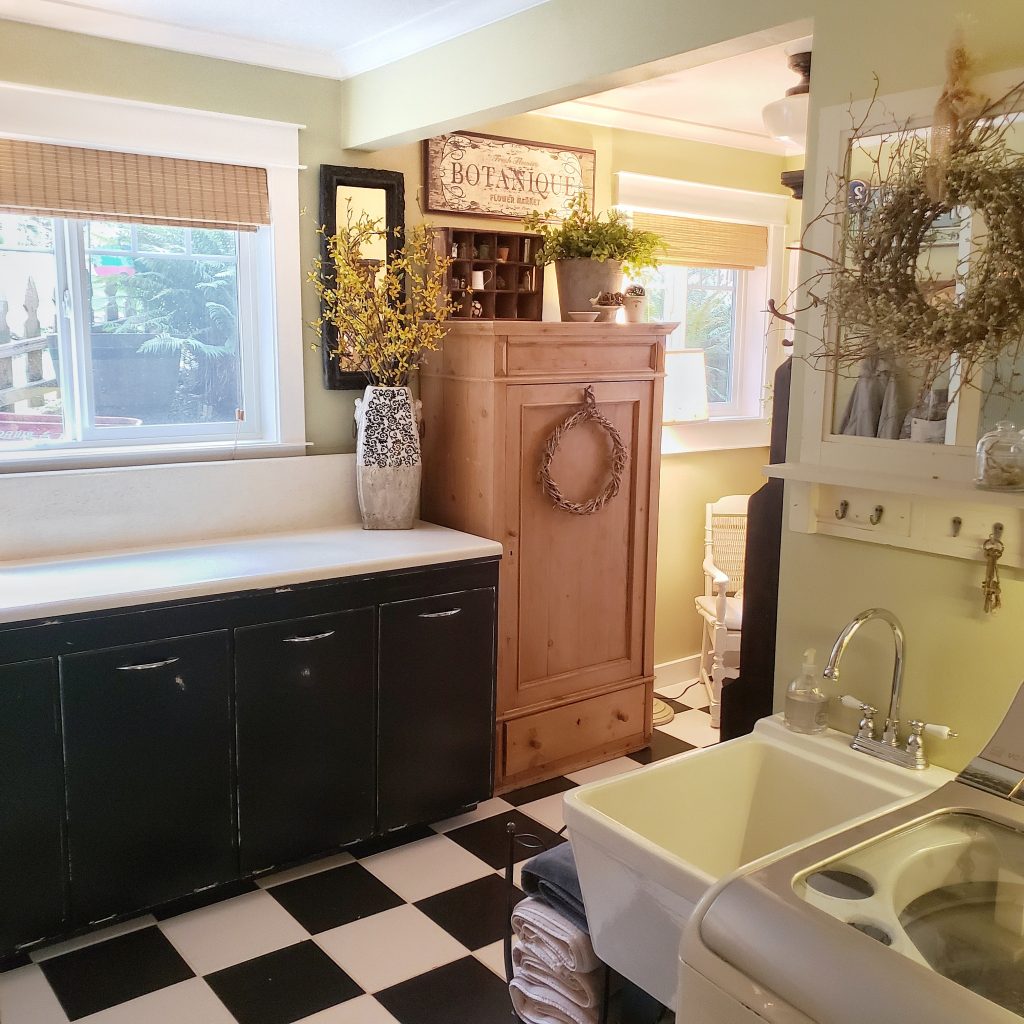
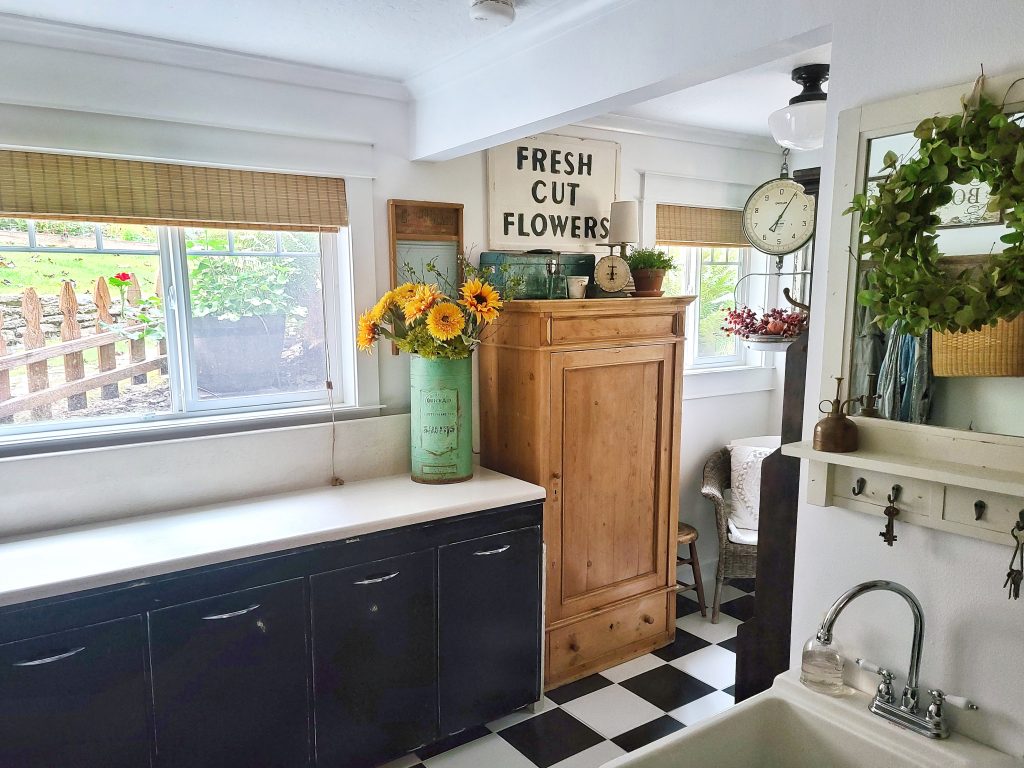
Looking for Storage and Countertop Space
I wanted more cabinet and surface space to fold laundry, and thought that this area in front of the window would be the perfect space.
We found this laundry sorter at a Habitat for Humanity store and fell in love. We purchased it before we closed on the house because we didn’t want to lose it, and knew it would go perfectly in this space.

Here’s a really scary picture! There were a lot of BIG white furniture pieces going on in this room. After living with the laundry sorter for a year, we decided to paint it black.
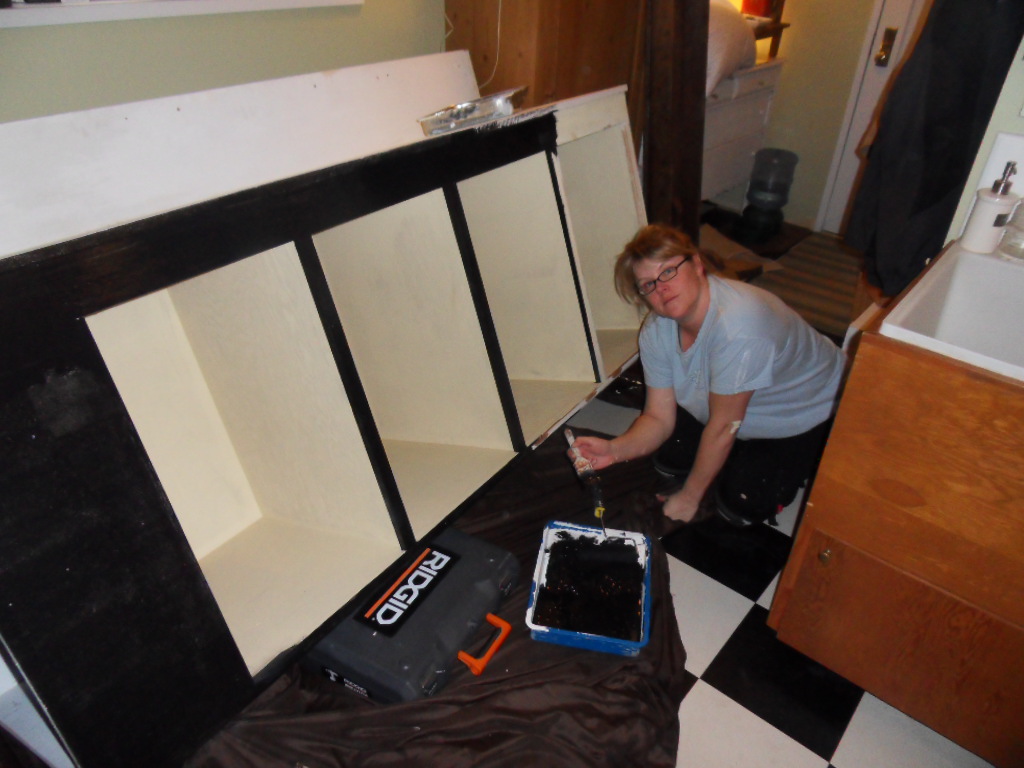
Don’t I look like I’m having fun?
Painting Time
This room has always had a different feel from the rest of the house. I decided to paint it a soft green to have more of a garden feel. And I liked it. So much so that I kept the wall color for 8 years.
But when I had the lights on, some sections looked like split pea soup. When we had to get a new washer and dryer last month, I knew it was time to go lighter.
And the painting begins.
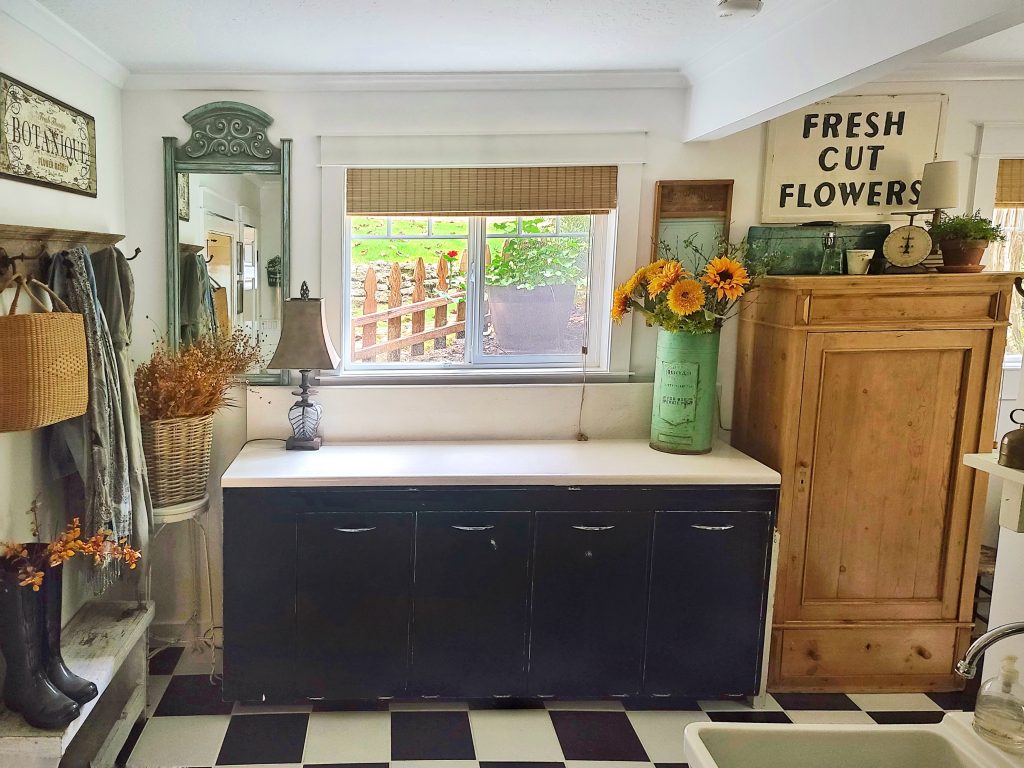
As much as I liked my green garden-inspired laundry room, the white lightened up the room. We have a lot of trees in the backyard and it doesn’t get much natural lighting in here.
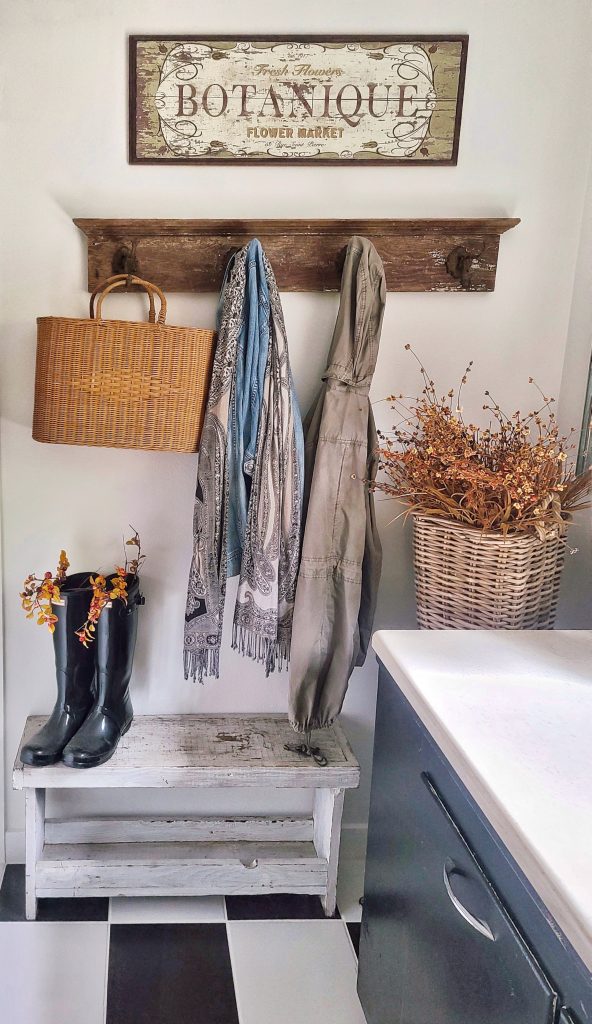
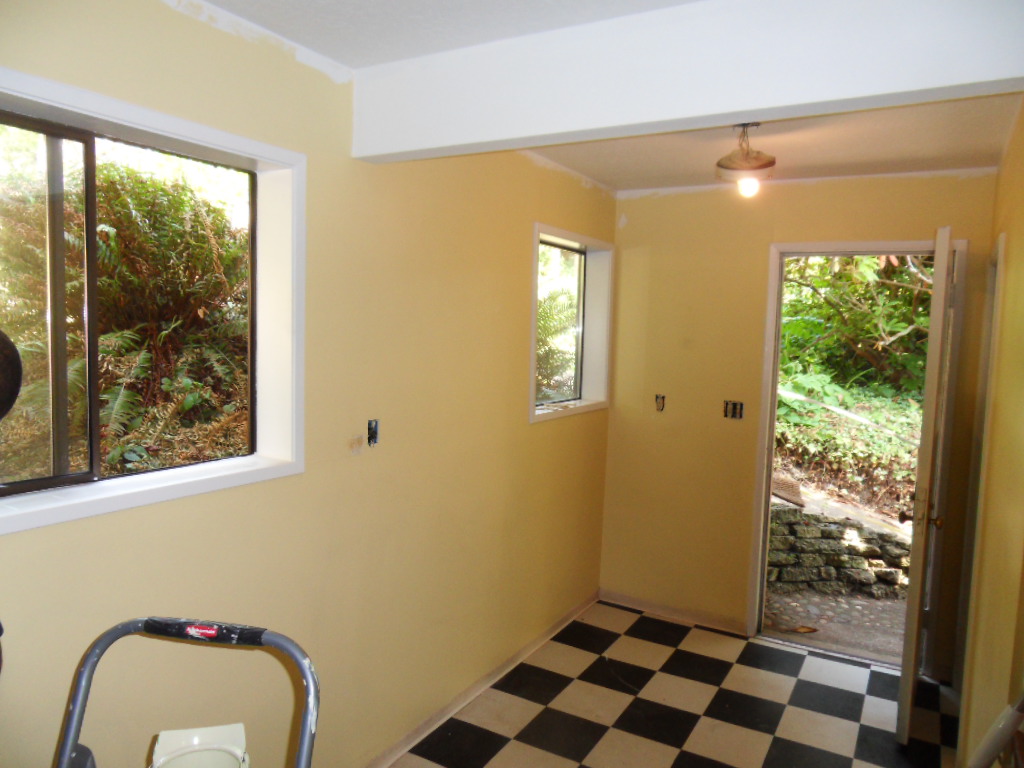
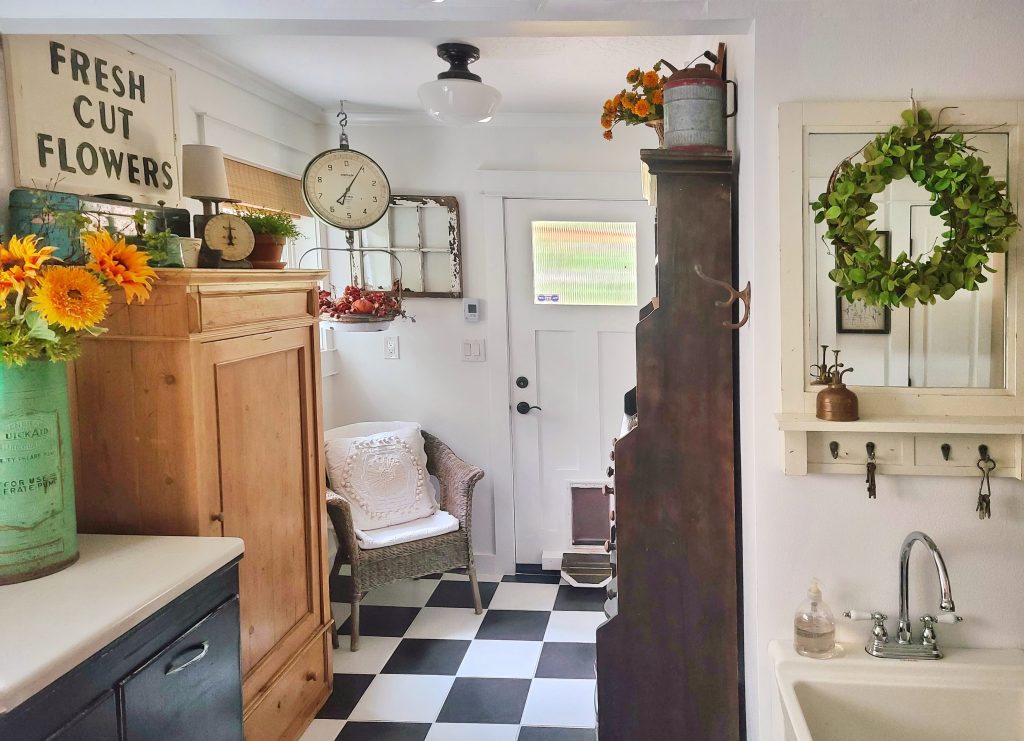
Here’s the area where we take off our shoes and coats.
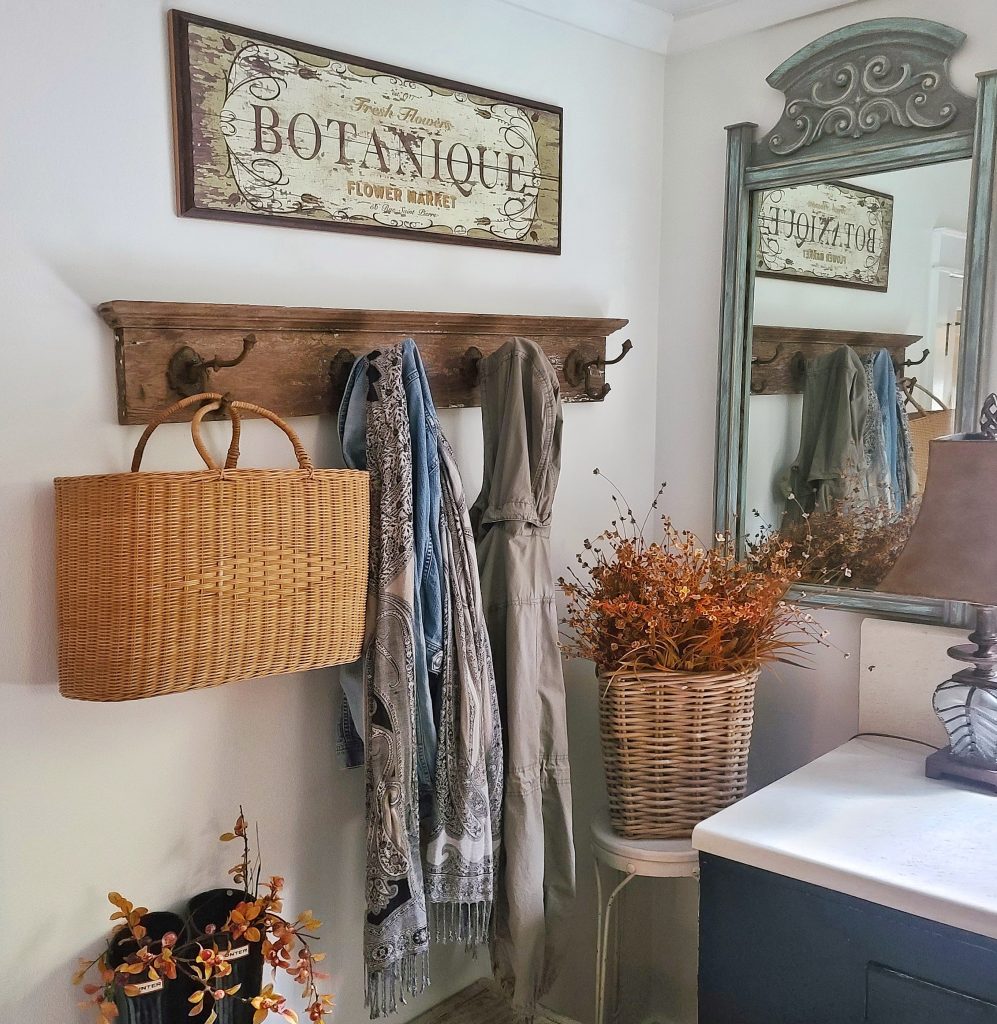
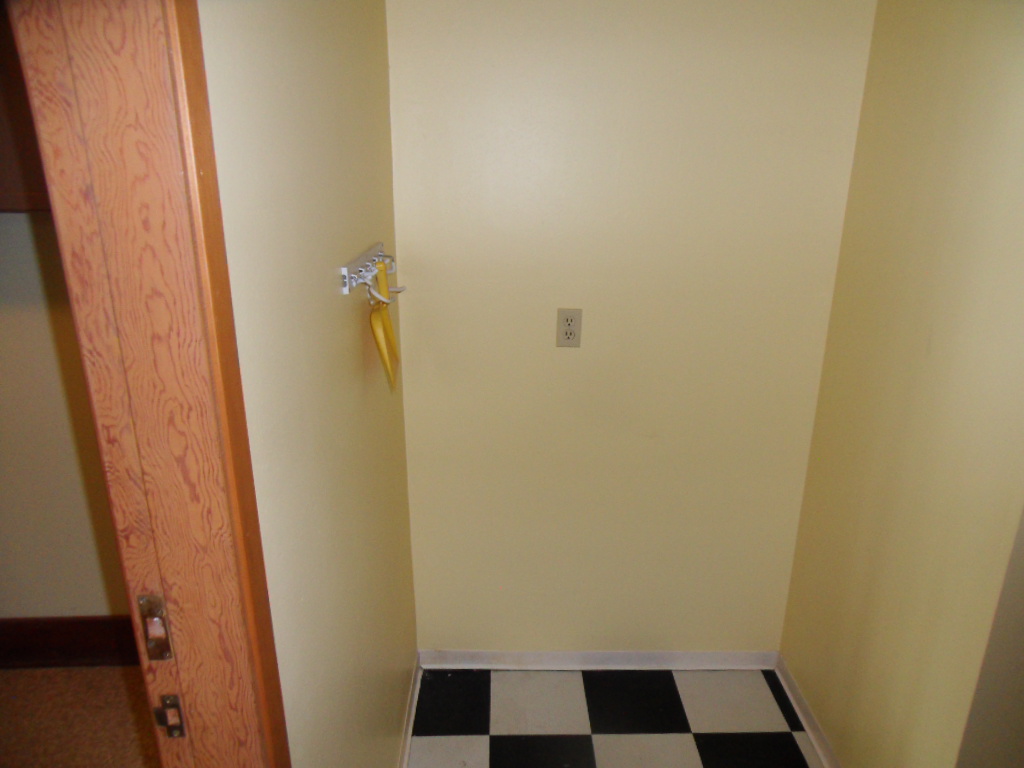
The Many Versions of This Alcove
Here’s a view on move-in day. We have always had a serious issue with storage space, especially in the laundry room. Here was a great opportunity to add some storage space.
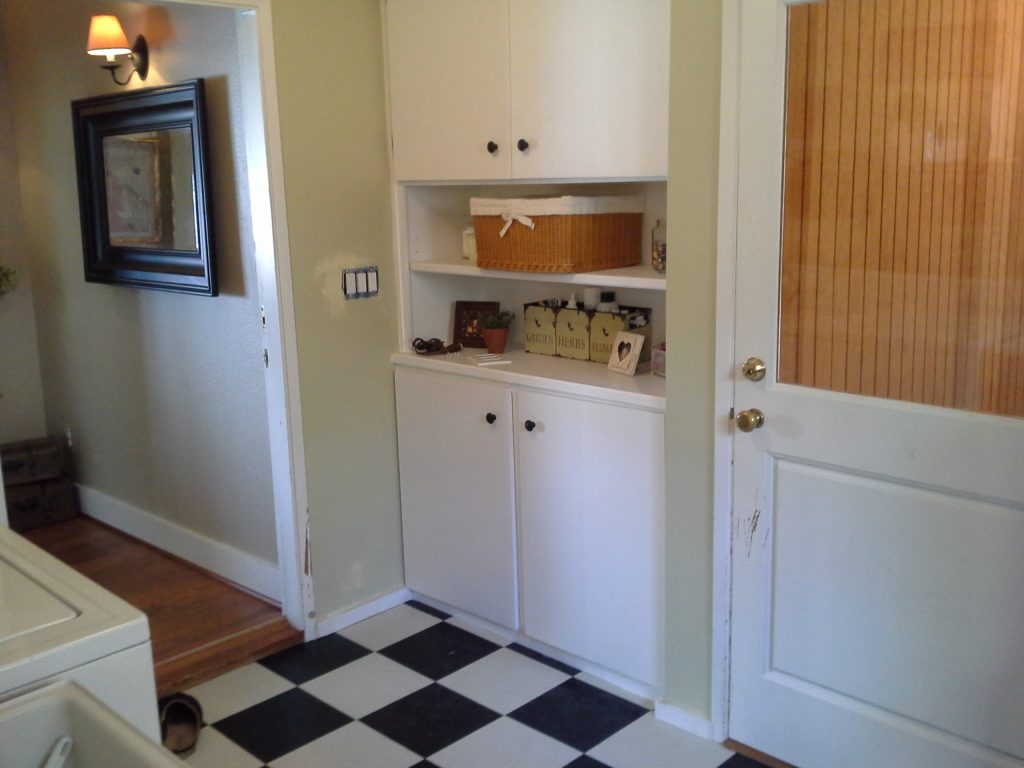
Phase 2 included a brand-new built-in. But when we started our master bathroom project, we realized that we needed this built-in for the hallway between the bedroom and bathroom, on the other side of the wall.
After living in the house for some time, we knew it was more important to have a closet for dog food, a vacuum and so much more.
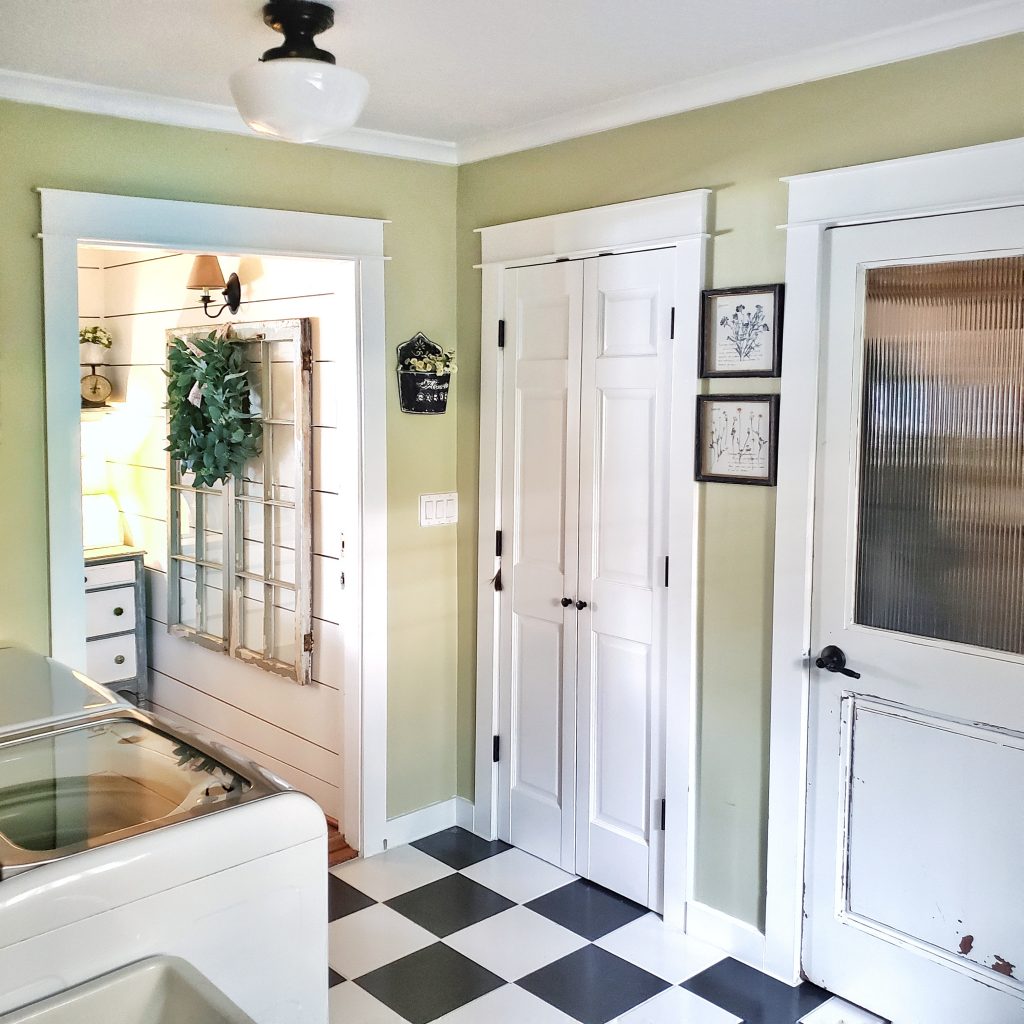
The closet fits our storage needs in the laundry room so much more now.
Our Laundry Room Refresh Phases
Phase 1
Phase 2
Phase 3
Phase 4 – Still to Come
We are so close to being finished with our laundry room refresh! We want to add a subway tile wall in back of the washer and dryer. That will be the next project.
I am debating whether I should paint the window and door trim a color to pop off of the white. Please help! Leave me a message and let me know if you think I should paint the trim, and if so, what color.
If you have any questions or additional suggestions, feel free to share them in the comments below. And be sure to share this blog post link with anyone who may need some inspiration.
Until next time,
Follow Me for More Inspiration
Shop my Amazon Storefront, my LTK sources, and my favorite home decor, garden, and lifestyle products. When you make a purchase from one of my links, I earn a small commission which helps me to continue sharing all the content you expect on my blog.
Be sure to follow me on Pinterest, Instagram, Facebook, TikTok and LIKEtoKNOW.it. Do you like gardening? Join my Facebook Gardening Tips & Tricks group.

Kim,
I love your refreshed laundry room. What a great room to be in and do your laundry. Congratulations, you are being featured at Thursday Favorite Things. I hope to see you there.
https://www.eclecticredbarn.com/2020/10/thursday-favorite-things_22.html
Hugs,
Bev
Thank you so much Bev! I really appreciate the feature my friend. Love your wonderful party!
I love the way your laundry room turned out. I can’t believe you are still working on it. It looks perfect to me!
Thank you so much Catherine! I’ve always wanted a subway tile wall, and really wish I would have thought about it when we were putting in the tile floor. Now I’m going to have to figure out how to do it!
I LOVE the transformation! What if you painted the door black to match the floors? Maybe leave the trim white?
I also like the blinds, they match the wood cabinet.
Thank you Sharon, and I really appreciate your input. I was also thinking of a black door.
What a fun space ! Love seeing the transformation this makes me want to redo my laundry room my husband will be so pleased…
It is a fun space. I’m always about inspiring someone to make more work for themselves and their husbands!!!
Wow! Such a large laundry room, looks great!
It really is a big laundry room! We use it so much. Thank you Jane!
Great Job. So cute.
Thank you Rebecca! I’m so glad you visited my blog!
Love seeing the process! You have great vision, Kim!
Thank you Molly. I can’t wait to get my subway tile wall done!
Kim,
I love this transformation!
Great job
Thank you so much Rachel!
What a pretty laundry room! I think I would leave the trim white. There is a lot going on in the room color and pattern wise (in a good way!) and I think the simple white trim looks good, very classic cottage! Thanks for sharing!
Thank you so much for your input Vicki. I really appreciate it.