
How to Make an Easy DIY Iron Pipe Pot Rack for Your Kitchen
If your cabinets are overflowing and your kitchen is short on space, a hanging pot rack solves two problems at once. It gets your pots and pans out of the cupboard and turns them into something worth looking at.
Here’s the part I love… You can build this iron pipe pot rack for under $120 in materials, and it takes about 20 minutes to assemble. No welding, no special tools, just threaded pipe and fittings you screw together by hand.
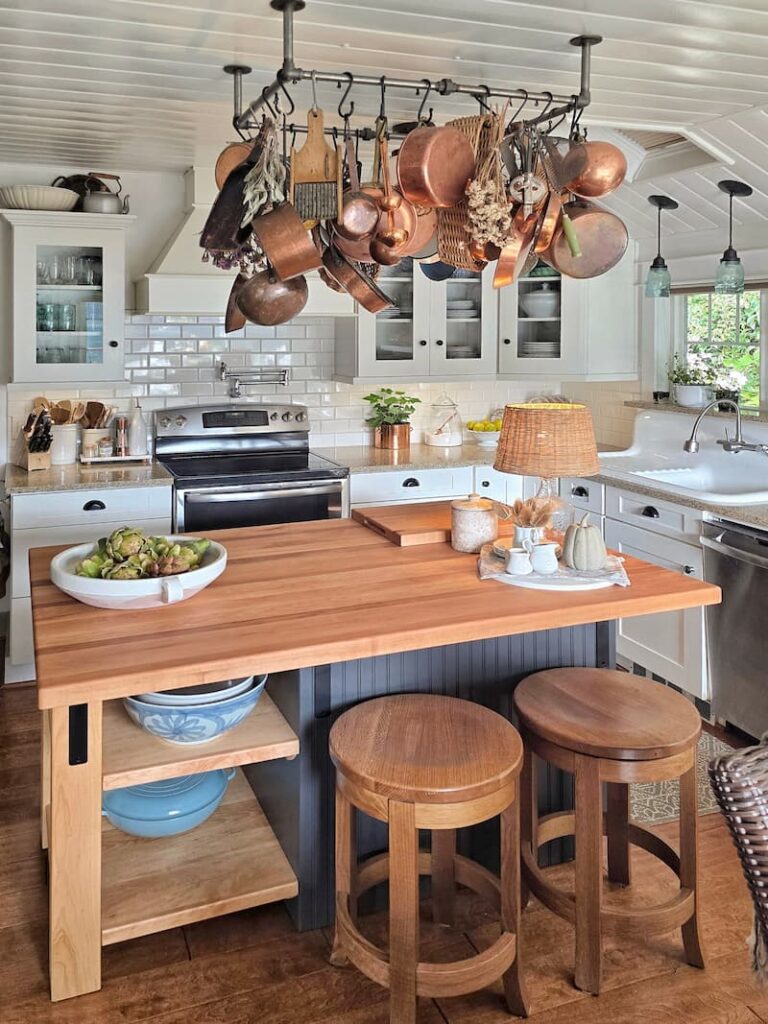
It’s an easy weekend project, and it added just the right amount of industrial character to our little cottage kitchen.
As an Amazon affiliate, I earn a commission from qualifying purchases at no additional cost to you. My blog also features other affiliate links for your convenience. Click here to read my privacy policy.
Where the Idea Came From
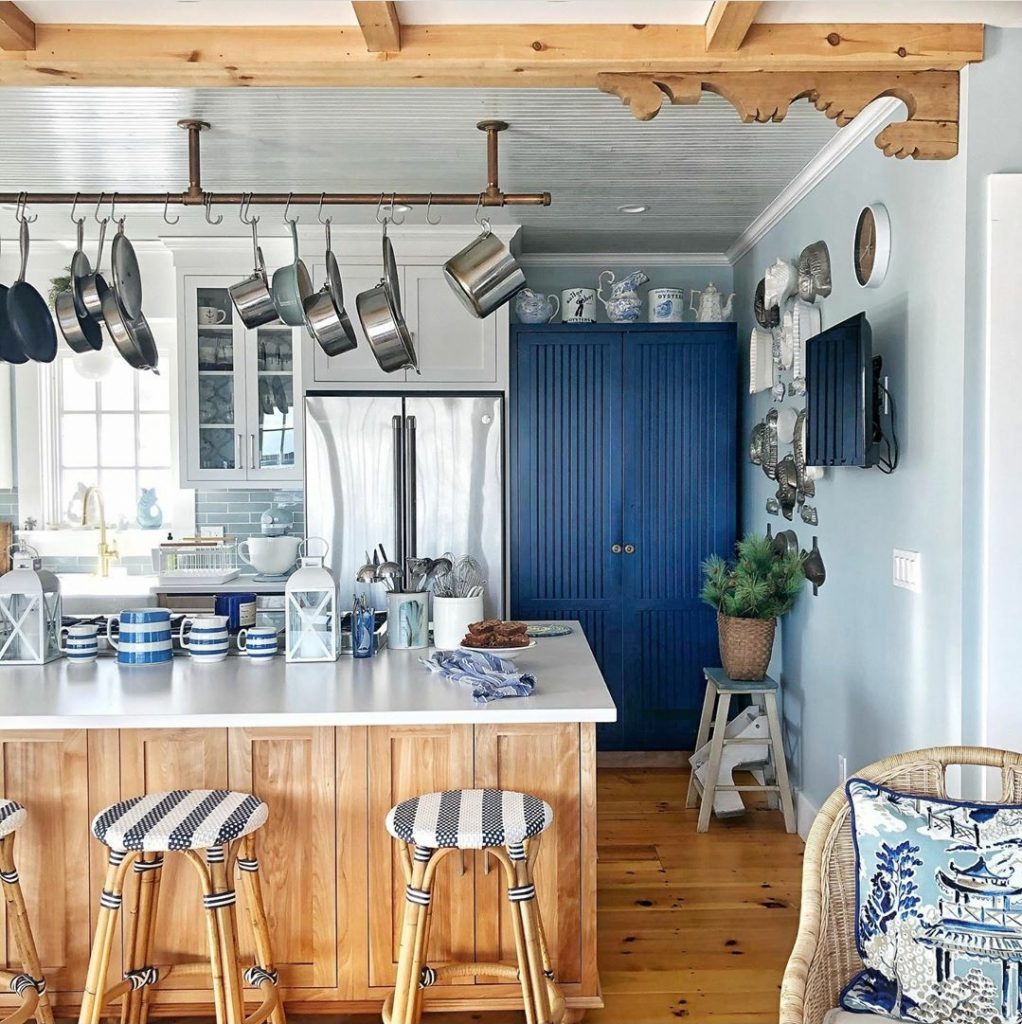
This started when I first saw my friend Molly’s kitchen pot rack on social media. I fell for the industrial look right away and decided I had to have one. I didn’t have the space for anything like hers. After a fair amount of begging (and a little more begging), my husband agreed to help me figure out a smaller version that would fit above our kitchen island.
A few brainstorming sessions later, we landed on a compact rack, giving us the added storage space without swallowing the room.
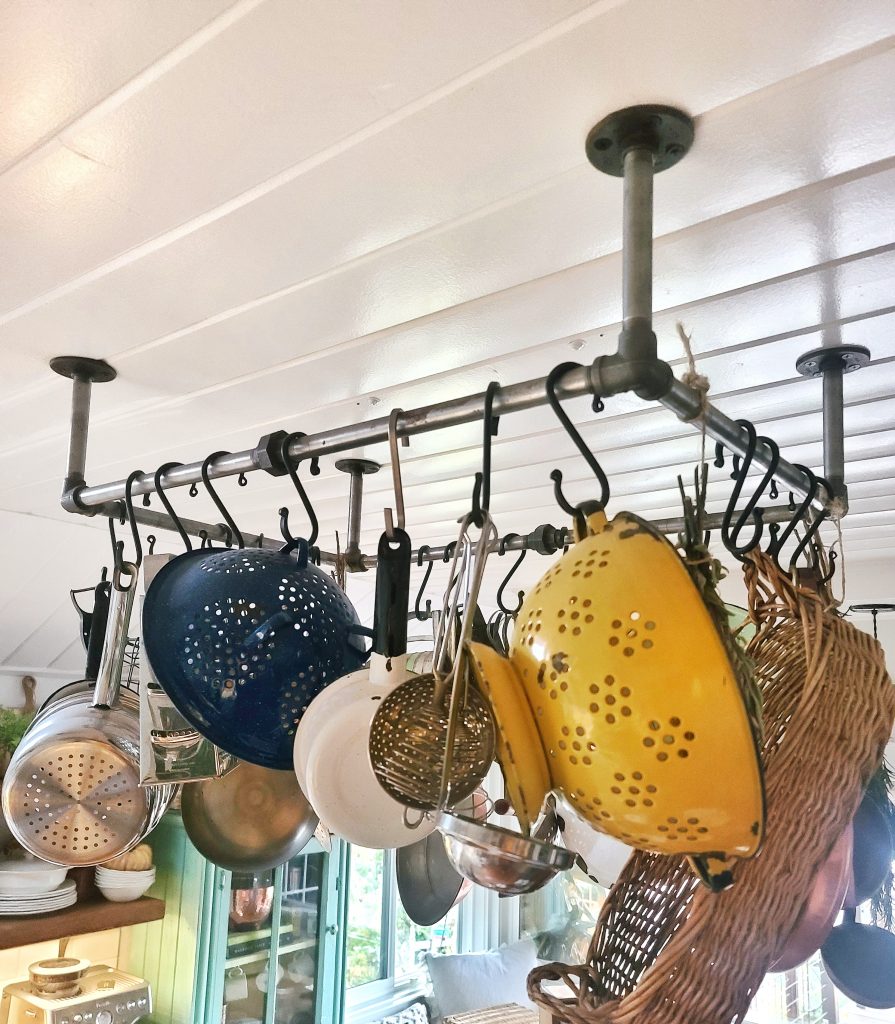
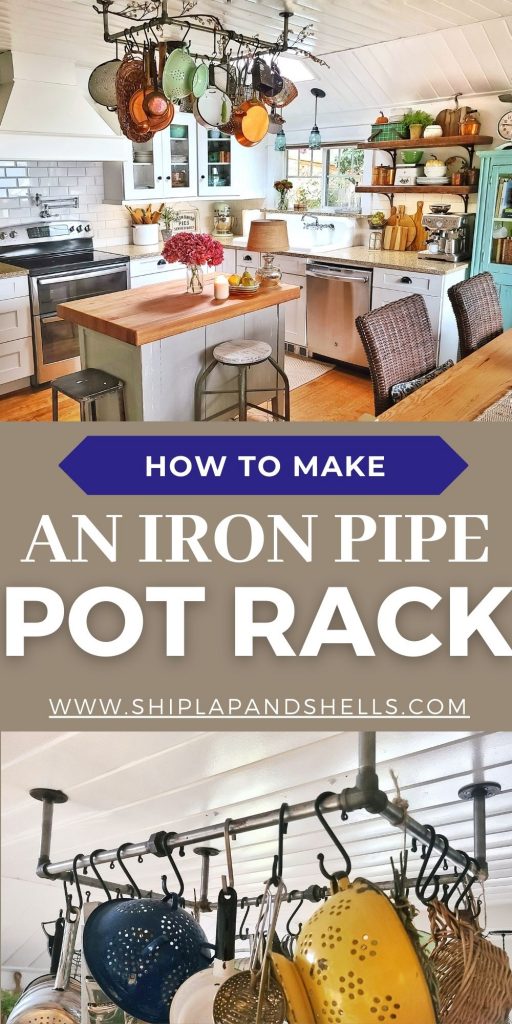
The rack in the photo above finishes at roughly 30″ L x 16″ W x 6″T. I say roughly because you pick up an inch or so from the fittings themselves, mostly the unions and the 90-degree side outlet elbows. You can find everything at Amazon, Home Depot, or your local hardware store.
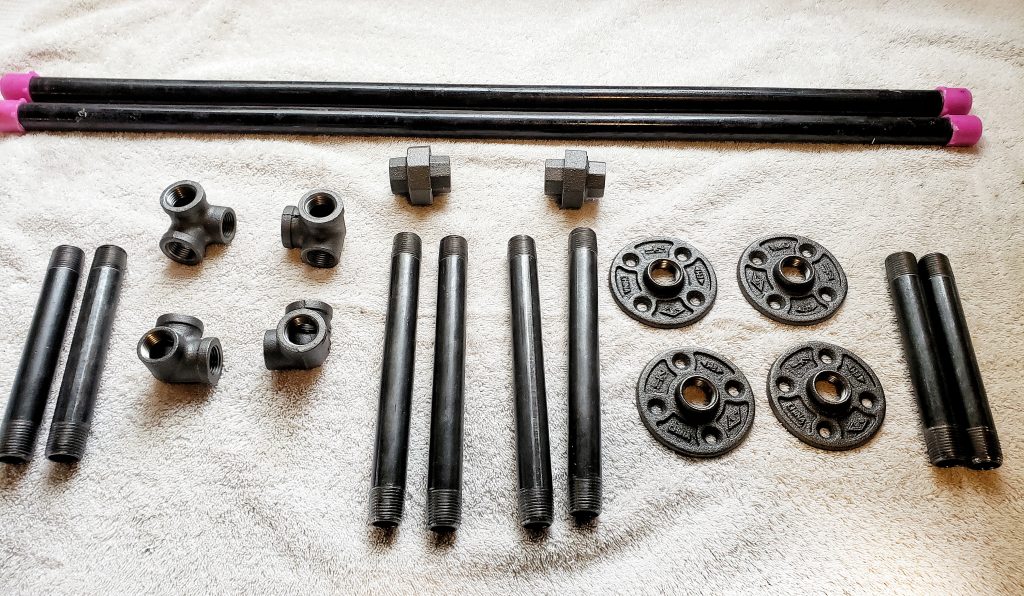
DIY Pipe Pot Rack Material List
A Note About Black Pipe
New black iron pipe comes with an oily coating that keeps it from rusting on the shelf. You can leave it on, or take it off. We removed ours because I wanted a more rustic, aged look.
We used a wire wheel on a bench grinder to strip the coating, then cleaned the pipes with a mix of dish soap and baking soda before assembly.
If you don’t have a bench grinder, a wire brush and some elbow grease will get you most of the way there.
Where Can You Install a DIY Hanging Pot Rack?
The beauty of building it yourself is that you can size it to your space. The length of the two main side pipes sets the overall size of the rack, so that’s the measurement to plan around. Here are a few ways to work one into your kitchen.
Ceiling-Mounted Pot Rack
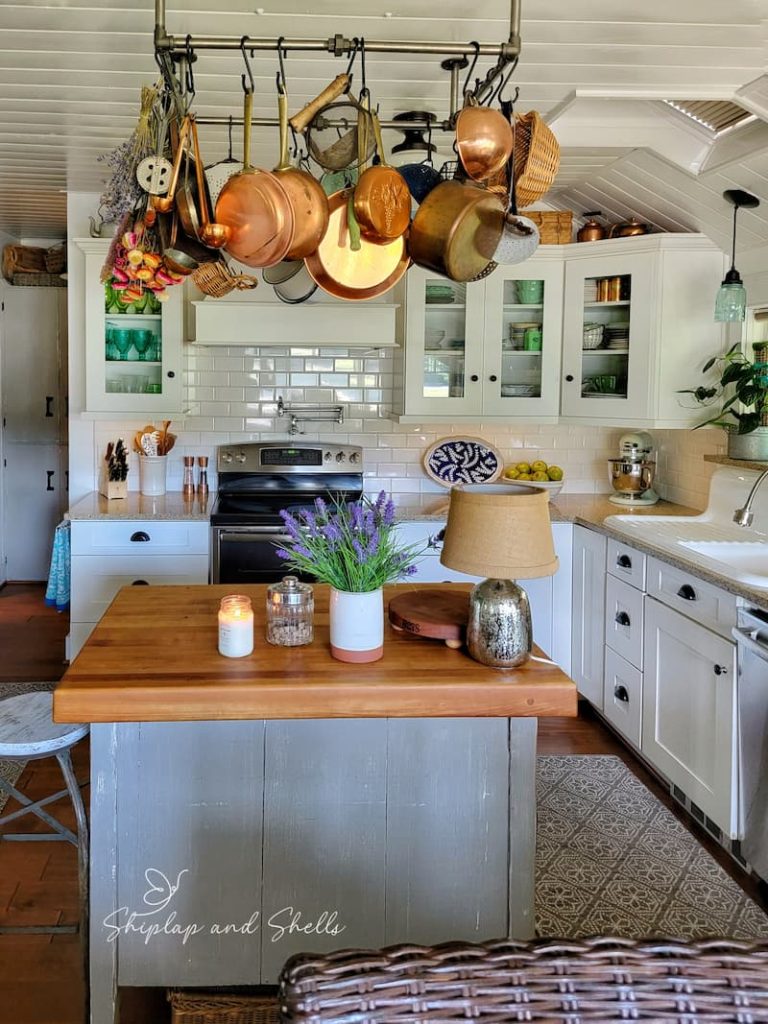
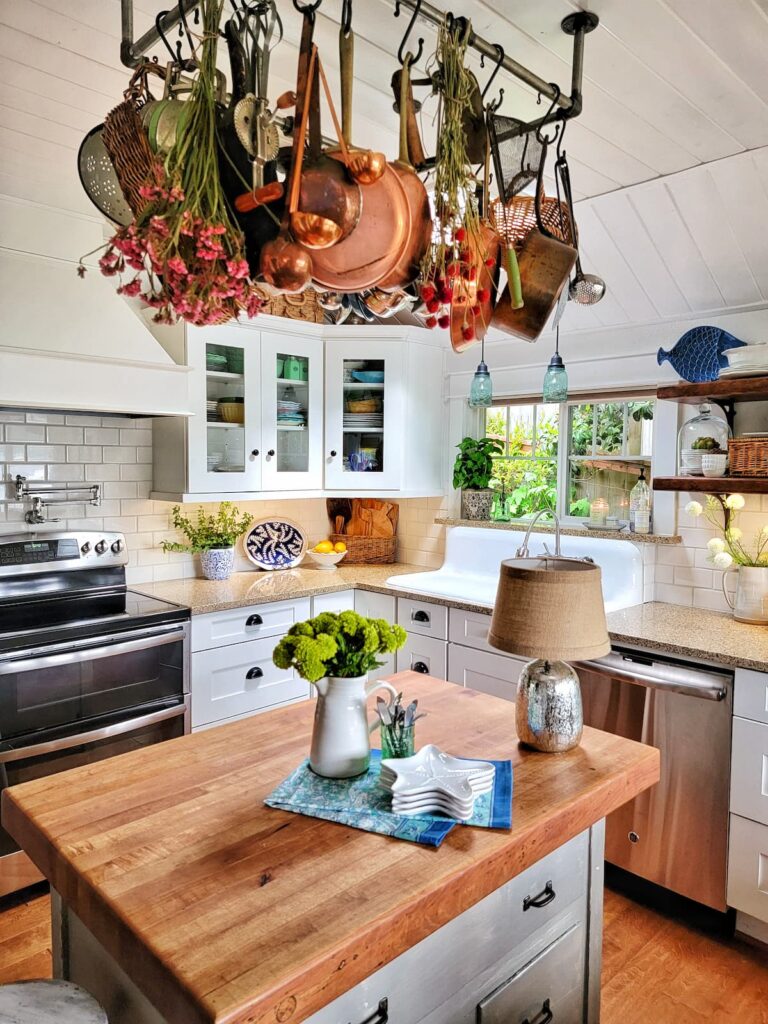
This is the version in my kitchen. A ceiling-mounted rack is ideal when you’re short on wall space, and hanging it right over the island puts your favorite cookware front and center while keeping it within easy reach.
Over the Kitchen Sink
A smaller wall-mounted version above the sink is perfect for colanders, pots, and anything you hand wash. Everything drips dry straight into the sink and stays off your counters.
Backsplash Over the Counter
Put that empty vertical space to work by mounting a rack on the backsplash above the counter. It keeps your most-used pans at arm’s reach while you cook.
Inside a Walk-In Pantry
If you have a walk-in pantry, a rack in there is a great spot for the larger pots and pans you reach for less often. It clears out cabinet space without cluttering the kitchen itself.
Custom Configurations
Long and narrow for a slim wall, or a big square statement over the island: the dimensions are yours to set based on your ceiling height, your storage needs, and how your kitchen actually flows.
Six Steps to Build a DIY Industrial Pipe Pot Rack
Ready to build one? Here are the six steps. They’re simple enough for a first-time DIYer, and the whole thing threads together like a puzzle.
Step 1: Attach the 6-Inch Pipes to the 3-Way Elbows
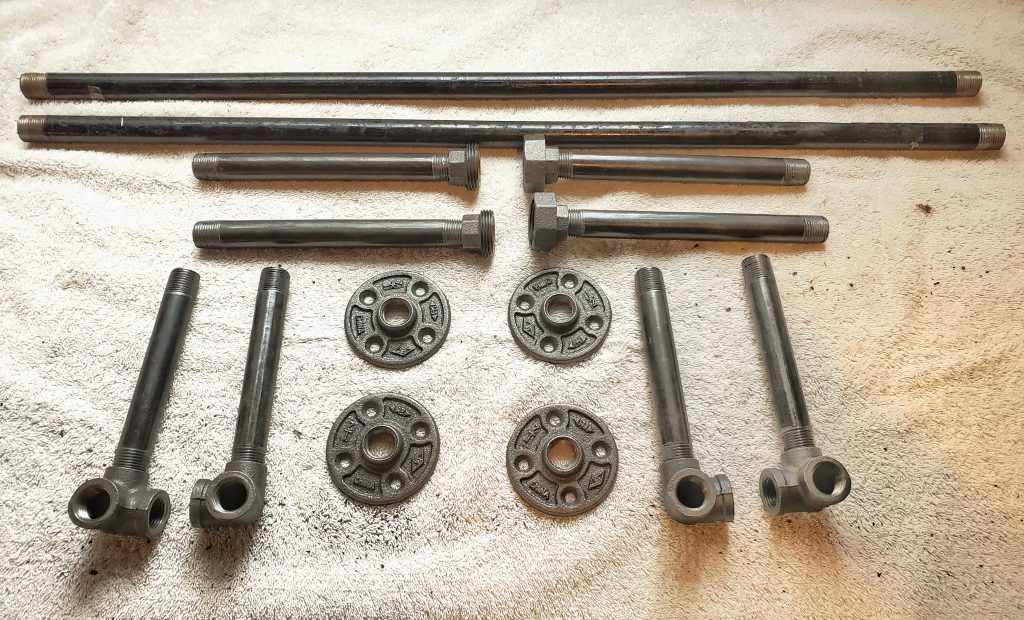
Thread a 6-inch steel pipe into a 3-way side outlet elbow. Repeat with the other three 6-inch pipes and elbows.
Tip: Wipe the pipe threads with a rag and a little WD-40 first. It clears out the metal shavings left behind from manufacturing and makes everything screw together far more easily.
Step 2: Attach the Pipe Unions
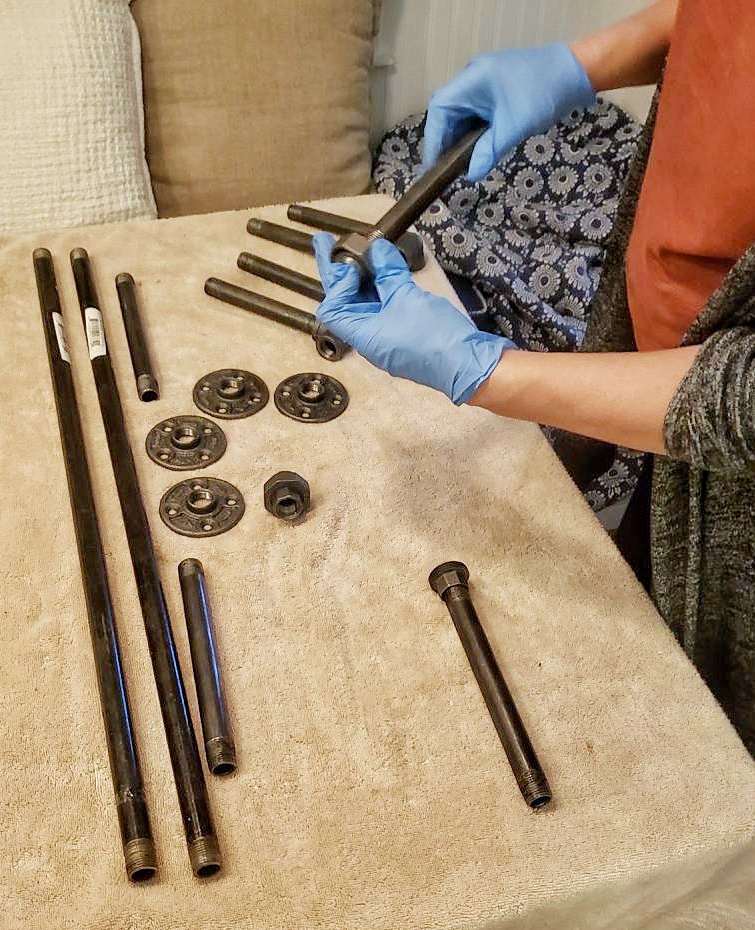
Separate each iron pipe union into its two halves and thread one half onto each 8-inch pipe, as shown above.
Step 3: Attach the 30-Inch Pipes
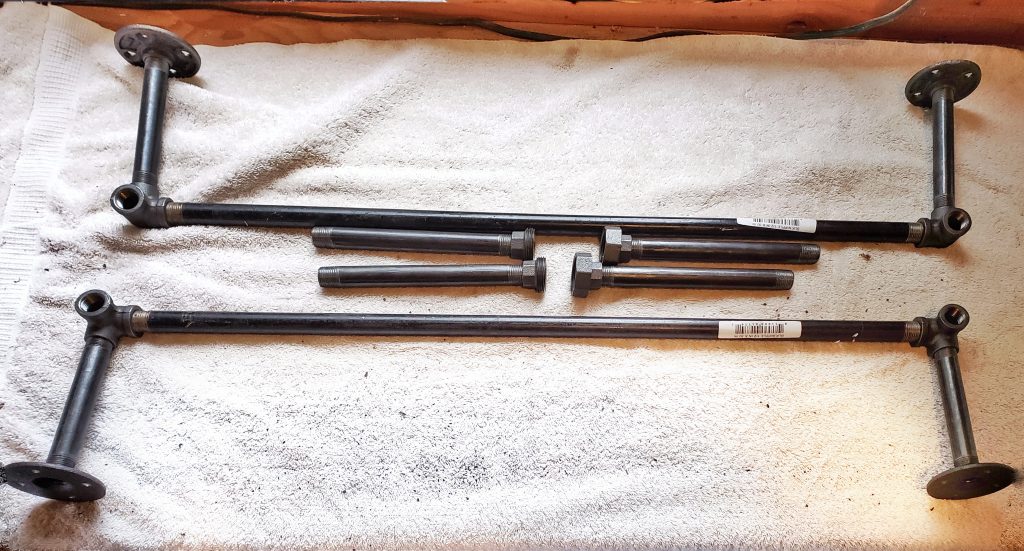
Thread a 30-inch pipe into a 3-way 90 side outlet at each end. Repeat with the second 30-inch pipe.
Step 4: Attach the Floor Flanges
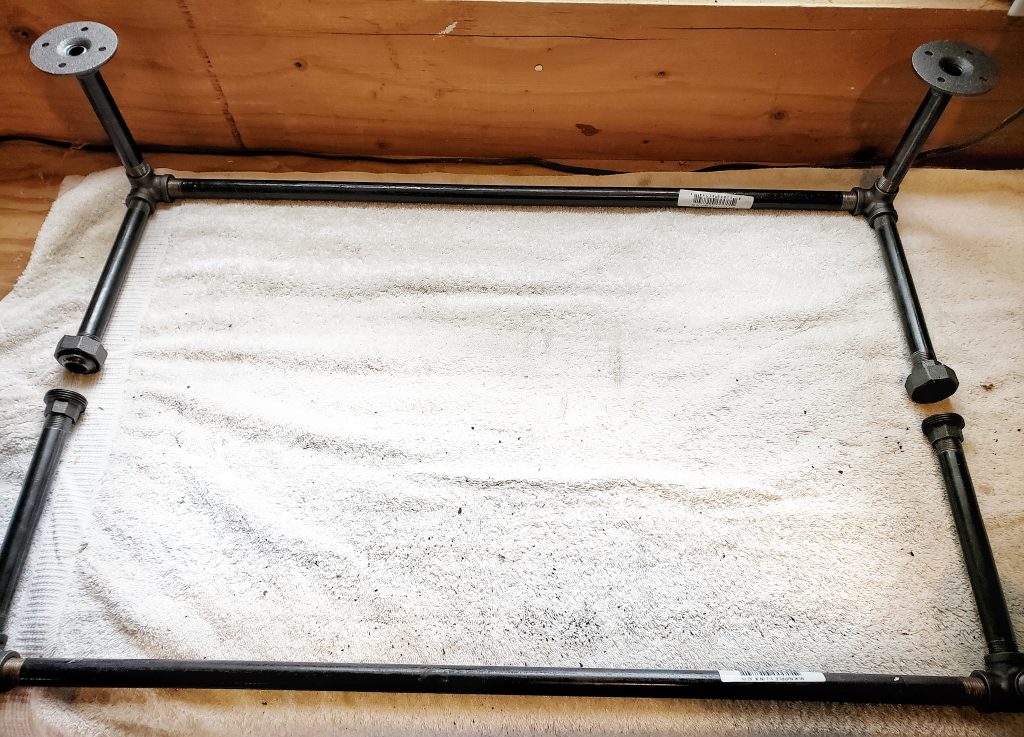
Screw one floor flange onto each 6-inch pipe. The flange is the round foot that mounts the rack to the ceiling.
Step 5: Join the Two Union Halves
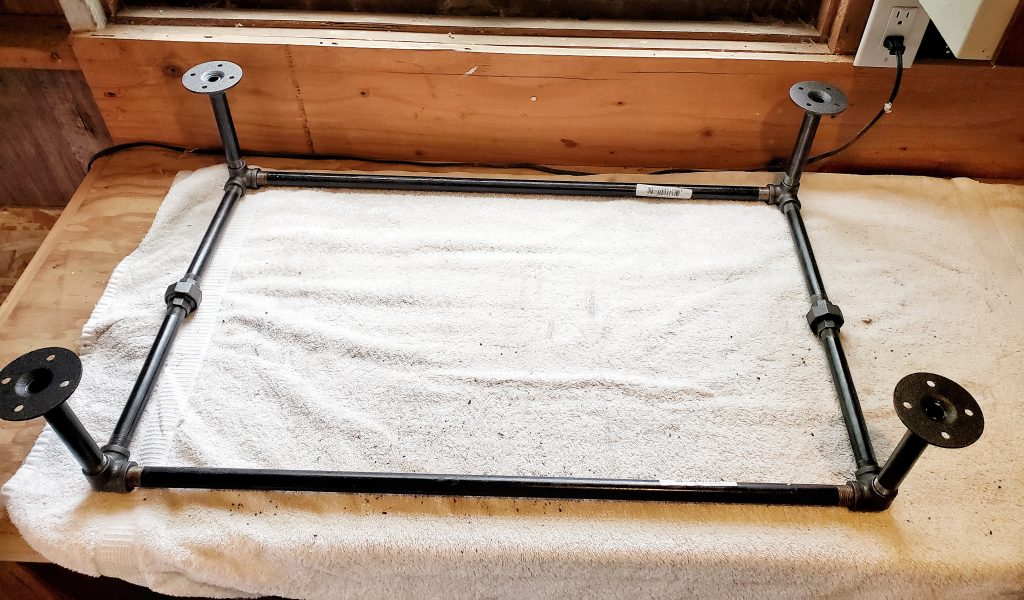
Bring the two sides together and connect the halves of the union. That completes the frame of your pot rack.
Step 6: Mount the Rack to the Ceiling
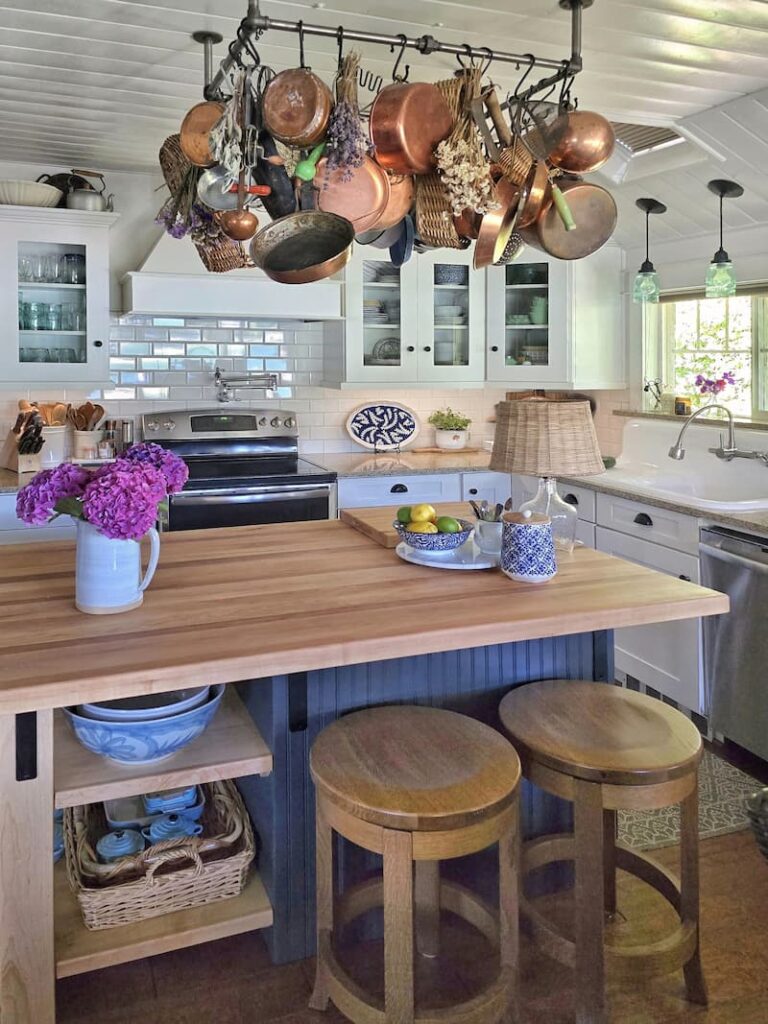
Install your finished rack. Anchor it into ceiling studs or joists, or use heavy-duty anchors rated for the full weight. This is not the place to cut corners, since it’s holding metal over your head.
Hanging Your Pots and Pans
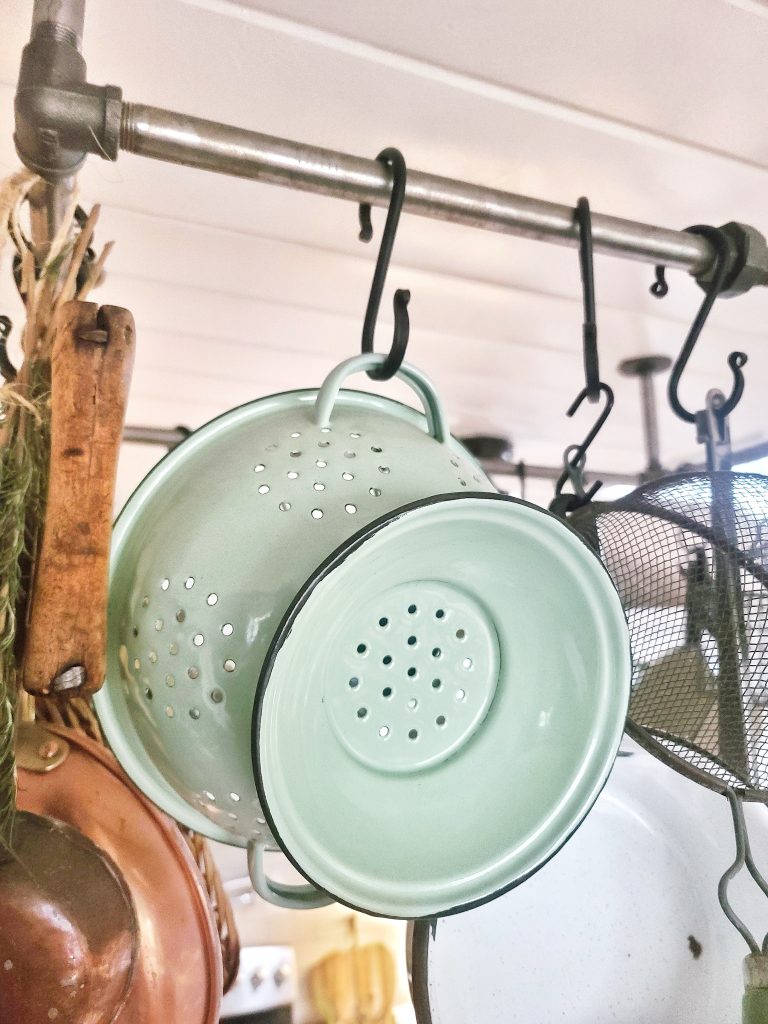
With the rack up, it’s time for the fun part… styling it.
Choosing the Right S Hooks
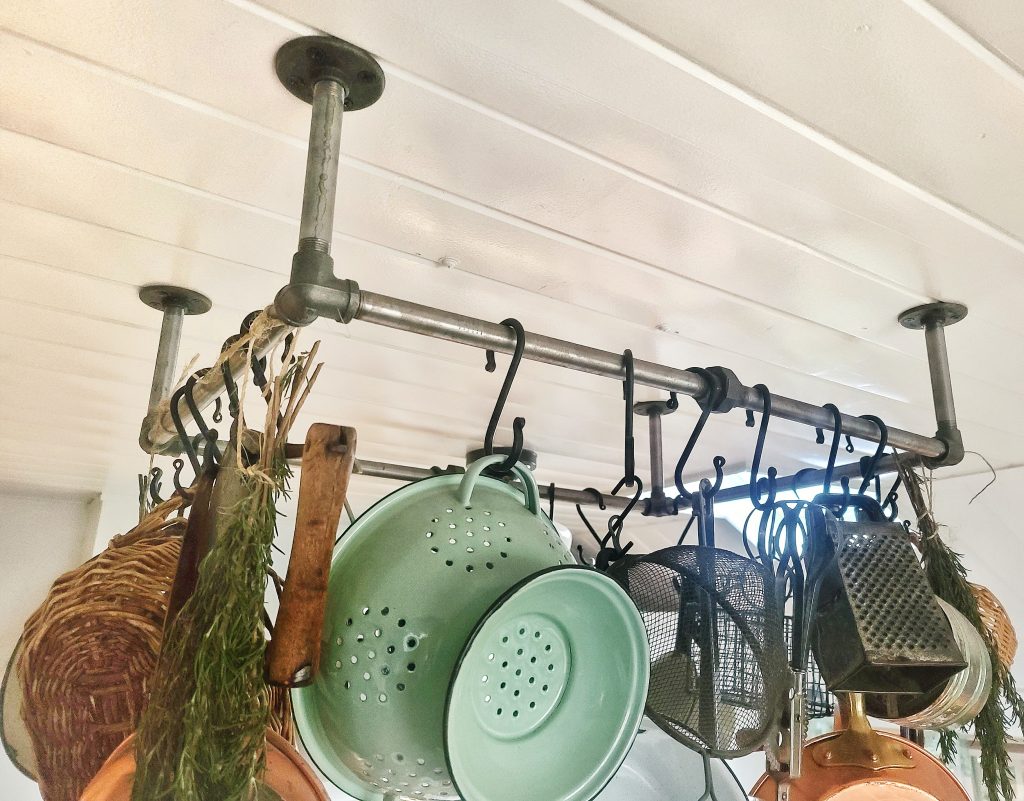
I used S hooks to hang everything, and they could not be simpler to use. They come in different sizes and thicknesses, so match yours to the pipe diameter. You want them to slide on easily but still hold securely.
What to Hang
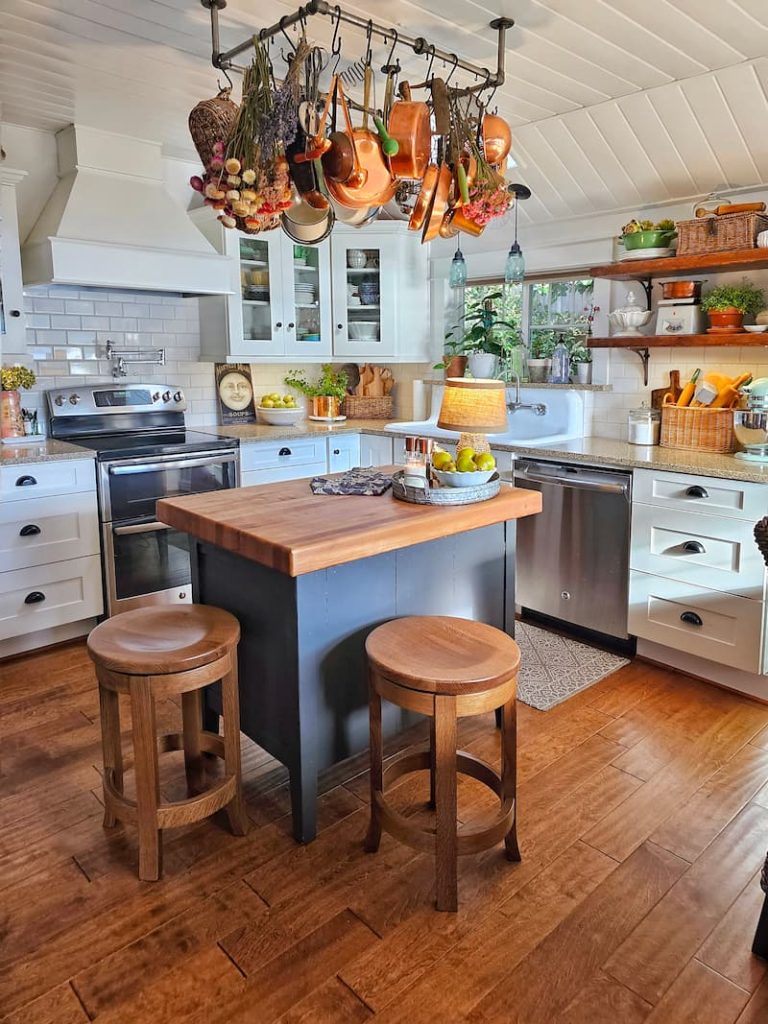
Start with what you reach for most: skillets and saucepans. Then add colanders, ladles, large spoons, and other utensils. If you have a matching cookware set or a favorite old pan collection, show it off. My vintage copper collection is the piece that makes the whole rack.
Keep an eye on balance. Place heavier pieces toward the center or spread them evenly so the rack doesn’t tilt or pull unevenly on the anchors.
What Not to Hang
The rack is sturdy, but it has limits. Skip the heaviest items, like large cast iron pots or Dutch ovens, and resist the urge to overcrowd it. A packed rack is harder to use and loses that easy, collected look.
Styling Your DIY Pipe Pot Rack
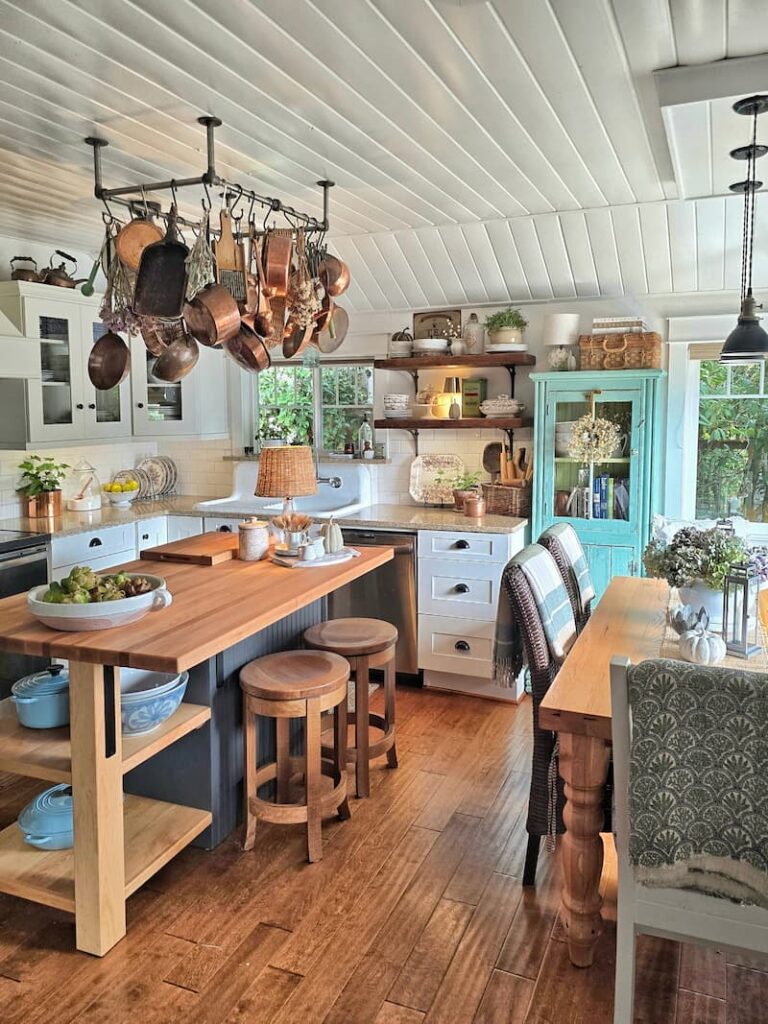
You don’t have to stop at cookware. This is where I hang my prettiest baskets, copper and enamel pans, and bundles of dried flowers from the garden.
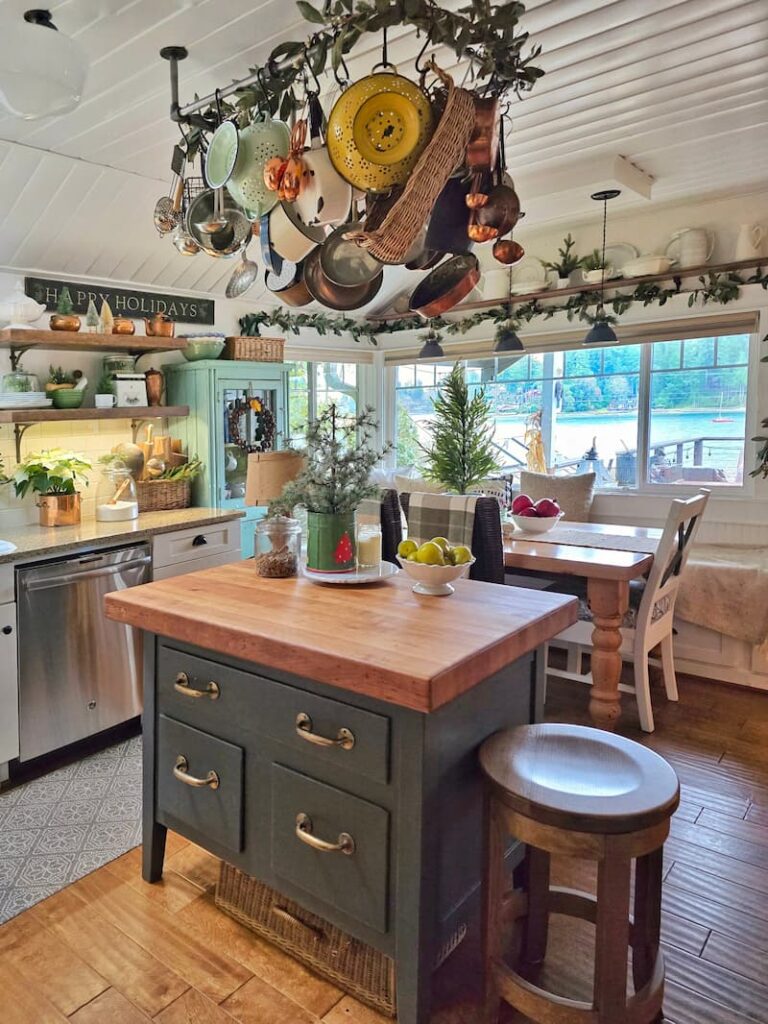
Come the holidays, a little garland or a string of battery-operated twinkle lights turns it into a seasonal focal point.
DIY Pot Rack FAQ
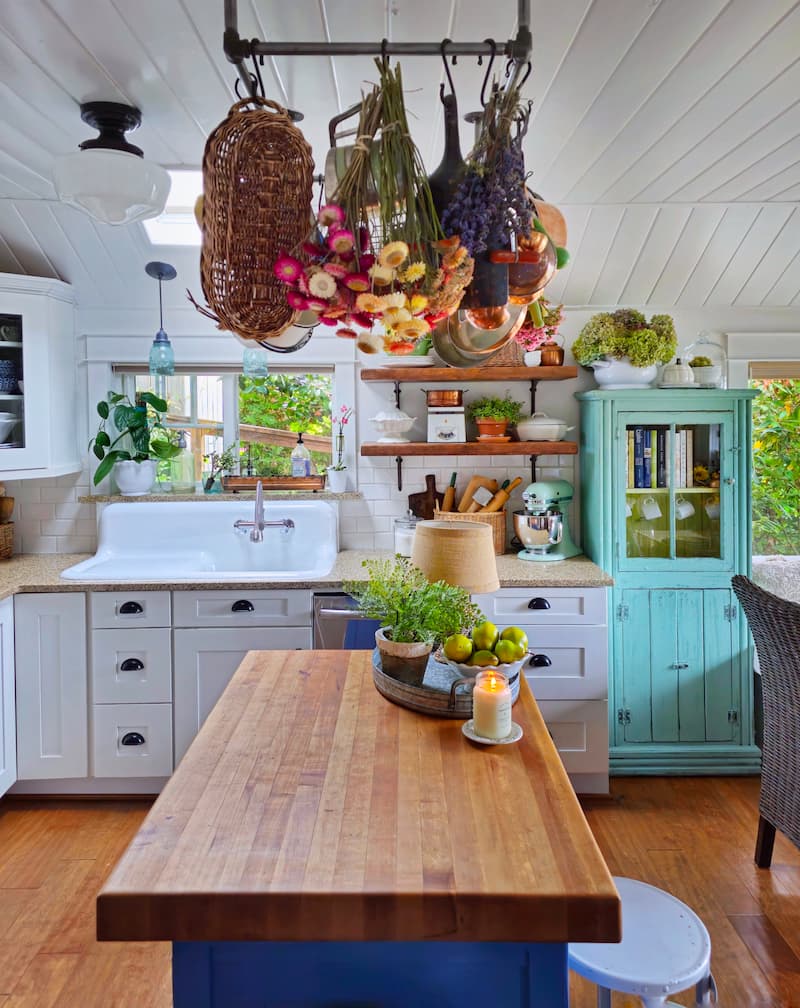
Aim for a balance between reachable and out of the way.
A good rule of thumb is to hang the rack so the bottoms of your pots sit at least 6 feet (about 1.8 meters) off the floor, which keeps most people from bumping into them. Adjust from there based on your ceiling height, your height, and the size of your cookware.
It depends on the rack, the installation, and the ceiling behind it.
A well-built rack mounted correctly can typically hold between 100 and 200 pounds (about 45 to 90 kilograms). A few things that determine where you land in that range:
Material and construction. Steel and iron racks carry more than wooden ones.
Installation method. Mounting into ceiling joists or studs is strongest. On drywall, use heavy-duty anchors or toggle bolts rated for the load.
Weight distribution. Spreading the load evenly keeps stress off any single point of the rack or its hardware.
Ceiling strength. A rack bolted straight into joists holds far more safely than when anchored only into plaster or drywall.
Yes, but drywall alone can’t carry much weight, so it takes the right hardware and a little planning.
Use the Right Anchors
Toggle bolts (butterfly anchors) are ideal for heavy loads because they spread the weight across a wide area behind the drywall.
Heavy-duty drywall anchors are made for heavier weights and work well for medium-sized pots and pans.
Find the Studs
Even if you’re using anchors, getting at least part of the rack into a stud or joist adds a lot of support. Use a stud finder to locate them, and anchor into the drywall only where your mounting points don’t line up with a stud.
Account for the Weight
Add up the rack plus everything you plan to hang on it. An easy trick: weigh yourself holding the rack, then weigh yourself without it, and the difference is the rack’s weight. When in doubt, choose hardware rated well above what you think you’ll need.
Install It
Mark your mounting points once you’ve located studs or chosen anchor spots.
Drill pilot holes: sized for the anchors in drywall, or slightly smaller than your screws when going into studs.
Set the anchors firmly, then line up the rack and drive the screws into the anchors or studs until secure.
It’s doable with the right anchors and a careful approach:
Choose heavy-duty anchors. Toggle bolts and heavy-duty drywall anchors distribute the load across a wider area of drywall or plaster.
Know your weight. Total the rack plus its contents and pick anchors rated above that, with a safety margin.
Mark your points. Choose a spot that works for access and workflow, and line the marks up with the rack’s mounting holes.
Set the anchors. For toggle bolts, thread the bolt through the rack first, pinch the wings closed, push them through until they snap open behind the surface, then tighten. For screw-in anchors, drive them flush before attaching.
Once it’s up, pull down gently to test the hold before you load it, and never fully load a rack you’re not confident is secure.
Plenty. A few of my favorite uses beyond pots and pans:
Utensils and kitchen tools
Drying herbs and flowers
Storing baskets and containers
Hanging baskets for fruit and vegetables
Final Thoughts
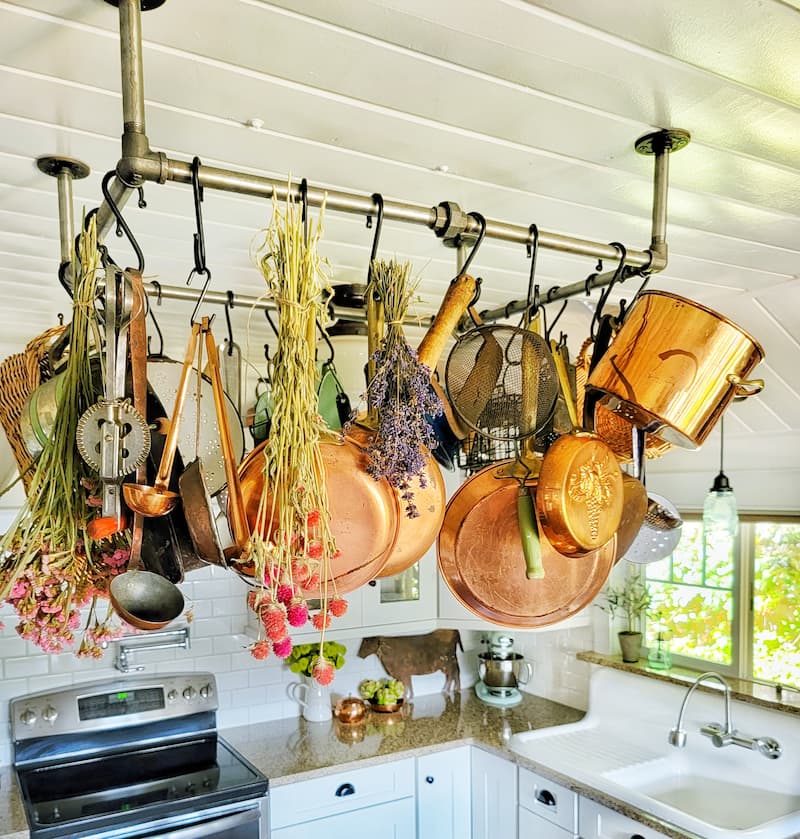
Whether your kitchen style is cottage, country, or farmhouse, this iron pipe pot rack will look great in your space. Ours cost under $120 in materials, came together in less than 20 minutes, and it’s still one of my favorite projects we’ve done in this kitchen.
If you build one, I’d love to hear how it goes. Drop any questions in the comments, and share this post with anyone who could use a little more storage space in their kitchen.
Until next time,

MORE POSTS
For You To Enjoy
Follow Me for More Inspiration


Beautiful pot rack! I’ve been searching and searching for help on a pot rack that’s actually attached to the island itself, and I can’t find anything. I don’t want it to hang from the ceiling or attach to a wall, instead I’d love for it to be attached to the island itself, so it’s still overhead. I don’t even know how to Google for it though, how would you describe it? Like a baker’s rack? Or freestanding? Not sure if you would have any thoughts on how to assess the weight capacity of something like that…or if I’ve even described it well enough for you to understand what I’m looking for.
Hi Lenore,
I am so sorry for missing this comment and replying so many months later.
I would think what your asking for would be more of a baker’s rack. I found a couple of things on the computer just for ideas:
https://rstyle.me/+WxgpH_u1ciX1-Je5CamLAQ
https://rstyle.me/+v3l4b0gSwyE_DhdzU0HZNg
Wow, it’s really great.
I’ve spent time to find the right pot racks in my home, and this post inspires me to make it DIY project.
I have one quick question:
I think most of the house in US has 2×4 (inches) studs and I also need to mount the flange to the 2 inch side, which is quite small to mount the pipe flange.
Didn’t you have any difficulty on finding the studs and mounting it?
Hi there! Thanks for your question.
My husband used a stud finder from Amazon to easily locate the studs. Here is the link:
Limited-time deal: Tavool Stud Finder Sensor Wall Scanner – 4 in 1 Electronic Stud Sensor Beam Finders Wall Detector Center Finding with LCD Display for Wood AC Wire Metal Studs Joist Detection https://rstyle.me/+waWvlbahIFwfFqmJvVq3nQ
And he also told me that the 4 mounting screws that attach each base to the ceiling are 1.5″ apart. So he angled the screws towards the center of the stud when he installed them with his cordless drill. He said you can easily tell if you got the stud if the screw tightens up and doesn’t spin, which would mean you are just in the drywall and missed the stud.
Hope this helps!
This is so great, Kim! Thanks for sharing my pot rack! (I used brass pipes and fittings for mine!)
And I absolutely love it Molly!
Now that looks fabulous! My fav. Christmas memory has to be when my children and I were alone (single motherhood) a kind neighbor placed a surprise cash gift on our front door step that totaled about $60. My youngest found it and brought it in. We were so touched at their kindness and that was our Christmas that year. I cried and we have never forgotten to bless others and pay it forward.
That is such a wonderful memory! I too was a single mom for many years and can imagine how you must have felt that day. Thank you for sharing
My favorite holiday memory was helping my grandparents put lights on their house and set up a nativity scene each year when I was a teenager. It was always comical trying to untangle the lights and figure out the broken bulbs and so pretty once it was done.
Forget the untangling of the lights, what about figuring out which light was burnt out and needing to be replaced because it made the entire string go out! Sounds like a lot of fun!
My favorite Christmas memory was baking lots of Christmas goodies and then passing them out to the neighborhood! That was about 7 years ago and it’s been a tradition ever since. ❤️
Baking has always been one of my favorite things to do for Christmas. And neighbors always love getting little goodies.
My favorite holiday memory was when we took our kids for an RV trip around the States for a year and spent Christmas in an RV park in Cottonwood, Arizona. My husband and I went for a walk on Christmas Eve and came back to find the boys had strung lights throughout the RV and decorated our little artificial tree with lights and handmade ornaments. The next morning we watched a solar eclipse through a pinhole in a cardboard box. Sweet memories!
That sounds like a wonderful Christmas! I love that the boys took it upon themselves to surprise you with some decorations.
We get lotto tickets as part of the beautiful tables are. I never win but someone always wins q little and its awesome. P.s. if I win I get that beautiful green collander too 😉
That is right. You most certainly do!
My favorite Christmas memory was the year I got my first dirt bike. I was only 10 years old. I was over the moon excited!
I felt the same way when I got my first bike!
Hi, Beautiful pot rack! Thanks for the inspiration 🙂 My favorite memory is going to my grandparents house for Christmas. Their house was simply magical to me. From the smell of the candles on the table, to the way the holiday lights outside were obscured by this little amazing beaded window that made each little twinkling light outside blur into a point of light creating a colorful masterpiece on the glass, to how they would hang a sheet across the livingroom so that we could not see the tree or presents before breakfast. (Although we always tried to peek! We would visit them twice a day on Christmas. The drive was about 35 mins each way. Once for breakfast and then we’d return again around 4:30pm for dinner. My grandparents really made us feel special. We didn’t have a great upbringing with my parents, so feeling all the love on Christmas was truly special and I will always cherish those memories. To this day the smell of a beeswax candle that has just blown out brings me back to that time. Happy Holidays!
I always had a special bond with my Nana and felt that Christmas was so special when she was around. What great memories. I love the sheet across the room so you couldn’t see what was going on!
Christmas Florida style with the lanai sliders open and shorts and flip flops on!
I could seriously do that this year! It sounds amazing!
I think my favorite memory was last Christmas when I spent a week with my mom at her assisted living. She was 89 with Parkinson’s and could no longer live with me. We watched old movies especially the older Christmas movies and when “It’s a Wonderful Life” came on we turned the lights down and soaked up every second! She went to heaven this Oct 3 and I’m so grateful for last years Christmas memory!
Thank you so much for sharing this Gwynne. You have touched me deeply, and I am so glad you have that special memory. My daughter passed away a couple of years ago, and while I was reading this, it brought me back to the memories I had with her while watching It’s a Wonderful Life. It was our favorite holiday movie. We watched it so much, we could recite every word.
We lived on a military base and my favorite memory was piling in the station wagon with a thermos of hot chocolate and homemade cookies to deliver to the Marines guarding the gates on Christmas eve . Sharing just a simple thing makes a world of difference wgen far away from home.
What a wonderful memory Deborah. It really brought a smile to my face. So Sweet.
My mom always strung Christmas garland (all plastic, in the early 1960’s) and big red paper honeycomb bells down the hallway. I would see them from my bedroom waking up and that made me feel so happy! I miss my mom and those silly plastic Christmas decorations.
It’s so hard when you don’t have those experiences in your life anymore, but I love that you have those amazing memories. Thank you for sharing.And yes, I remember everything being plastic back then.
Kim this is awesome! I love your detailed directions and the giveaway too! So fun! Your kitchen is just beautiful!
Thank you Kelly! I can’t believe how easy it was!
My favorite holiday memories are of my daughter waking up on Christmas morning and seeing the excitement on her face. I’ve always told her the reason we celebrate for the birth of Jesus Christ. To see the excitement on a child’s face though brings so much joy.
What a wonderful memory! I have the same ones with my daughter. Thank you for visiting.
I absolutely love this! My favorite holiday memories are baking cookies! We get together & bake all the goodies! And I love that my guy & I give each other a new ornament that sums the past year, some years he nails it others..lol ❤
Picking out new ornaments for one another is such a great idea. And I LOVE baking cookies too. Some years are better than others though. Thanks for visiting.