
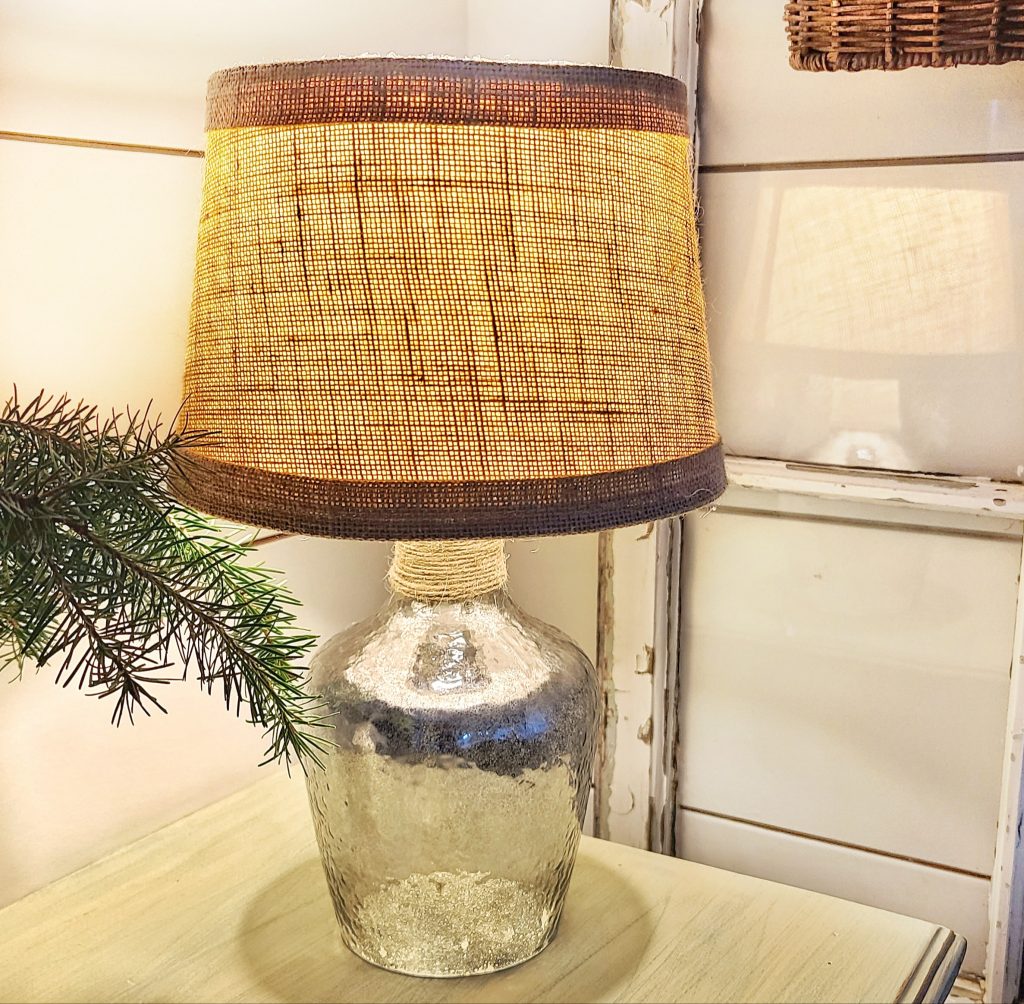
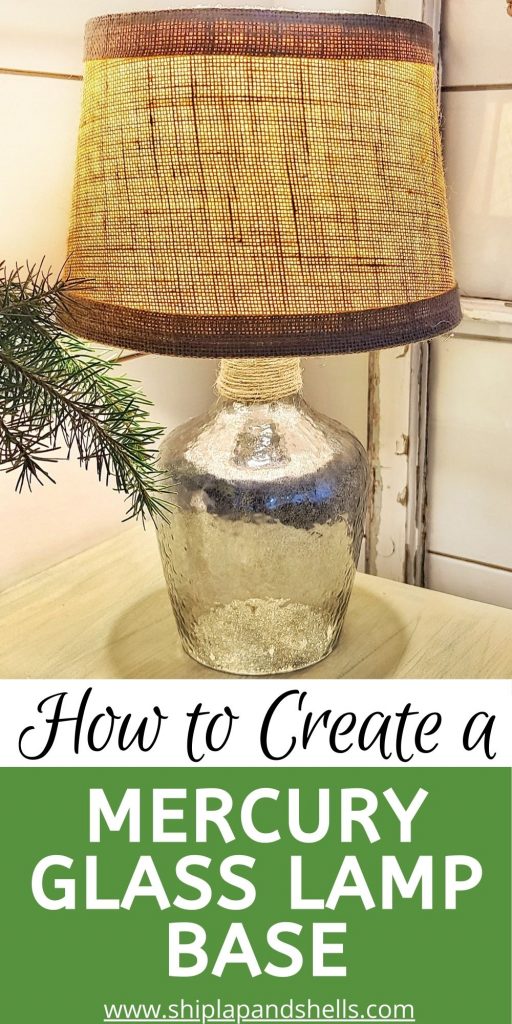
How to Create a Mercury Glass Lamp Base with a Twist
Do you love the look of mercury glass like I do? For this DIY project, I not only created a mercury glass lamp base but added some jute to the lamp base for an extra special twist. Step-by-step instructions below.
I love the look of mercury glass. And I am on a mission these days! Today I’m showing you how I took a clear glass lamp and created this beautiful look. Next…I’m moving on some ornaments, vases, and votive candle holders. And the best part? IT’S SO EASY!
As an Amazon affiliate, I earn from qualifying purchases at no extra cost to you. My blog contains other affiliate links as well for your convenience. Click here to read my privacy policy.
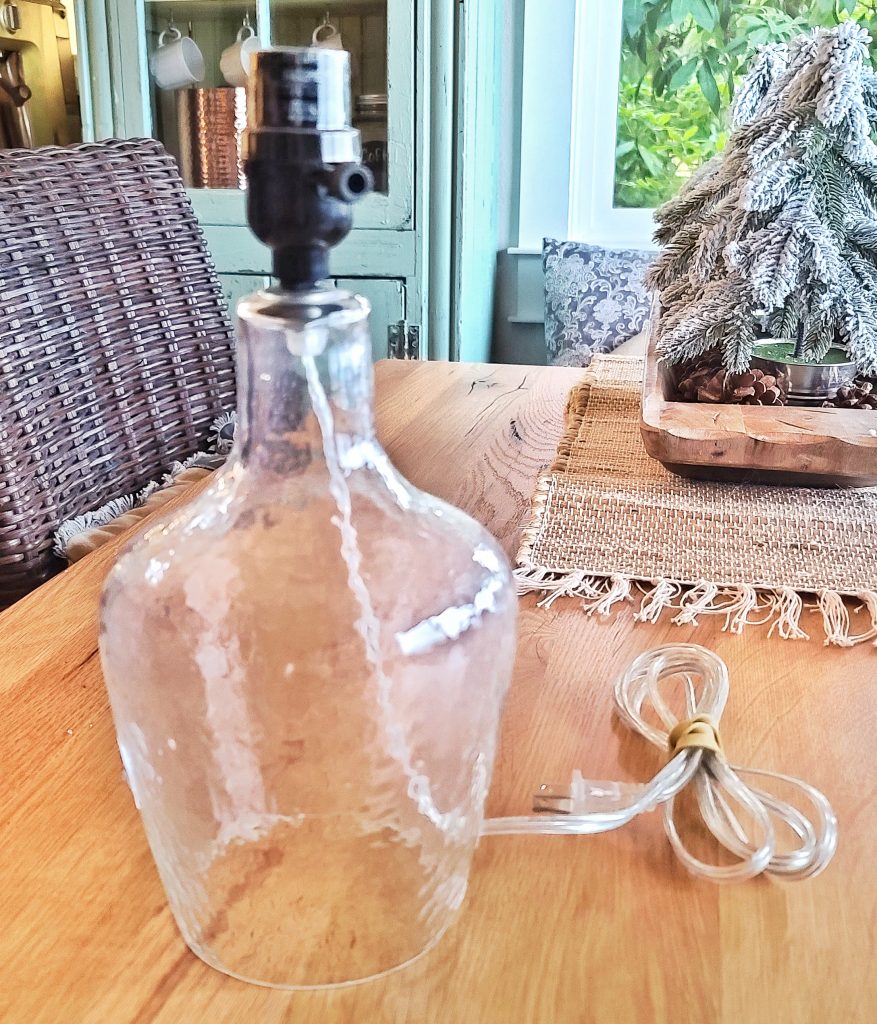
It all started when I found a glass lamp base at our Goodwill for $5.99. I’ve always wanted to try to create a mercury glass lamp base, but kept procrastinating. I now had some motivation.
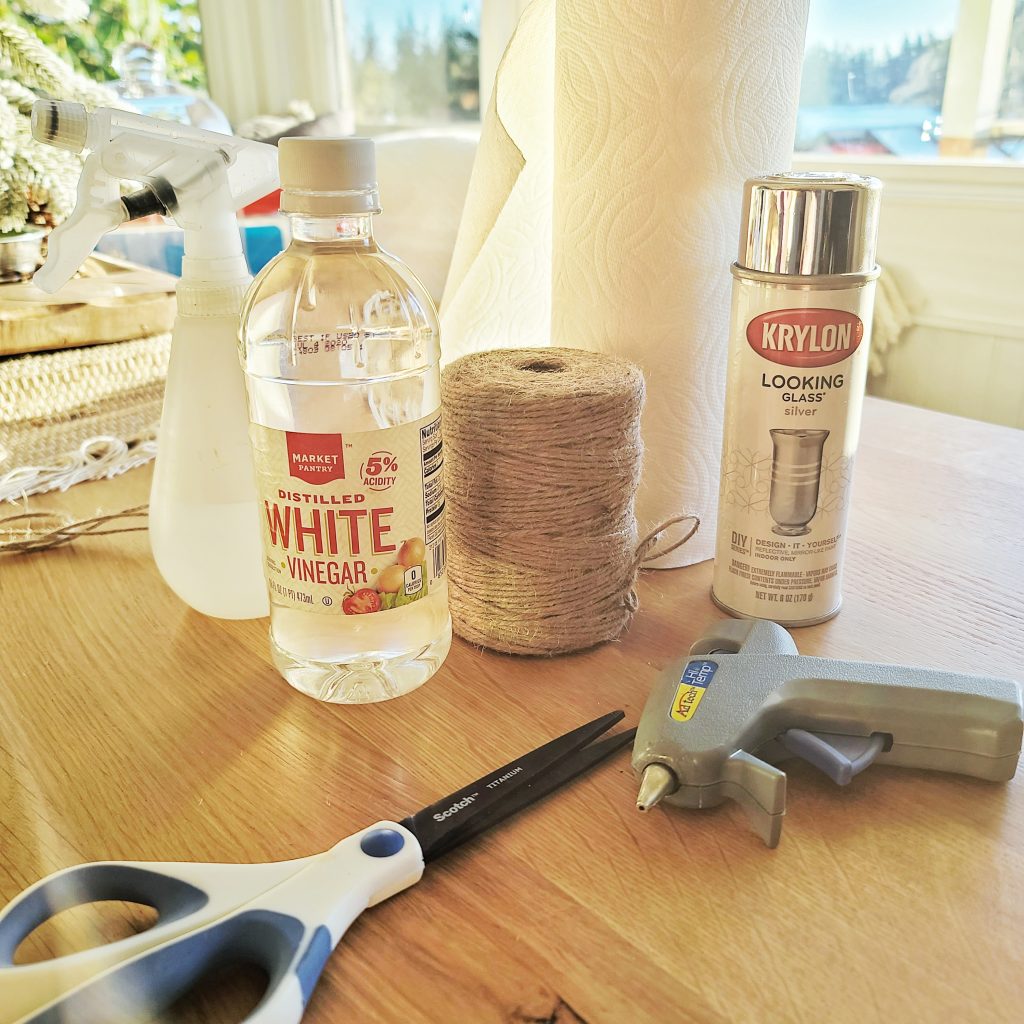
Material List
If You’re Going to Add Jute to the Lamp Base

Step-By-Step Instructions for a Mercury Glass Lamp Base
Step 1: Tape off the Lamp
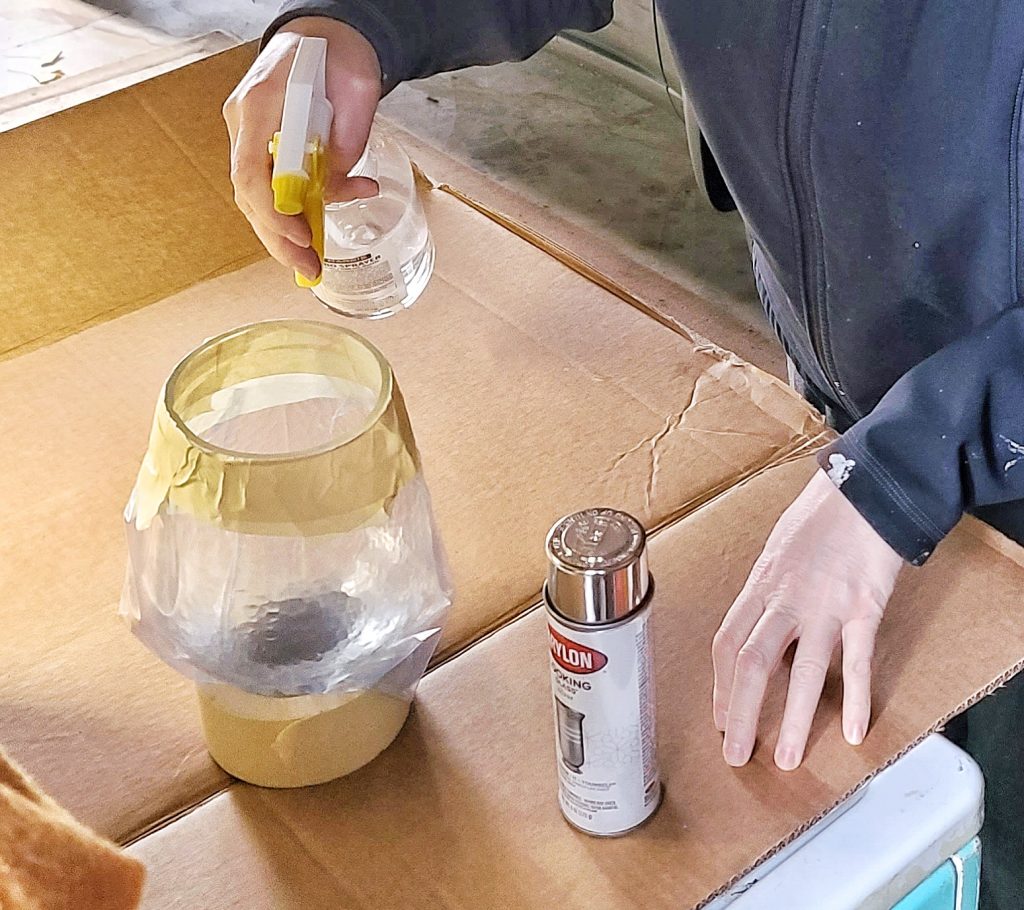
Using painter’s tape, tape off the entire outside of the glass base of the lamp. I removed the electrical cord and wires for this project to keep them from touching the wet paint inside.
After taping, poke a hole where the wires come through the top of the lamp base. This will allow the water/vinegar solution you are spraying inside, to drain.
Turn the lamp upside down and inside an old cardboard box to secure the lamp. We used a couple of masking tape rolls, which worked great.
Step 2: Create a Mixture
Mix one part water with one part vinegar in a spray bottle.
Step 3: Mist the Inside of the Lamp Base with the Mixture
Using the finest mist setting on the spray bottle, mist the inside of the glass lamp base with the 50/50 water and white vinegar solution.
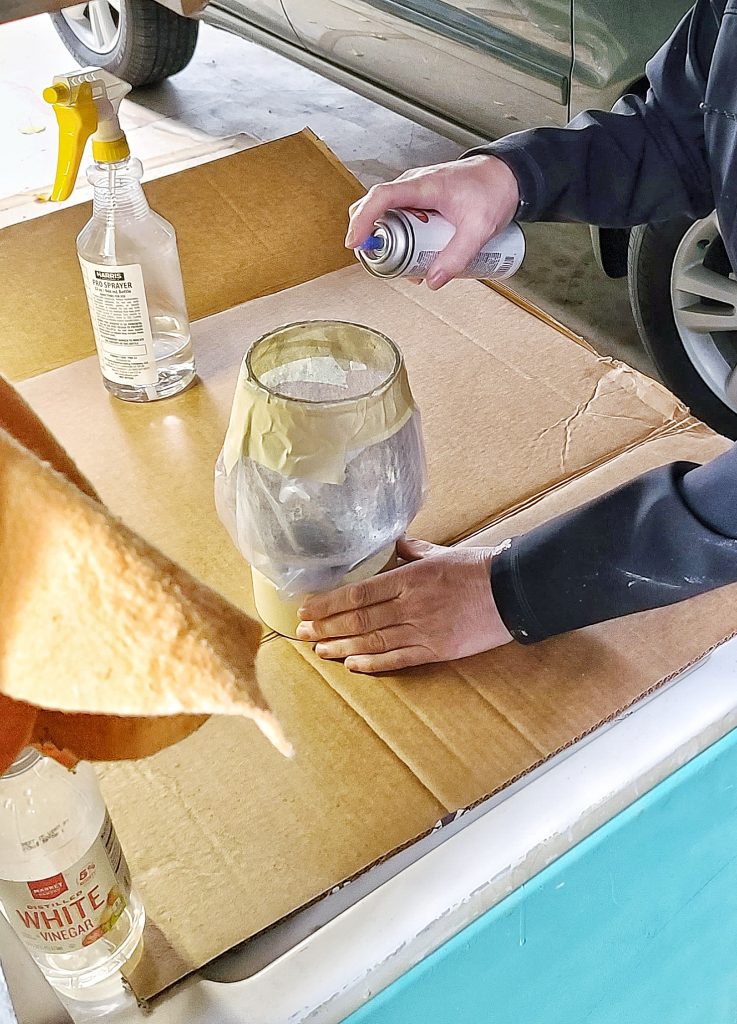
Step 4: Spray the Lamp With Spray Paint
Immediately spray the damp lamp with a light coat of Krylon Looking Glass spray paint. When using the spray paint, work outdoors or in a well-ventilated area.
Let the spray paint dry for 1 to 2 minutes, then spray again with just the water/vinegar solution and let dry for 3 to 5 more minutes.
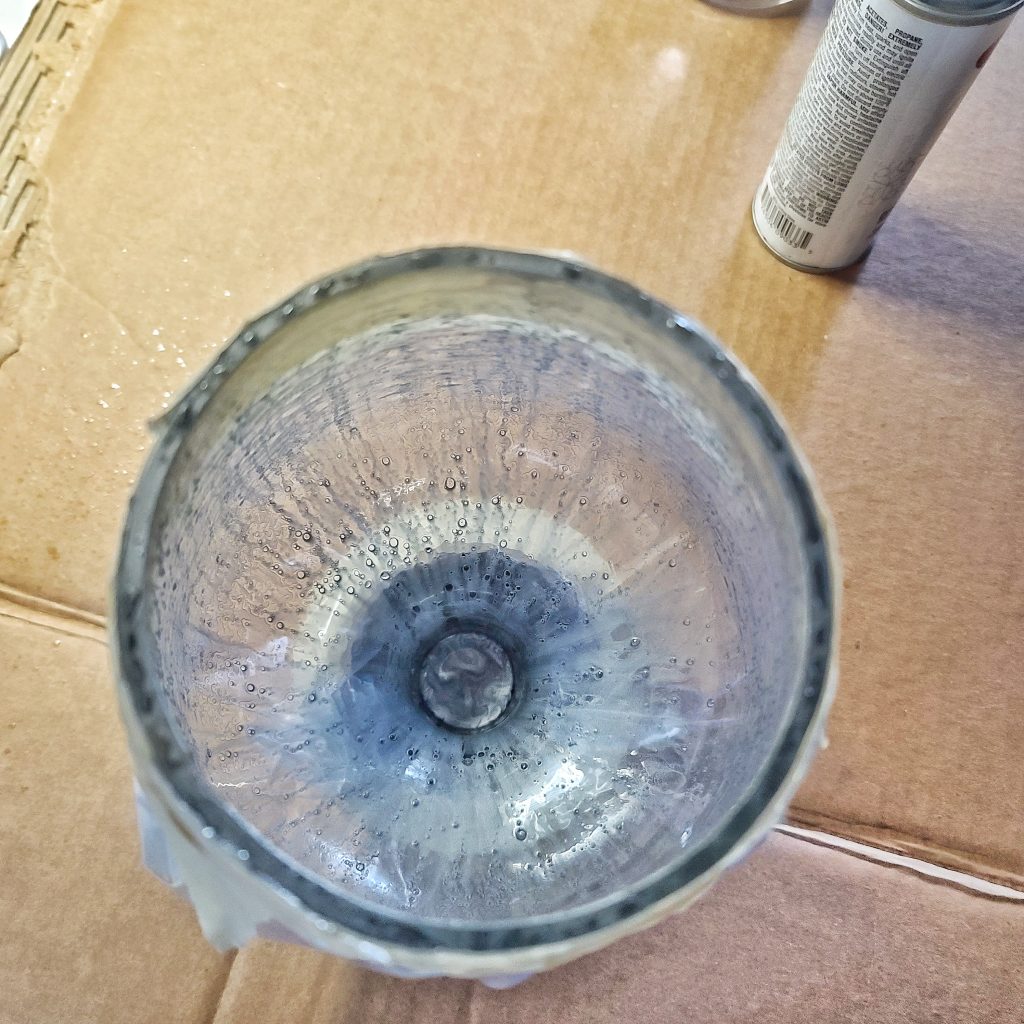
Step 5: Blot Away the Moisture
Using paper towels or a cloth, gently blot away the excess moisture on the glass, which will give the glass the mercury glass effect. It’s important not to rub.
Repeat steps 3 through 5 as many times as it takes to get the effect you are looking for. I did this a total of 3 times.
Step 6: Allow the Glass Base to Dry
Allow the glass to dry completely before removing the protective tape from the glass lamp base, and reinstalling the electrical wiring.
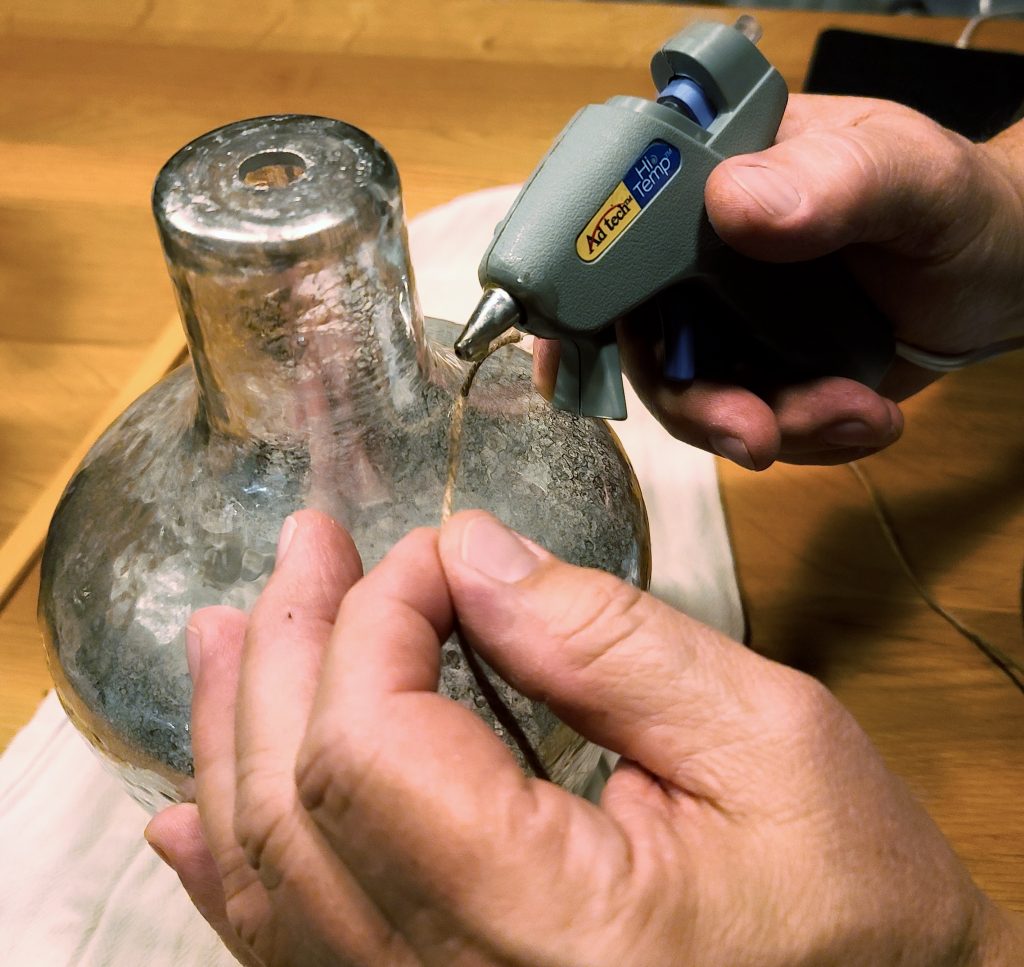
Step 7: Add a Drop of Glue to Lamp Base
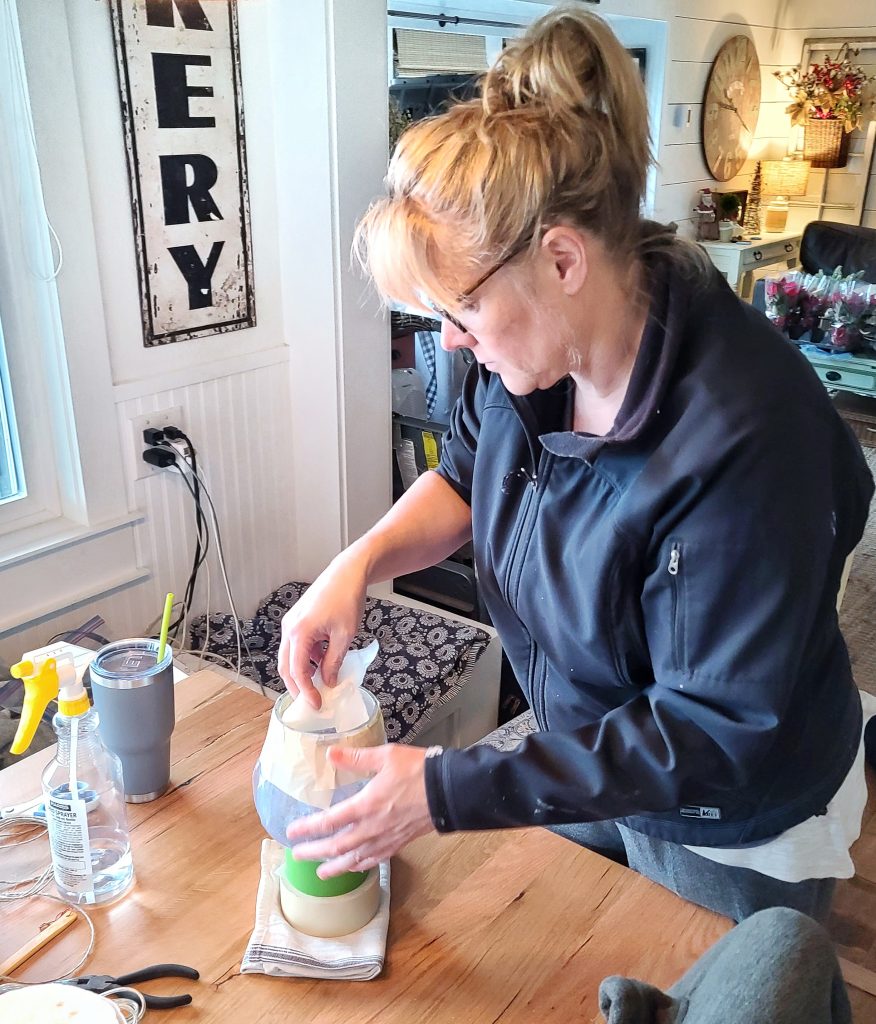
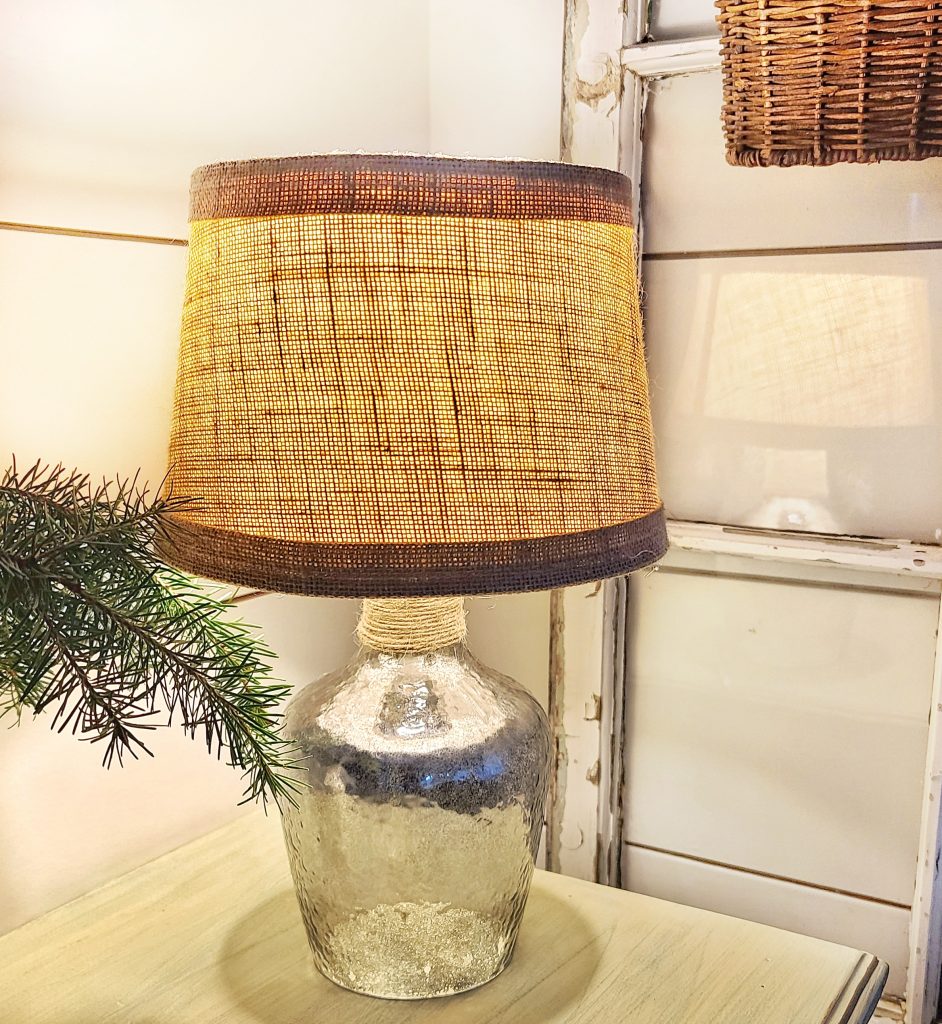
I wanted to add some warmth and texture to the lamp, so I decided to use some jute to achieve this look.
Apply a drop of glue with the glue gun to the back of the lamp, where you are going to start wrapping the jute, providing a solid anchor to hold the jute while wrapping it around the lamp.
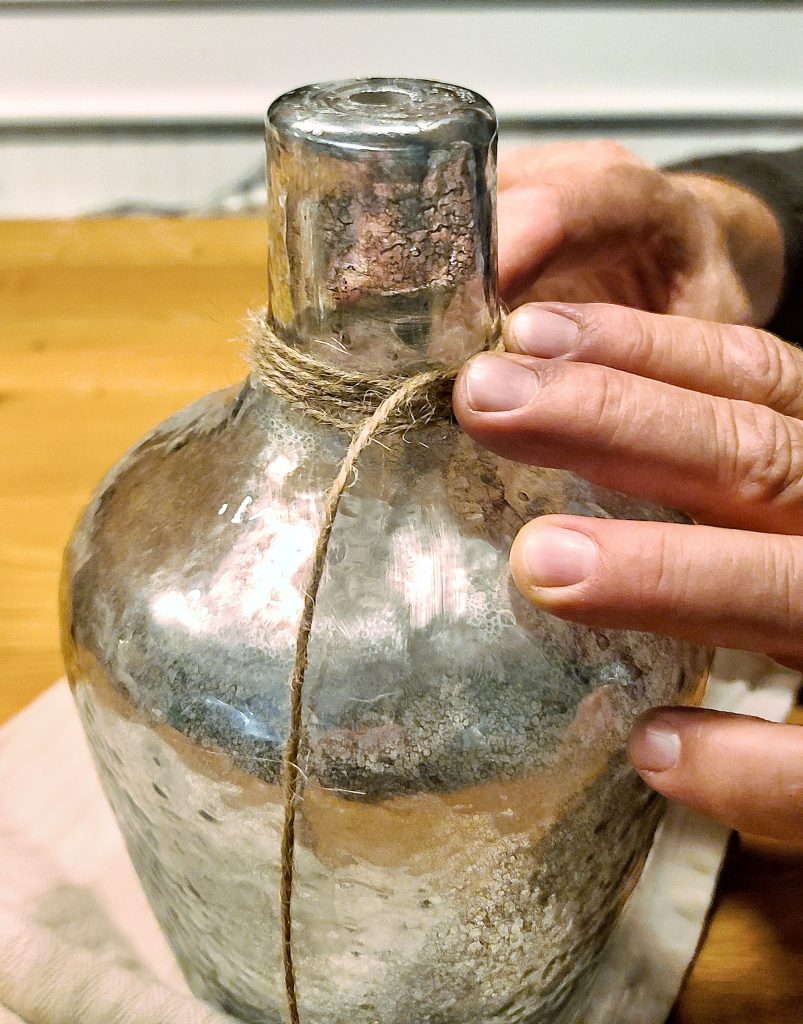
Step 8: Wrap Jute Around Lamp Base
Wrap the jute around the area of the lamp base you want to cover.
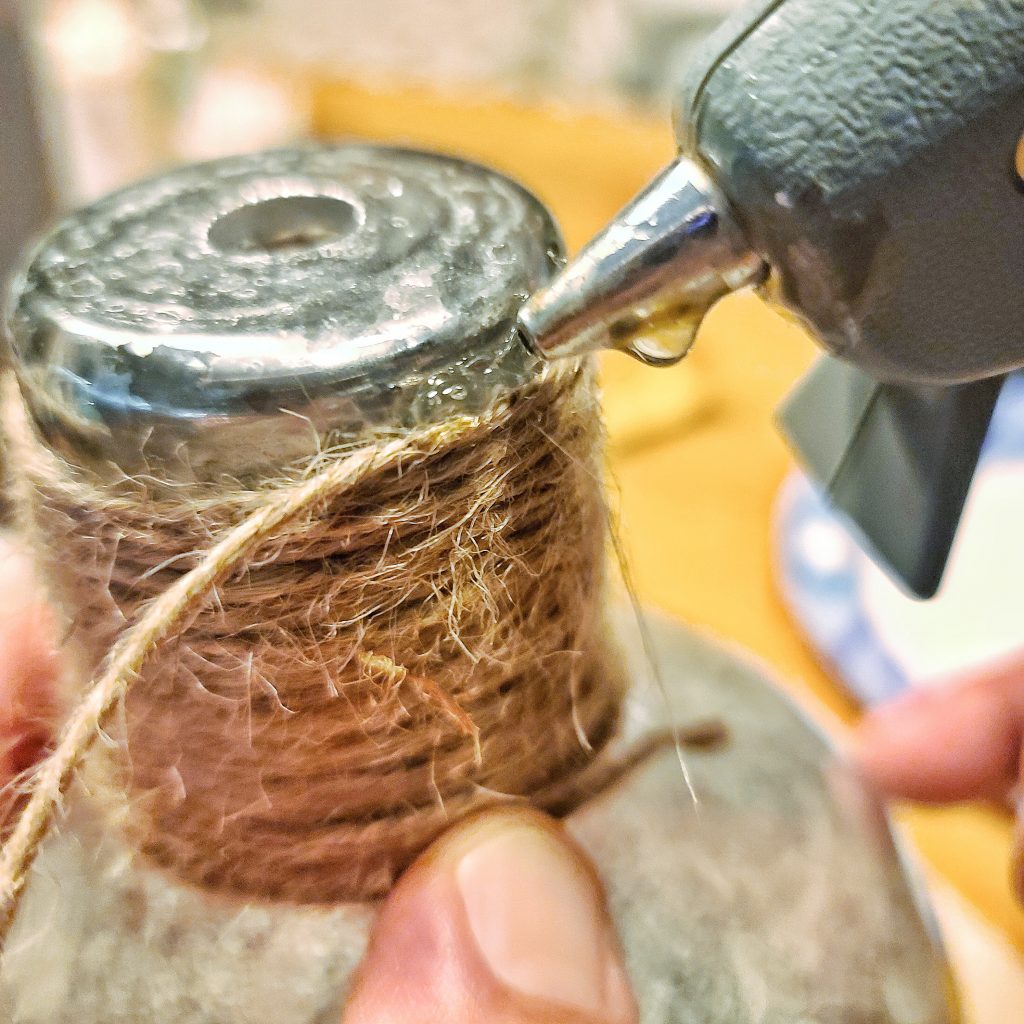
Step 9: Secure Jute to Lamp Base
Apply another drop of glue at the finishing point to end the jute wrap to secure it.

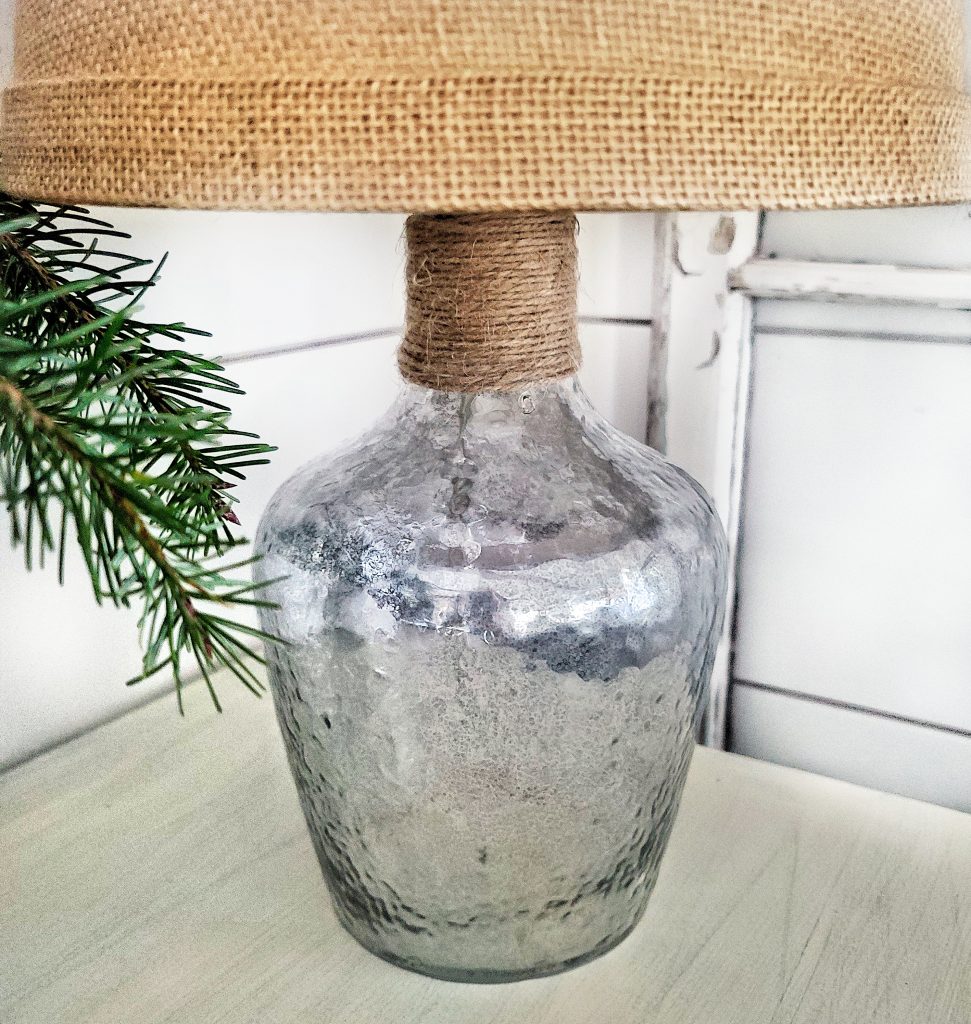
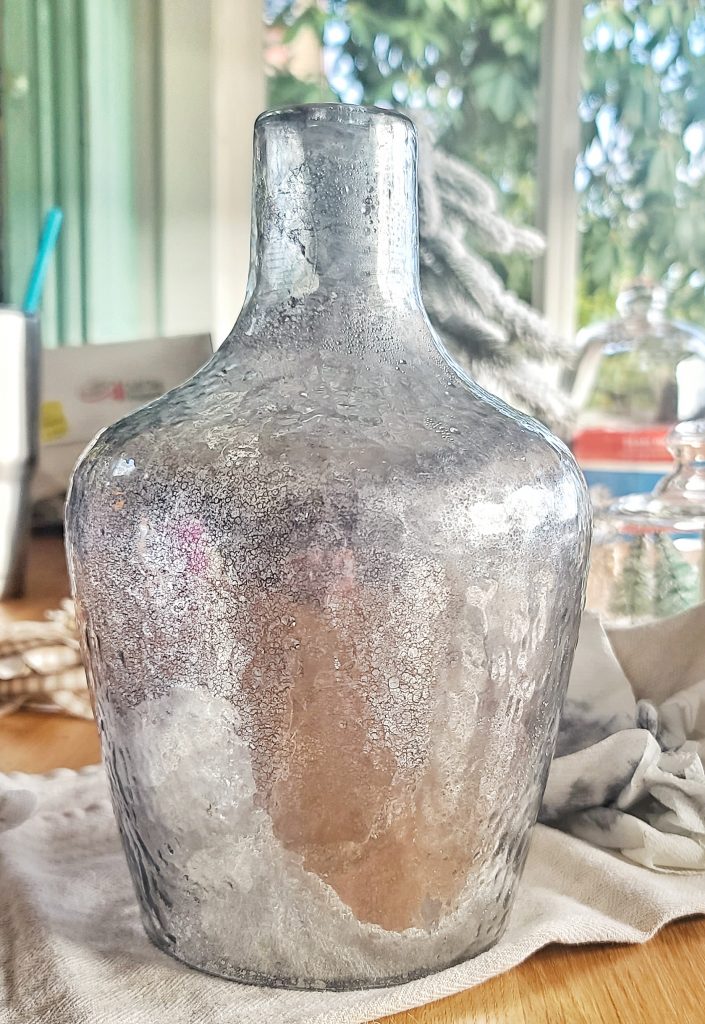
And here is the finished mercury glass lamp base with a jute twist.
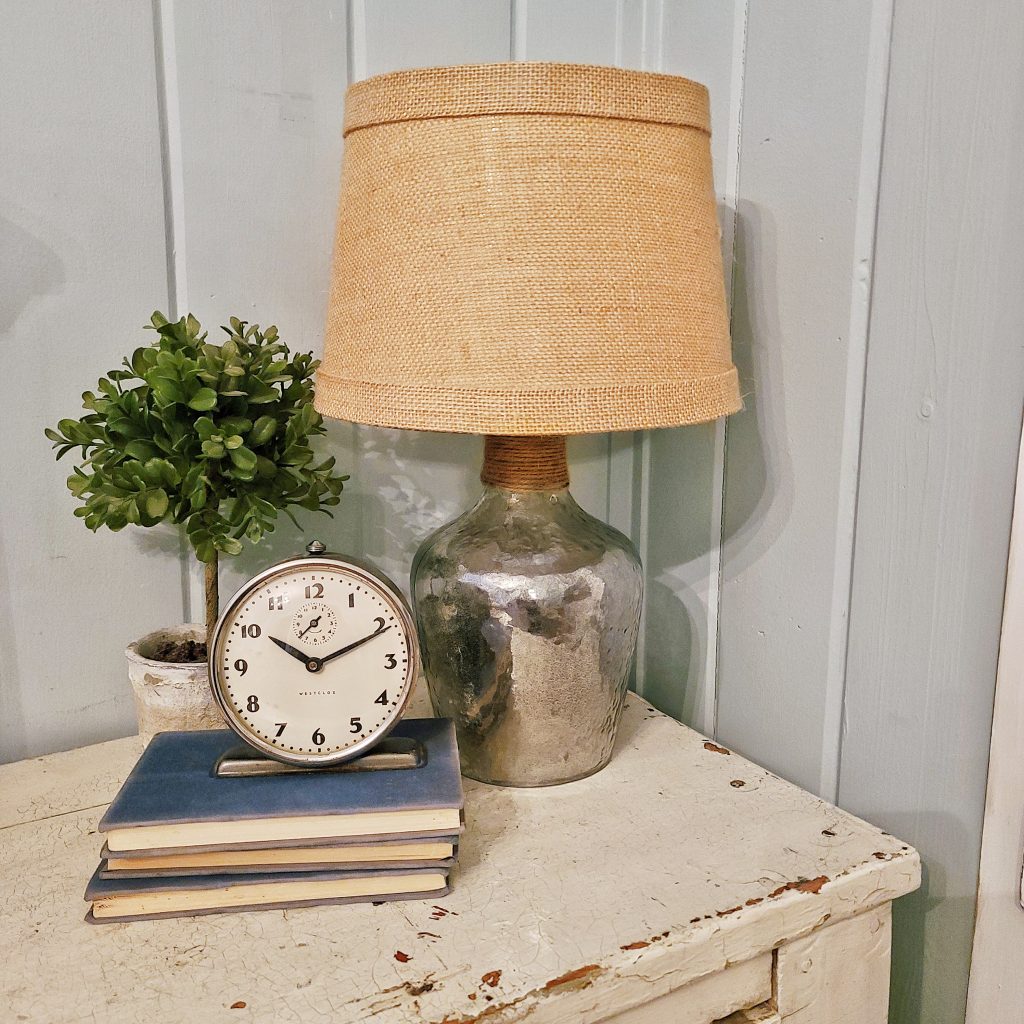
Because it was my first time using this technique, I learned a lot about how I wanted the finish to look. I will probably spray the lamp an additional time (that would make 4 coats) to get the finish just a little darker next time. But overall, I liked the way it turned out.
If you have any questions or additional suggestions, feel free to share them in the comments below. And be sure to share this blog post link with anyone who may find this project interesting.
Until next time,
Follow Me for More Inspiration
Shop my Amazon Storefront, my LTK sources, and my favorite home decor, garden, and lifestyle products. When you purchase from one of my links, I earn a small commission which helps me to continue sharing all the content you expect on my blog.
Be sure to follow me on Pinterest, Instagram, Facebook, TikTok and LIKEtoKNOW.it. Do you like gardening? Join my Facebook Gardening Tips & Tricks group.
Other Posts You May Enjoy

Grandma’s House DIY | Creating a Moody Speak Easy with Light
Chas Crazy Creations | DIY Lampshade Makeover
Life At Bella Terra | How to Clean a Crystal Chandelier
Health Home & Heart | Wireless Under Cabinet Lighting

Design Morsels | How To Paint A Chandelier
White Arrows Home | 3 Christmas Lighting Projects

The House on Silverado | Cozy Lighting Tips & Tricks
Kippi At Home | DIY Wooden Lanterns

Kim, I like how this came out! It’s stunning! I’d like to give it a shot! And I adore the lamp to which you’ve added jute!! Great instruction, and I had a great time hopping with you and your companion. Thank you for your contribution. What a wonderful project! I’m so excited you’re joining us for these hops!! Noritz Contractors
Kim, I like how this came out! It’s stunning! I’d like to give it a shot! And I adore the lamp to which you’ve added jute!! Great instruction, and I had a great time hopping with you and your companion. Thank you for your contribution. What a wonderful project! I’m so excited you’re joining us for these hops!!
I’ve been wanting to try this technique forever, so I’ve Pinned your post, hopefully I can try it out after the holidays. Your lamp is gorgeous, and love the burlap shade and the twine on the bottle neck!
Thank you Debra. I hope you try it. I was amazed by how easy it was.
Kim, I have always wanted to learn how to do this. I love mercury glass and I actually have a votive that has lost most of its mercury look. First of all, I was surprised to see the base of the lamp was open. For some reason I thought it would have a glass bottom. Your tutorial is very easy to understand too, and thanks for all the pictures. Adding the jute does provide some texture and goes well with your Shiplap and Shells theme.
Thanks for sharing and fun to be hopping with you!
Thank you Mary! It was fun to hop with you as well. Because the bottom of the lamp was open, I think the technique worked better painting the inside. But as I was writing the post, I forgot that most lamps have a closed base. I may need to rewrite the materials section. Thank you for bringing that up!
This is gorgeous! I’ve never seen this technique before, but I love it. The jute was the perfect touch, too. I think it turned out amazingly well! Thanks so much for sharing the tutorial!
That means a lot Amy, It was a really fun project to try.
This is just lovely Kim – and what a great idea! I might try this for our bedside lamps – I have an old beat up pull chain lamp on my side and my husband his his old white desk lamp from high school! Maybe it’s time for some grown up lighting! 🙂 Thanks for the inspiration and How To!
Thank you Barbara. I hope you try it! I can’t wait to see.
I LOVE how this turned out Kim! Its so beautiful! I want to try this! And I love that you added the jute!! Such a cute project! So glad you are joining us for these hops!!
Thank you Kristin. So happy it turned out, you know that DIYs are always a challenge for me, but fun to try something different. So glad to be part of this group.
I’m such a sucker for mercury glass – and I LOVE your lamp Kim. I think I need to do this too!!!! Great tutorial, and so wonderful hopping with you friend. Thanks for sharing.
I can’t believe you haven’t done something like this yet Chas. I thought you have done it all! You know you are my DIY hero.
This looks like real mercury glass. It turned out so pretty and i like the twine at the top, it’s a nice accent. Great step by step tutorial. So happy to hop with you today.
Thank you so much Andrea. It was so fun trying this. So happy to be hopping with you all, I had so much fun!
Your lamp turned out beautiful! I used this same technique on a lamp over the summer, and while I like it, it didn’t turn out as well as yours. Plus the jute accent and the shade finish it off perfectly!
Thanks for “hopping” with me!
-Niky @ The House on Silverado
Thank you so much Niky! I was shocked that I pulled it off. Very happy though. So fun to be hopping with you.