
How to Add the Perfect Lighting to Your Garden for the Holidays

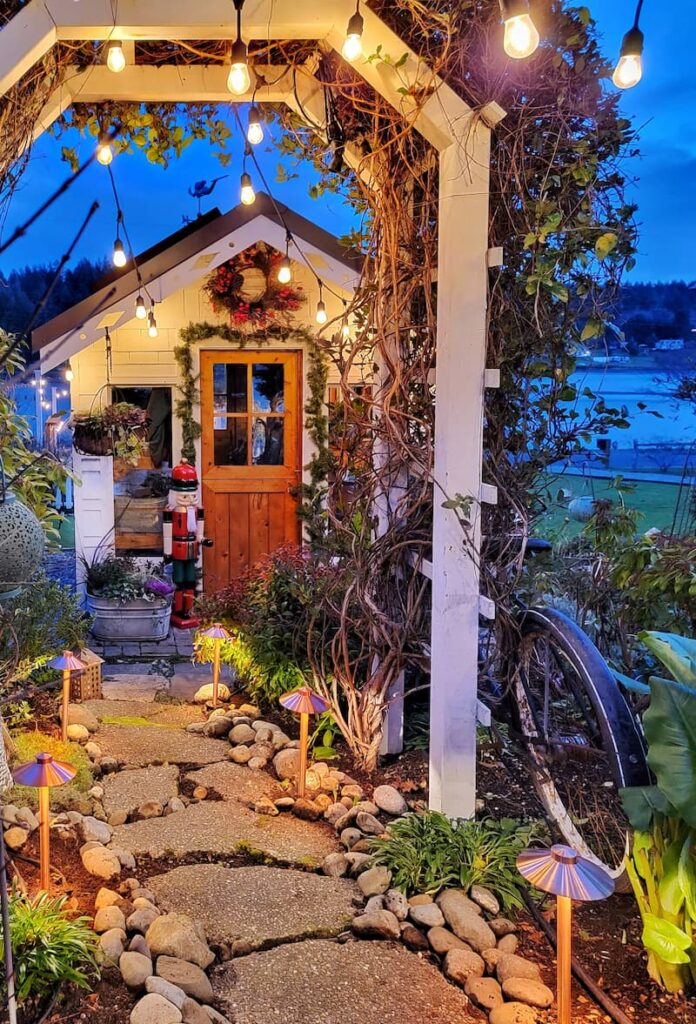
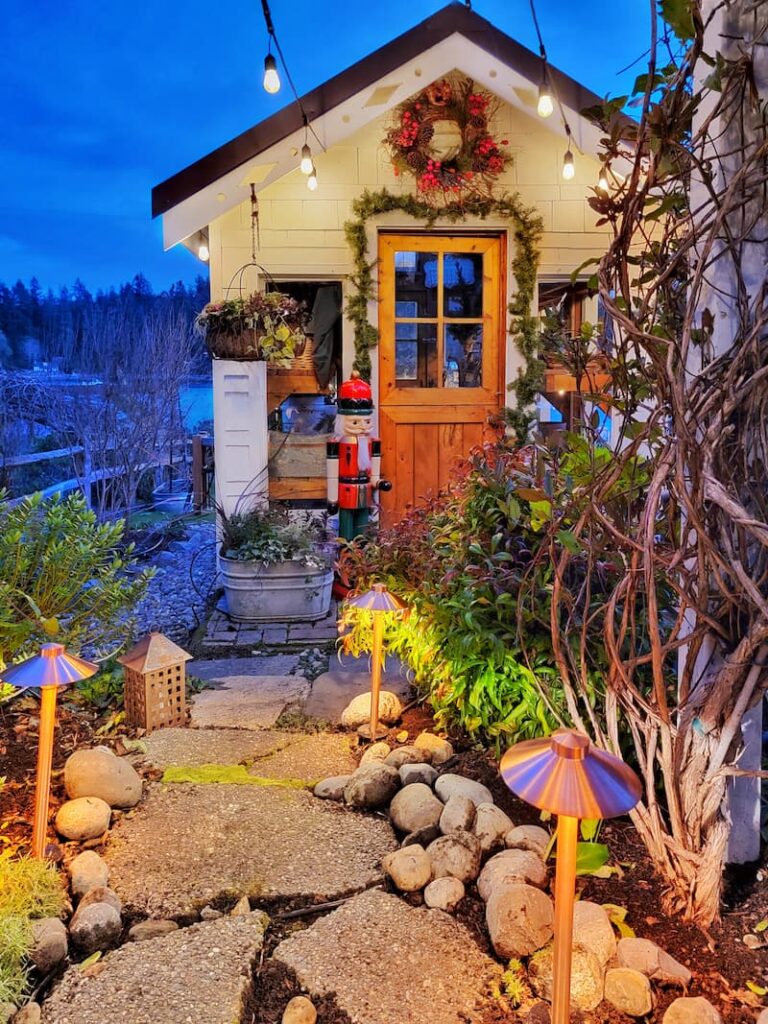
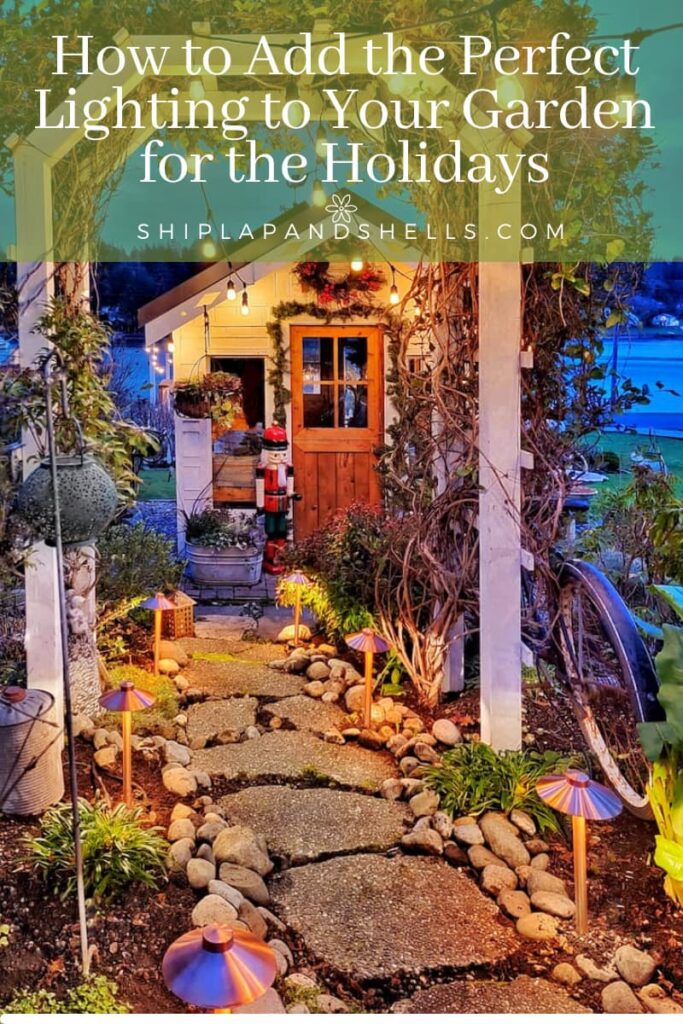
Do you have areas in your garden that would benefit from additional lighting? I’ve found the perfect copper lights to install along one of my garden pathways that will not only add light to this dark outdoor space for safety but will create interest and beauty in my greenhouse garden area for the holidays.

Today I’ll be sharing my new outdoor garden lighting from AQ Lighting and how easy it is to install.
Lighting the Garden Pathway For the Holidays
Our garden area next to the greenhouse is so charming during the day. But once the sun goes down there’s literally nothing left to see.
I’ve always wanted to have my garden lit up at night, especially along the path leading to the greenhouse, under the arbor. It seemed like such a waste to hide all that beauty during the evening hours.
But the whole idea of installing outdoor lights seemed both intimidating and tedious to me. I just never took the time to research the outdoor garden and landscaping lighting that was available.
The post is sponsored by AQ Lighting but all thoughts and opinions are my own.
As an Amazon affiliate, I earn from qualifying purchases at no extra cost to you. My blog contains other affiliate links as well for your convenience. Click here to read my privacy policy.
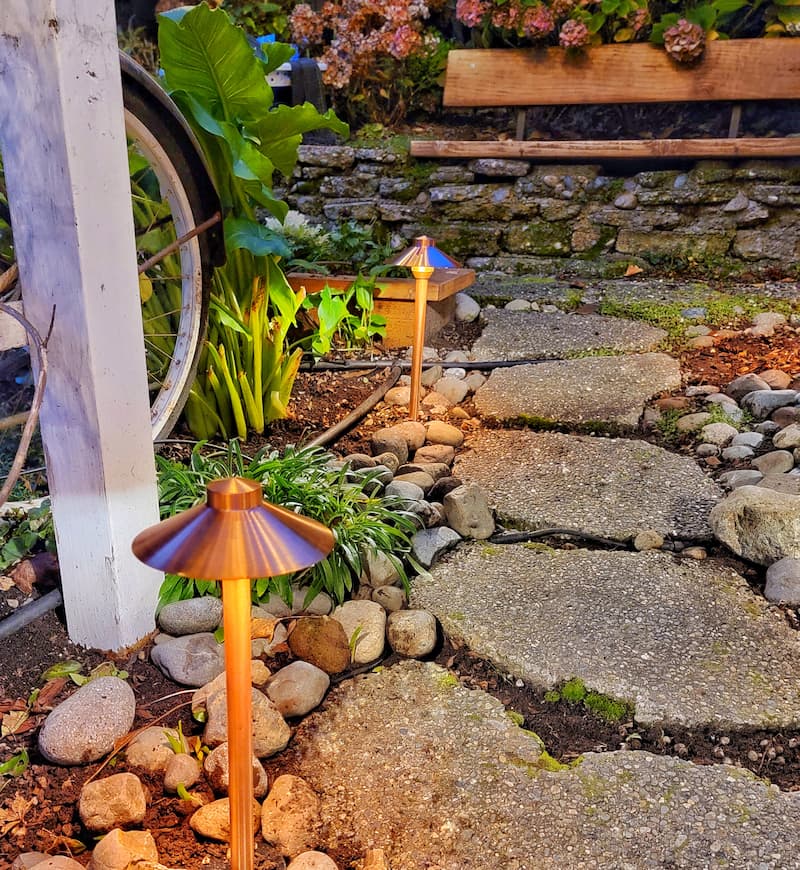
And then I saw Rachel at The Ponds Farmhouse‘s blog post about how easy it was to install her AQ Lighting outdoor area pathway lights and how beautiful they were.
Rachel’s copper lights had even started aging after just a few months and had a gorgeous patina.
I knew I needed to have them! Especially in time for the holidays.
I’ll be sharing Rachel’s newest blog post at the end where she has added even more outdoor lighting to her landscape for the holidays.
What I’ll Be Covering in This Post
- What makes this lighting so amazing
- More about the AQ garden lighting kit
- The steps I took to install the AQ lighting
- How my garden path was tranformed
What Makes This Landscape Lighting From AQ Lighting So Amazing
I have fallen in love with this landscape lighting from AQ Lighting.
- It’s so easy to install. Trust me…if I can do it, anyone can do it!
- You can add more lights to your original system as your budget allows.
- The LED copper lights easily plug into each other and come with a transformer that plugs into a standard electrical outlet.
- The timer makes it even easier for the lights to come on exactly when you want them to.
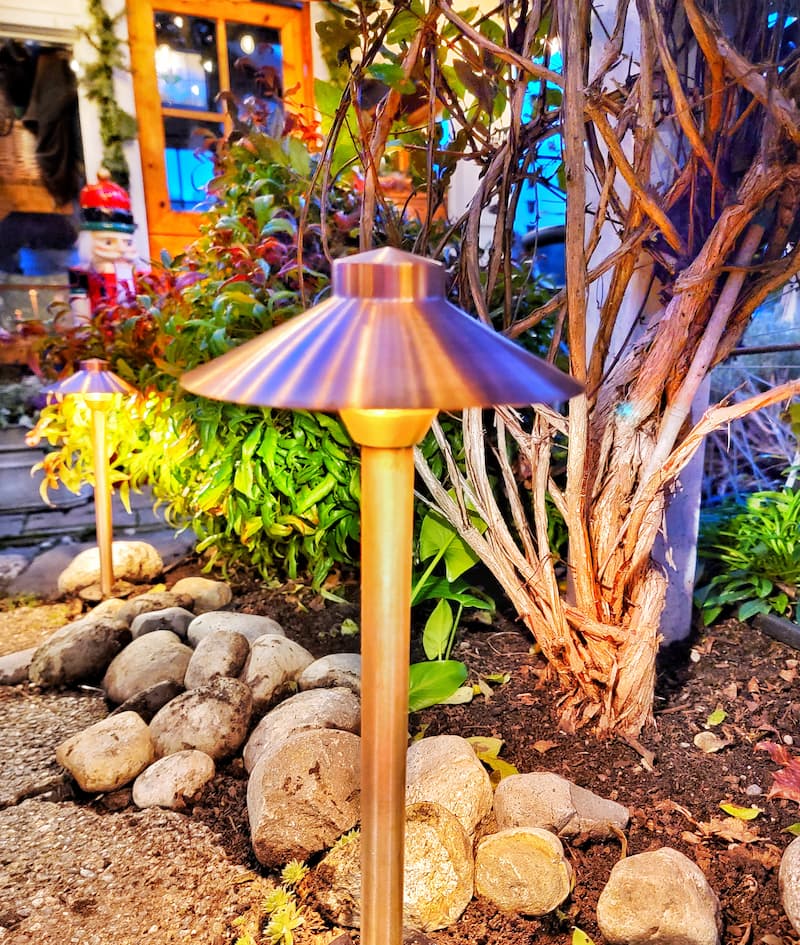
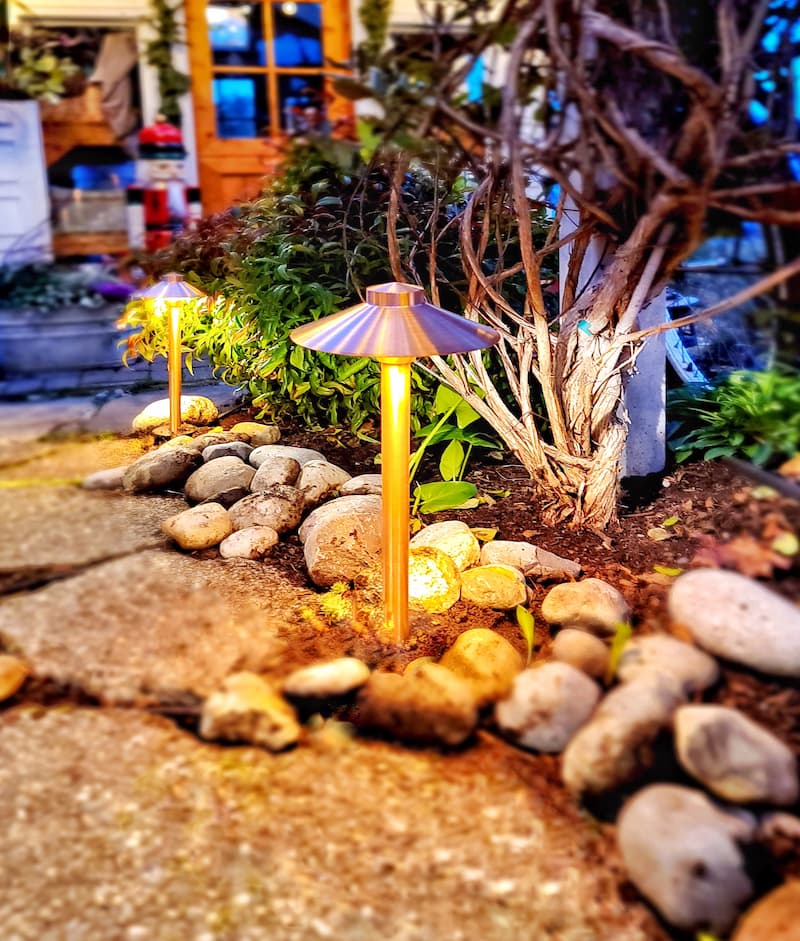
- The light fixtures are high-quality made to last copper that will resist the effects of rust or corrosion. That’s especially important for our garden because it’s so close to the saltwater. They are designed to withstand all weathers and the process of time.
- The raw copper will naturally patina over time, taking on darker and more natural brown and green tones.
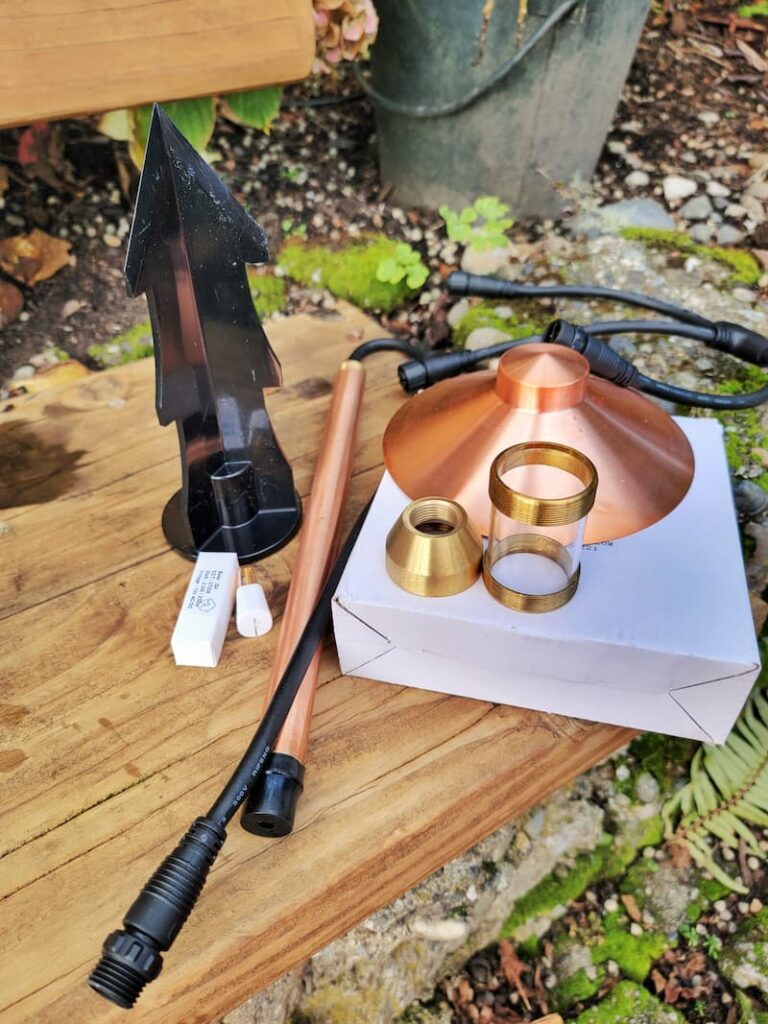
The Lighting Kit Included Everything I Needed
My lighting kit came with…
- 6 light fixtures – each with a copper finish, 11′ stem and canopy style shade.
- 12V 2w Warm White or Cool White LED JC Bi-Pin Cluster; LED bulb typically lasts up to 25,000 hours. the chip on board LED diode is encased in acrylic to protect the diode from moisture
- Mounting stakes
- Outdoor rated transformer
- Direct burial cable
- Retro adapters
What You Will Need
In addition to the supplies in the lighting kit, you will need the following…
- Rubber mallet
- Block of wood
*Note: I didn’t need this, but you may need a drill with a large bit to install the lighting if you have a lot of roots to help loosen the soil to drive the stakes in the ground.
Steps to Installing the AQ Lighting in Your Garden
Some simple assembly is required for the lights, however, it’s an easy process.
Once I set the lights in the location I wanted, it was just a matter of plugging them together and burying the cords under the mulch and rocks.
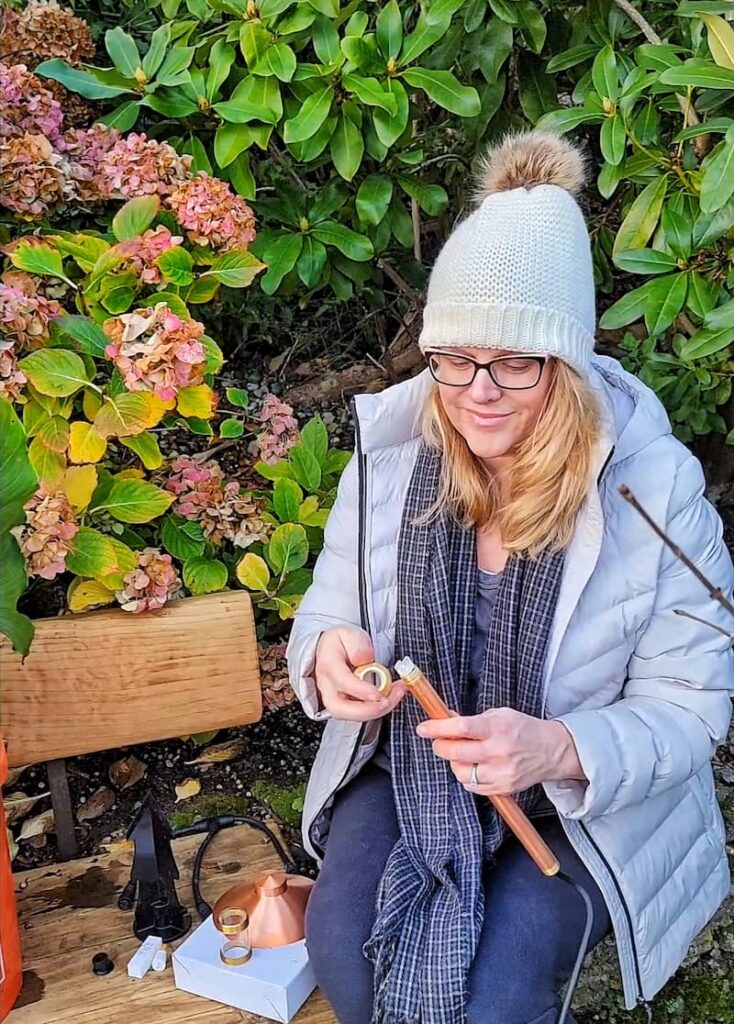
I first assembled the 6 LED copper finished light fixtures and canopy style shade. Then I added the LED bulb and twisted the stem to the fixture.

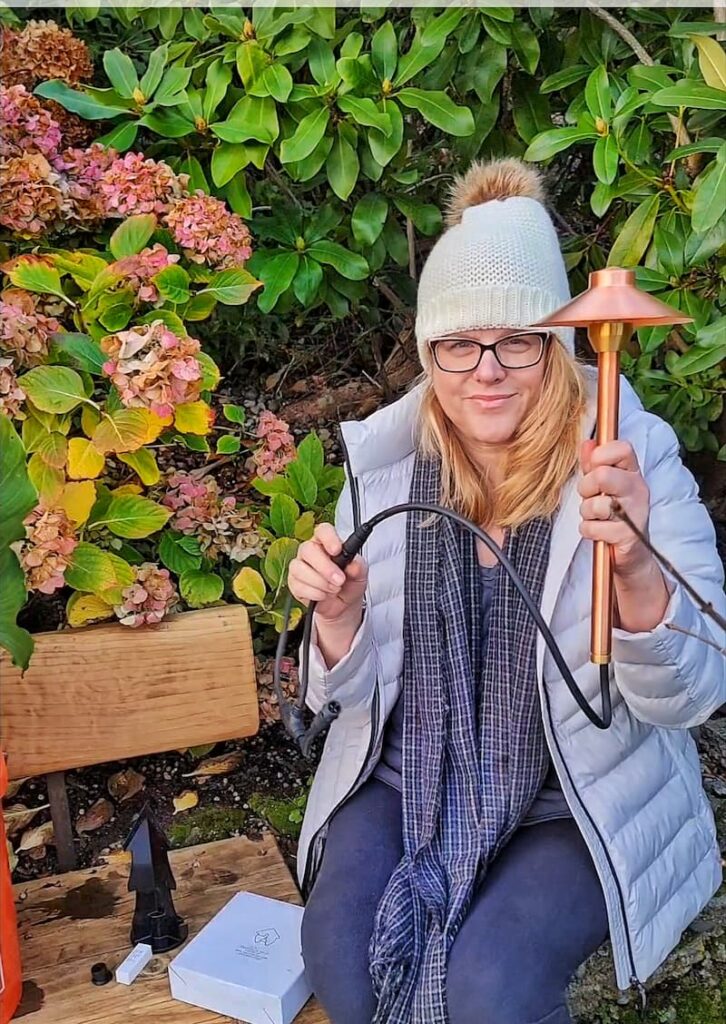
Next, I set the lights on the ground where I wanted them placed.
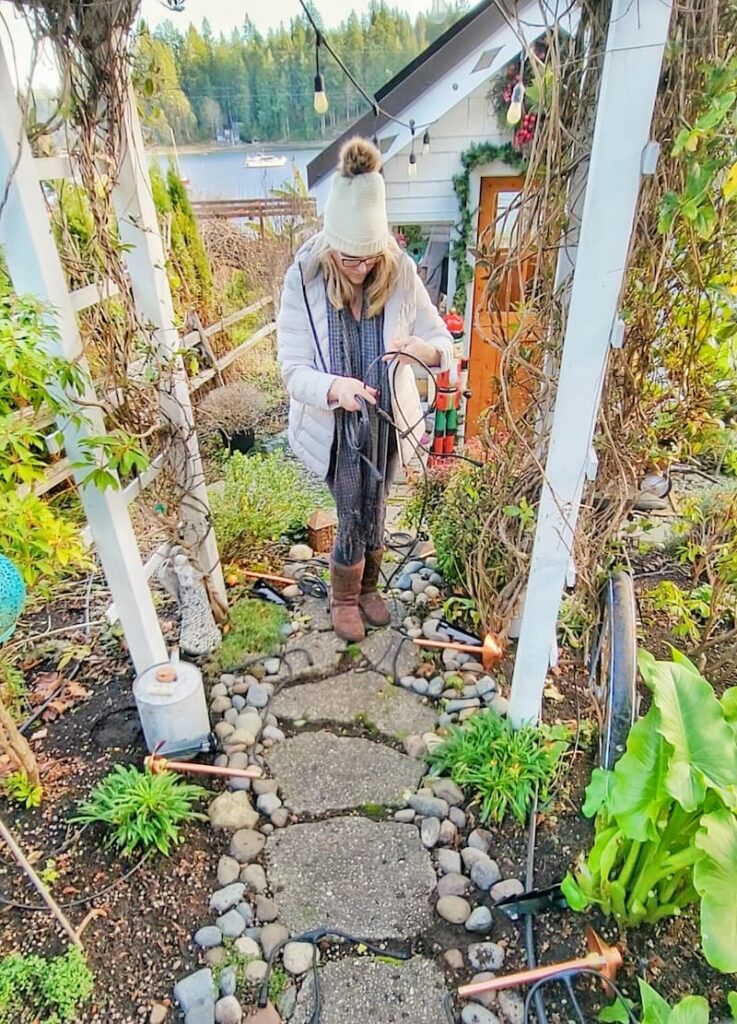
Attaching the cables to each light ensured I would have the appropriate cable length and know where to add each stake.
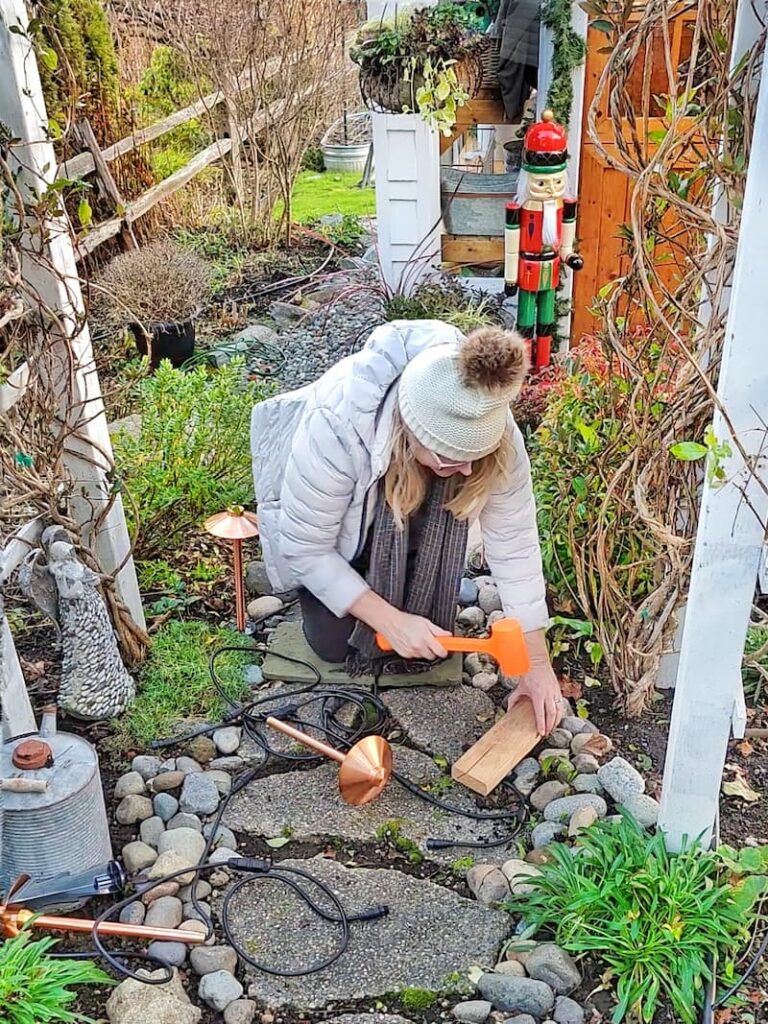
Then I drove stakes into the ground using a block of wood and a rubber mallet (you may need to use a drill to loosen the soil). You should leave the stake about a 1/2″ above the ground to attach the light.
I screwed the base of the landscape light into the top of the stake.
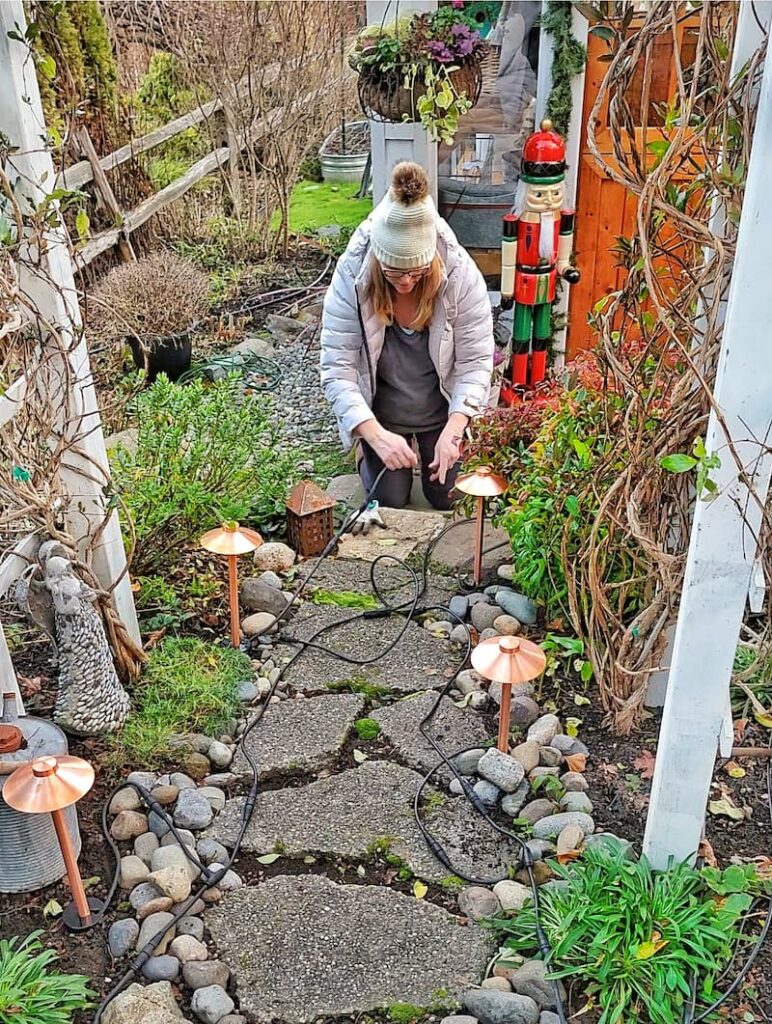
Each light plugs into the other and the kit comes with a transformer that plugs into a standard electrical outlet.
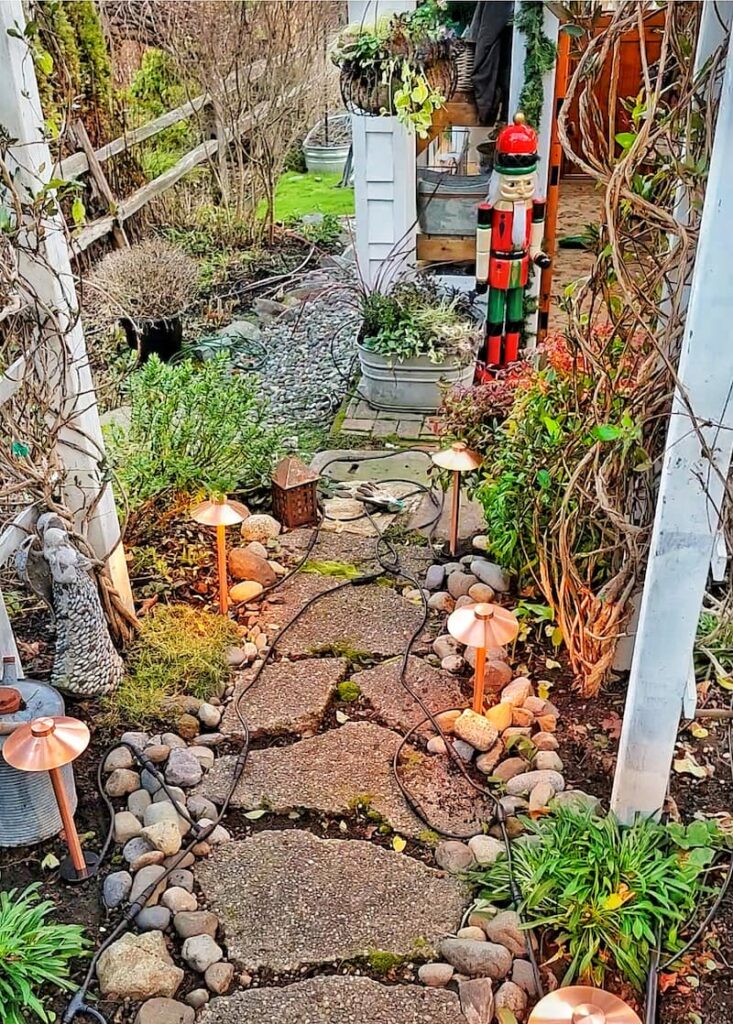
Be sure the lights are level and cover the base and cables with mulch. There were plenty of rocks around the pathway so I used them as well.
It’s hard for me to believe how easy this lighting project was. I was able to install the lights myself and it only took about an hour and a half to install the 6 pathway lights, including the assembly time.
Another great thing about AQ lighting systems is that you can start out with just a few lights for your garden or landscape, and add more lighting once your budget allows without having to start the entire process over.
Creating a Magical Evening Garden With Lighting For the Holidays
The transformer includes a timer for turning the lights on and off. Our timer is set for the lights to come on at dusk and stay on for 4-5 hours depending on the season.
The timer is also adjustable so when we have a time change or we are entertaining guests, we have the option of readjusting the time the lights will be on.
The LED lights give a warm glow to our favorite garden path and create the most beautiful ambiance.
Rachel and The Ponds Farmhouse
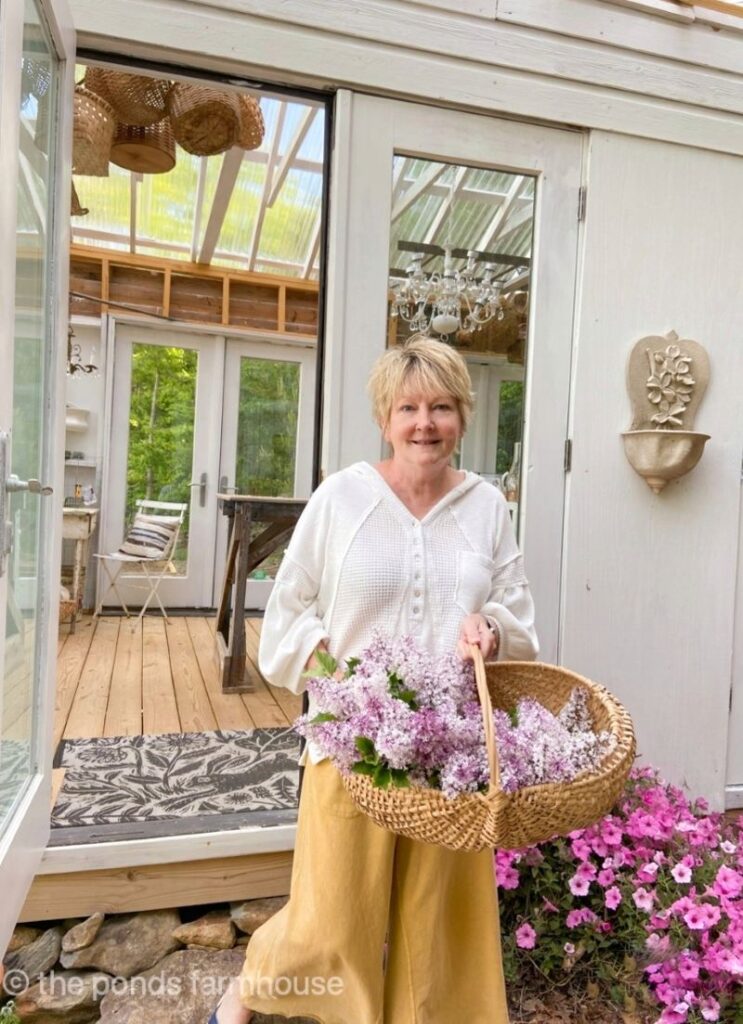
Before I share Rachel’s newest outdoor lighting project, I wanted to share a bit more about my friend.
She is one of those creative and talented bloggers that does just about everything. Whether she’s sharing a new DIY project, thrifting for vintage and antiques, decorating her home, sharing the latest in her greenhouse, creating a new tablescape, or sharing a recipe, you can always learn so much and get so much inspiration from Rachel’s blog.
Check out her blog, The Ponds Farmhouse HERE.
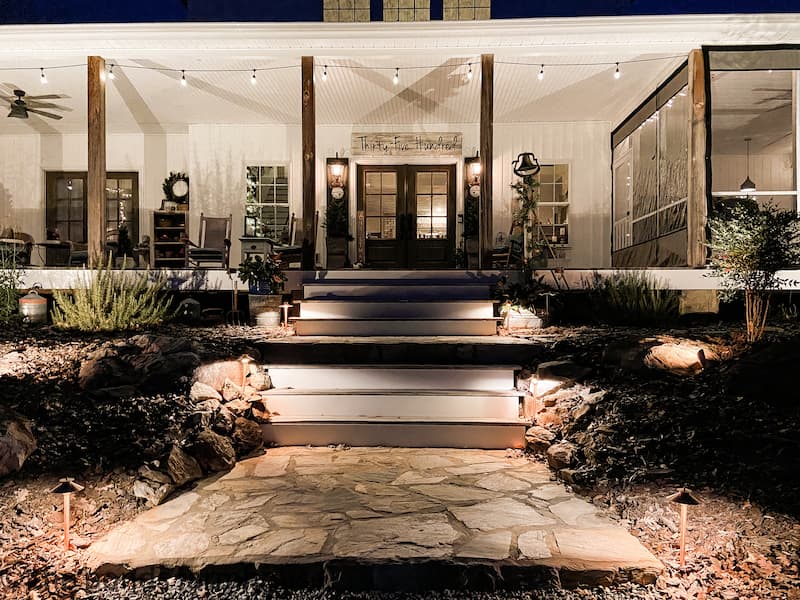
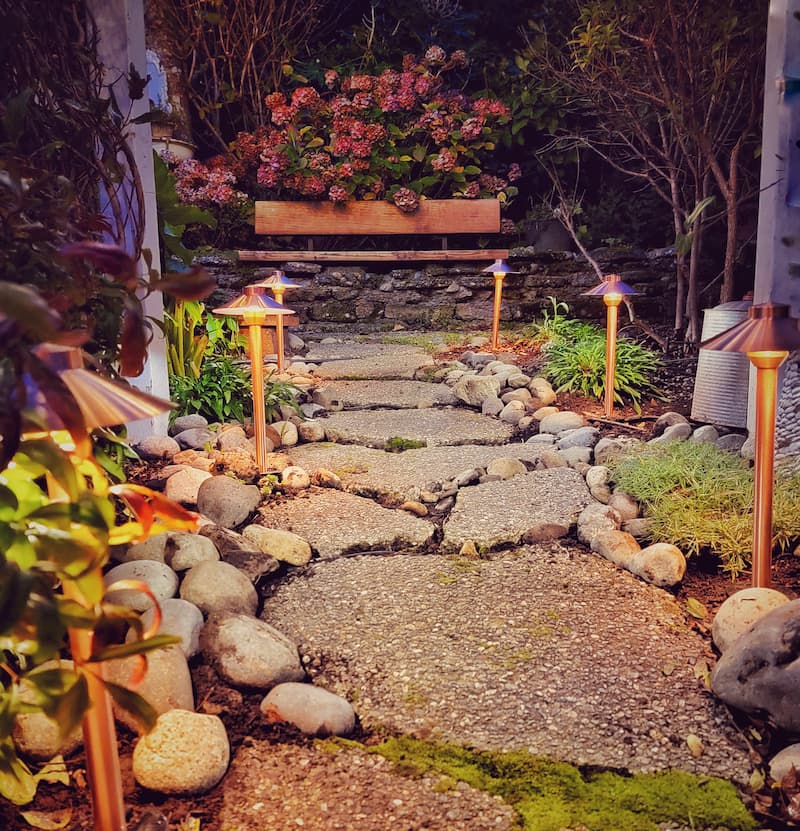
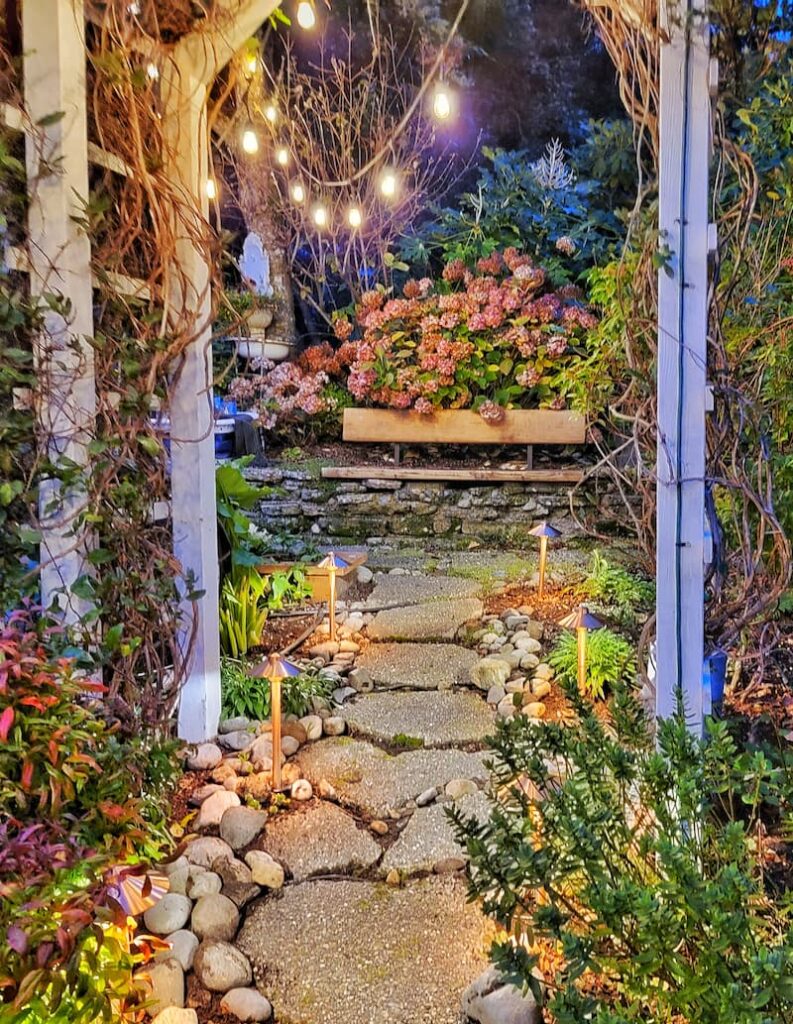
And here’s Rachel’s newest AQ Lighting blog post about adding lighting for the holidays and beyond.
Rachel and I have different styles and used our lights in different ways, but both are just as beautiful. Don’t you just love how one style of outdoor light fixture can look great no matter what the landscape style?

A Special Thank You
As a special thank you to our readers, AQ Lighting is offering a 10% discount code HOLIDAY10 which is good until 12/25/2021 on ANY of their lighting.
I hope you can see why I love this AQ lighting so much and I was able to convey just how easy it was to install this low-voltage landscape lighting in your garden.
Please leave any questions in the comments below or contact AQ Lighting for more information.
Until next time,
PIN AND SAVE ON PINTEREST
If you’ve enjoyed this blog post, please pin and share this on Pinterest.
Let’s Connect on Social Media
- Follow me @shiplapandshells on Pinterest, Instagram and Facebook
- Join my Facebook Gardening Tips & Tricks Group.
Kim I really like these lights and that they form a patina. I may get some for our new stone steps heading down to the fire pit. So cute
And they’re even cuter after a week Ann!
Kim.
I love how your lights look in your garden. I’m so glad we were both able to add to our exterior lights for the holidays.
I love how great they look in both our outdoor spaces Rachel.