
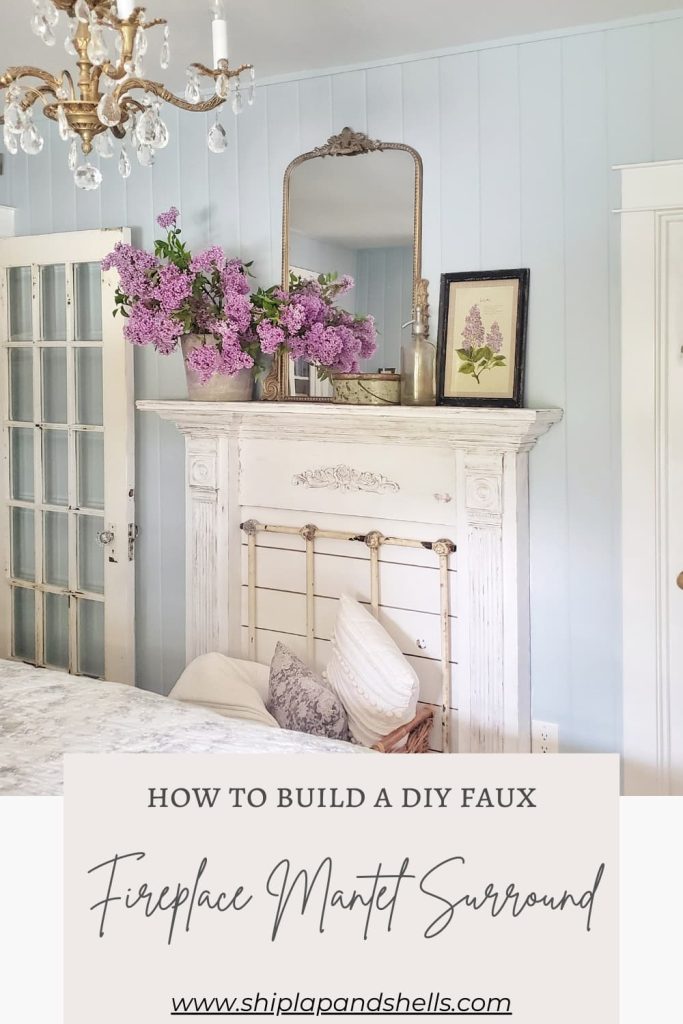
How To Build a Charming DIY Faux Fireplace Mantel Surround

Want to bring some cozy vibes into your space without the hassle of a real fireplace? Creating a faux fireplace mantel surround is a great way to add warmth and character to any room. This weekend DIY project can transform an ordinary space into a great focal point with the charm and coziness of a traditional fireplace.
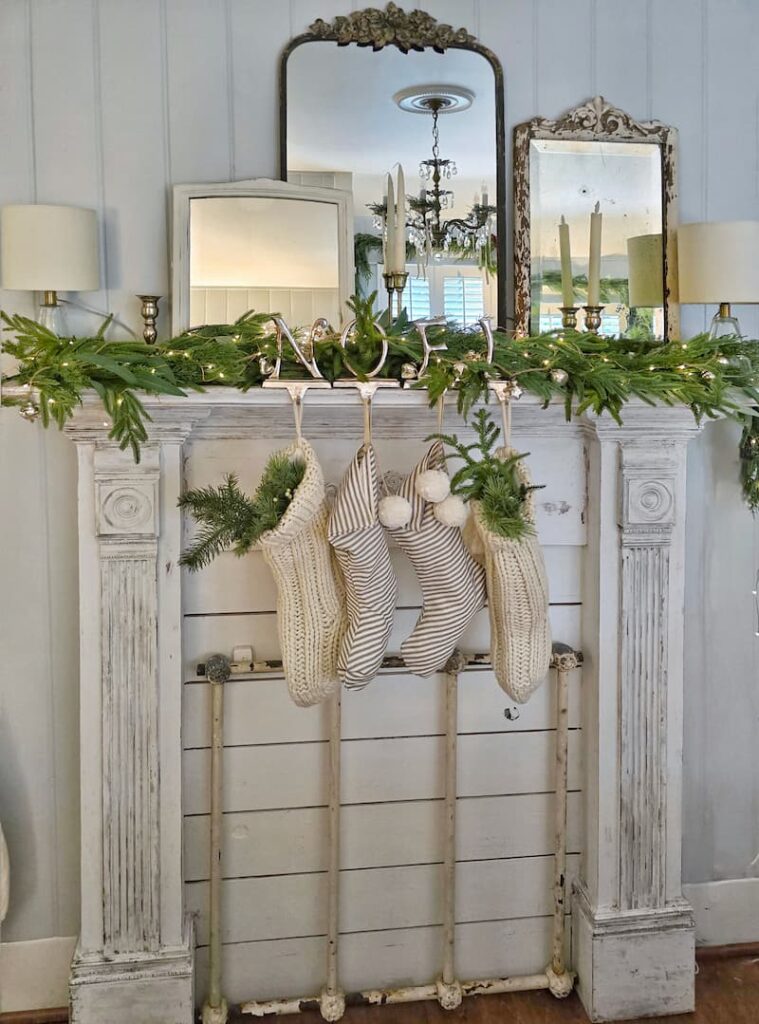
Picture a gorgeous mantel that becomes the heart of your room, perfect for hanging stockings during the holidays or displaying your favorite decor year-round. The best part? You can totally build it yourself!
In this post, I’ll break down everything you need to know, from the basic supplies to the step-by-step process. Don’t worry if you’ve never tackled anything like this before. Whether you’re a DIY pro or still figuring out which end of the hammer to use, I’ve got your back.
By the end of this guide, you’ll be ready to create a stunning focal point that’ll have your friends asking, “Wait, that’s not a real fireplace?”
As an Amazon affiliate, I earn a commission from qualifying purchases at no additional cost to you. My blog also features other affiliate links for your convenience. Click here to read my privacy policy.
Why We Decided to Create Our Own Faux Mantel
Let me tell you about my fireplace obsession. Like many of you, I’ve always been drawn to that magical way a fireplace can make any room feel like home. So when we bought our house and discovered it didn’t have one, I was a bit heartbroken but also inspired.
But that wasn’t going to stop me. I wanted to have the look of a real fireplace in our home, but the living room was just too small to build a faux option.
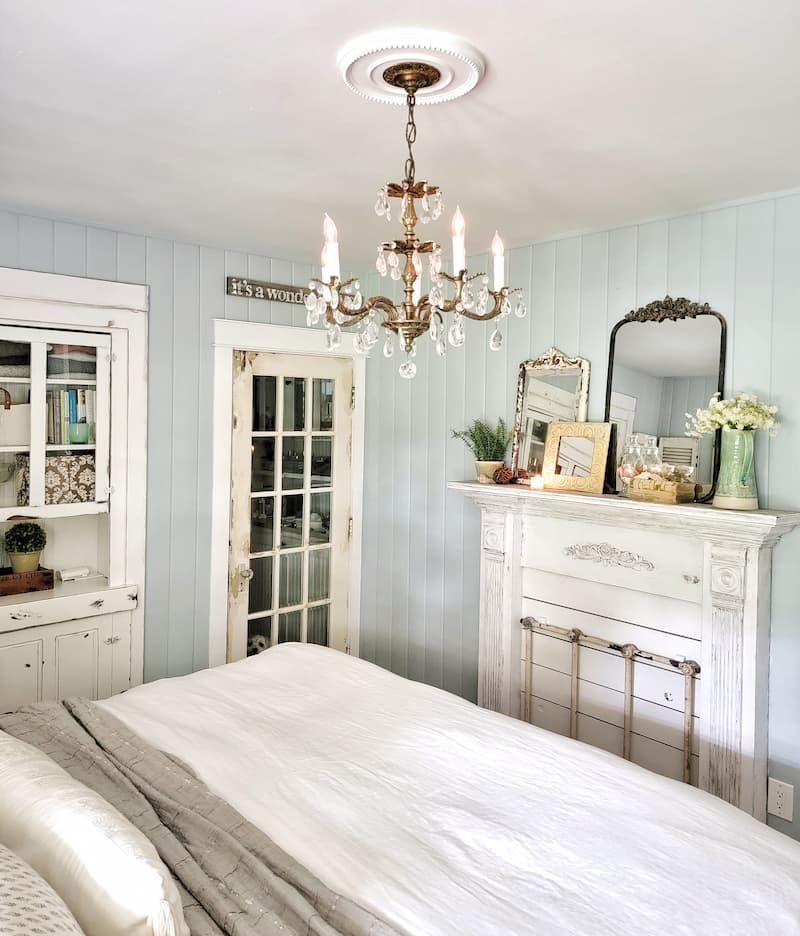
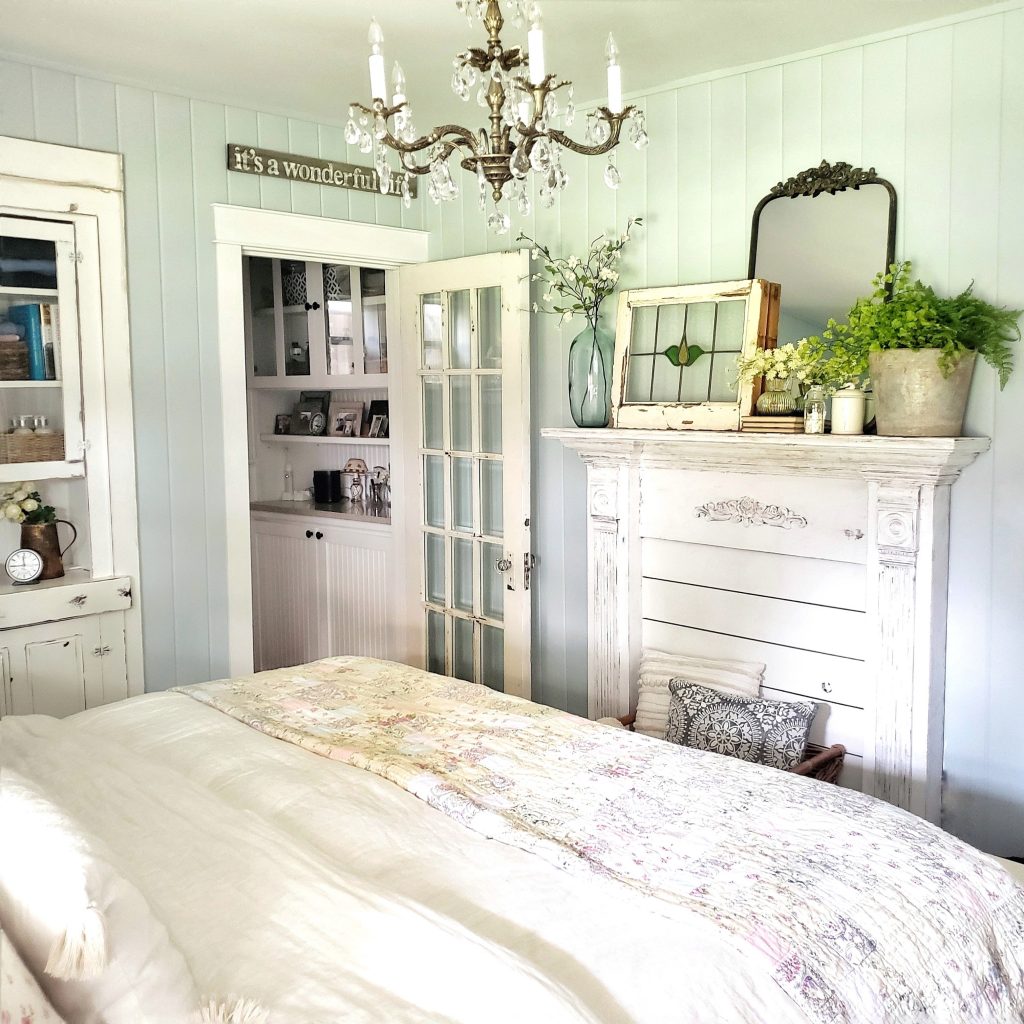
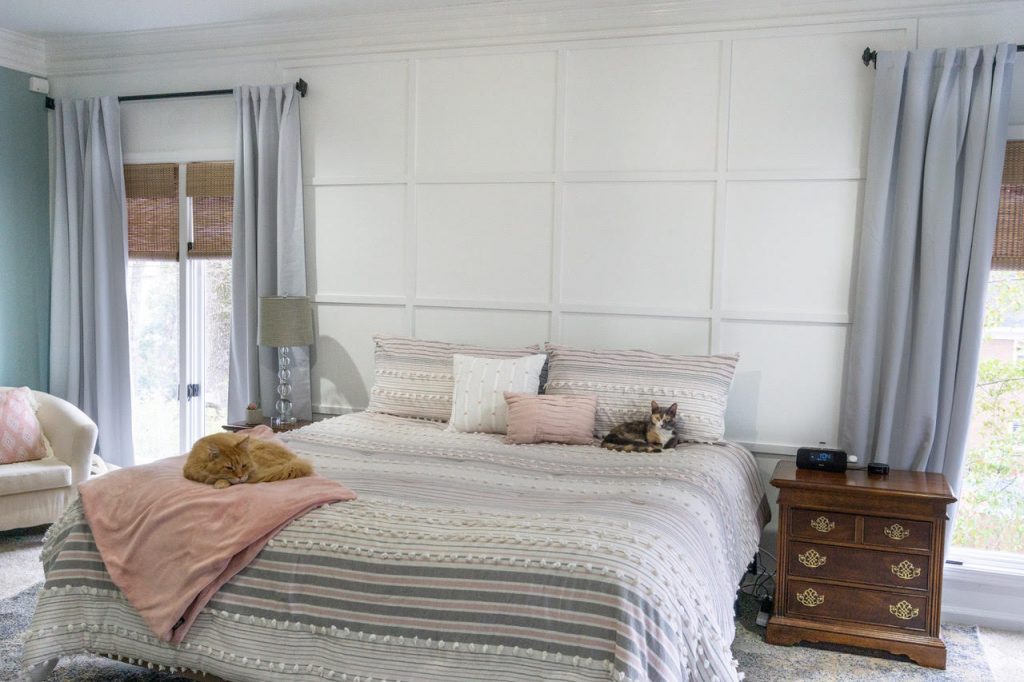
While our cozy living room couldn’t quite squeeze in a fireplace setup, I spotted the perfect opportunity: a bare wall in our master bedroom begging for some character.
At first, I went down the vintage rabbit hole, dreaming of finding the perfect antique mantel. But after months of searching and discovering that shipping costs alone would set us back $500+, I had an “aha” moment.
Why not create exactly what we wanted from scratch? Sometimes, the best solutions come when you take matters into your own hands, right? And that’s how our DIY fireplace adventure began.
Reasons to Build a DIY Faux Fireplace Mantel Surround
Here are some of my favorite reasons to build a DIY faux fireplace mantel surround:
DIY Faux Fireplace Mantel Surround Plans
Before my hubby and I started this project, I found myself on Pinterest, scrolling through endless gorgeous fireplace designs for inspiration. Instead of copying just one, I mixed and matched my favorite elements from different photos, creating something uniquely “us.”
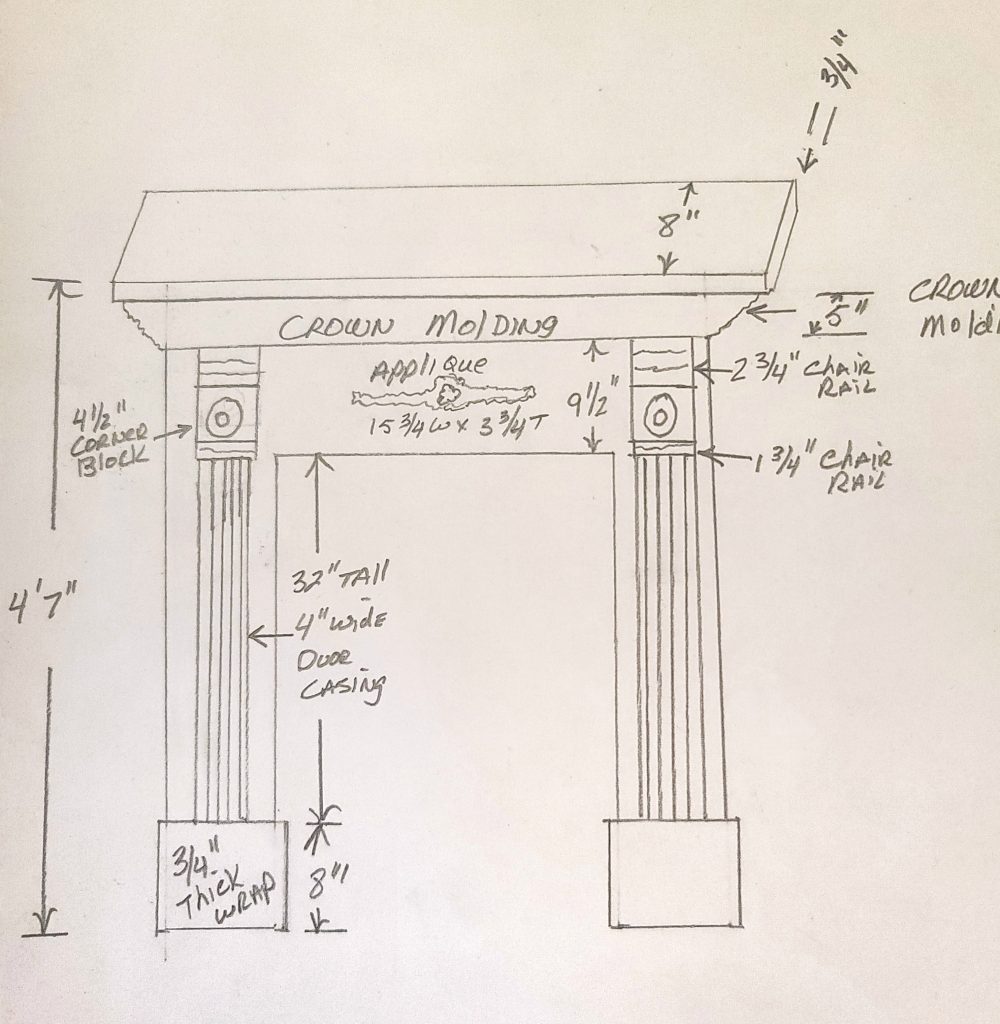
Armed with inspiration and a rough sketch, we pieced together a design with the perfect vintage charm we were after.
The best part? Whether you’re dreaming of a decorative faux fireplace mantel surround like ours or planning to frame an actual fireplace (wood-burning or electric), these steps will work just the same.
Fireplace Mantel Tools and Materials
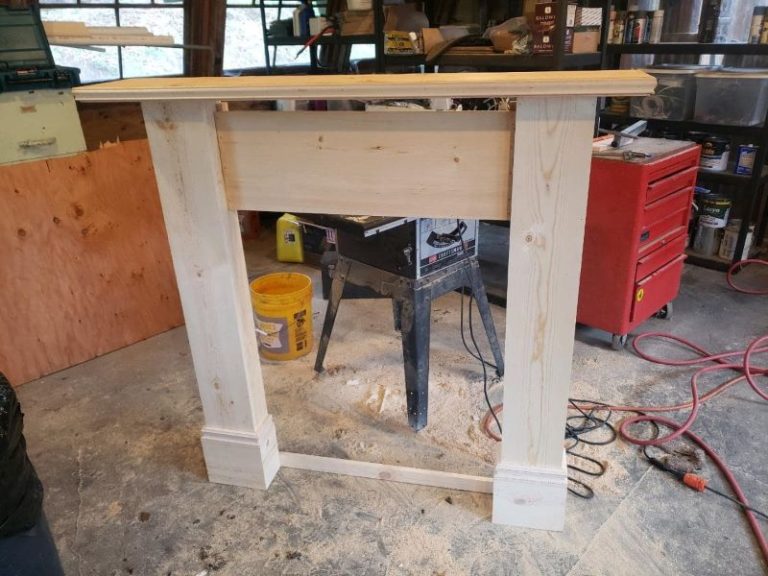
Our faux fireplace mantel surround finished at 4’7″ wide, across the mantel top, and 5′ tall to accommodate the space we had to work with.
My bedroom is tiny, so we decreased the dimensions we would have typically used. Of course, you can adjust these measurements based on the space that is available to you.
The Wood We Used
For our project, we selected real wood instead of particle board. It’s lighter and is more resistant to water damage than particle board.
Pine was the wood we used and is considered a common board in the construction industry. This type of wood is most prevalent and affordable at Home Depot or other home improvement stores.
When purchasing lumber for this project, we purchased longboards and cut them to size. This helped to reduce the wood waste.
Required Tools & Materials
Although power tools will make this project easier to build, they are not required.
How to Build a Faux Fireplace Mantel and Surround Step-By-Step
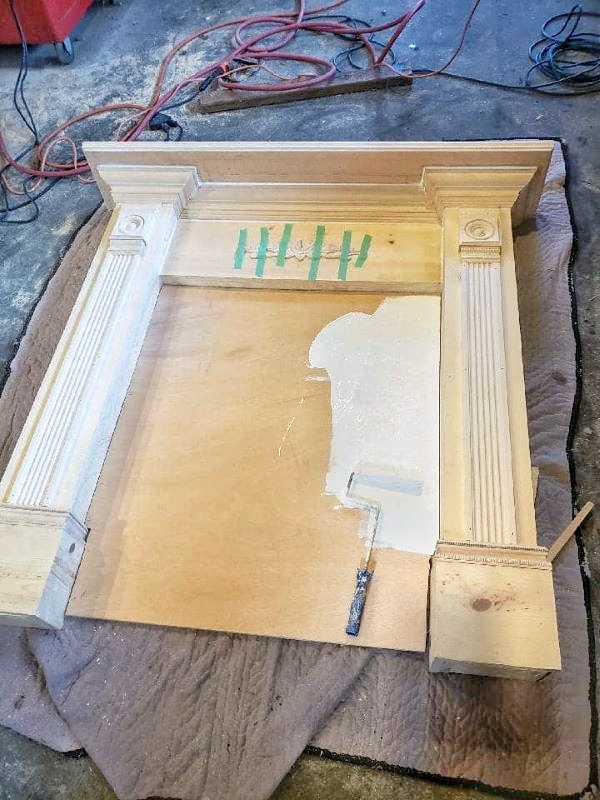
To keep the rest of the room clean, we decided to build our fireplace mantel off-site, in our garage, and then attach it to the bedroom wall when it was completed.
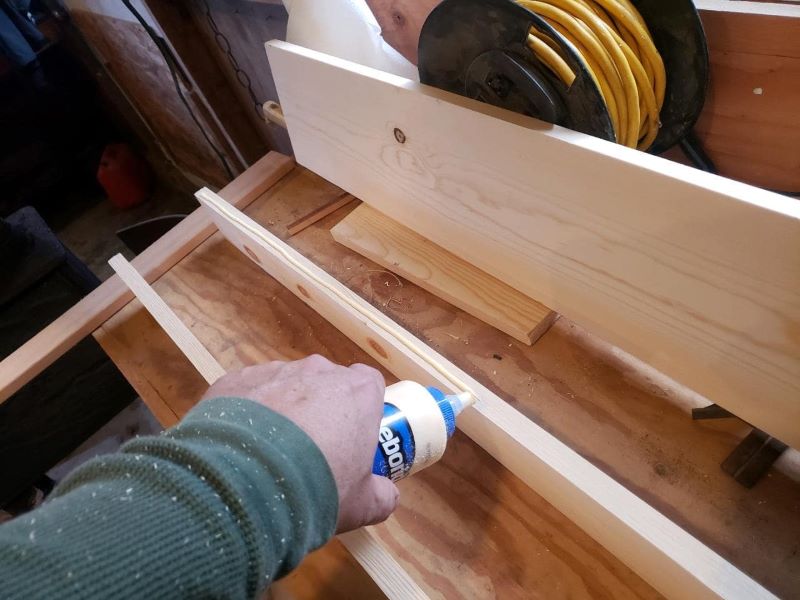
Step 1: Assemble Columns
Apply glue to the edge of the 1″x 4″ legs, and lay a 1″x 6″ face board on top of the legs, nailing them down.
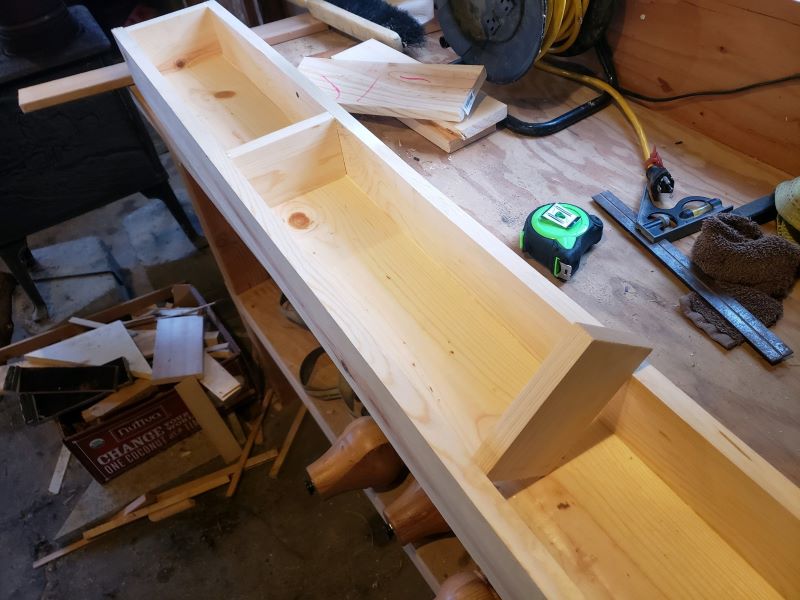
As needed, install braces inside the leg box to strengthen the columns. We put an end cap at the top and one at the bottom of the leg column to close it off.
Step 2: Attach the Apron Board Between the Columns

Nail a support board for each column for the apron board. Add a 1″x 2″ across the bottom of the board to close off and add bulk.
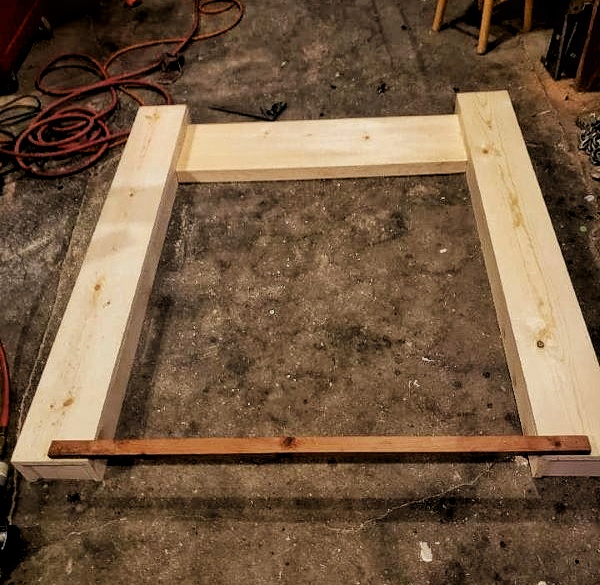
Temporary support was added across the column legs. This maintained the surround’s shape during the building process.
To allow for more exposure of the apron board, drop the board down from the top, 75% of the width of the crown molding. In this case, it was approximately 3″ from the top shelf.
Step 3: Wrap the Base of the Column Legs
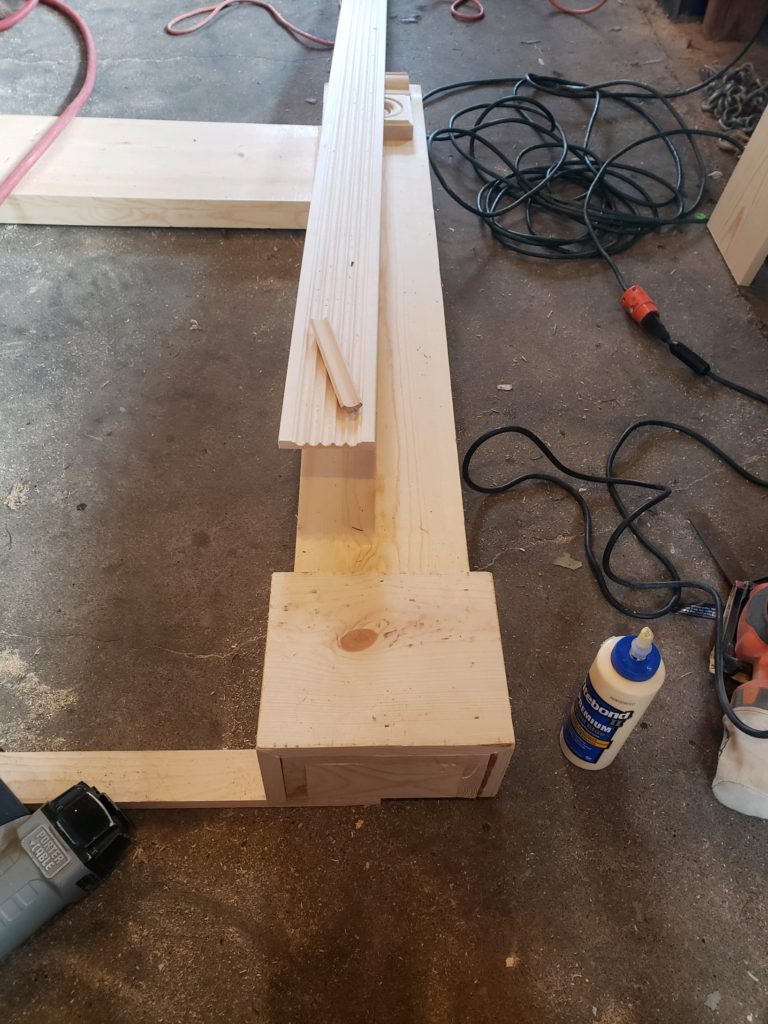
Wrap the column bases with leftover 1″x 8″ pine pieces.
Step 4: Attach the Mantel Shelf
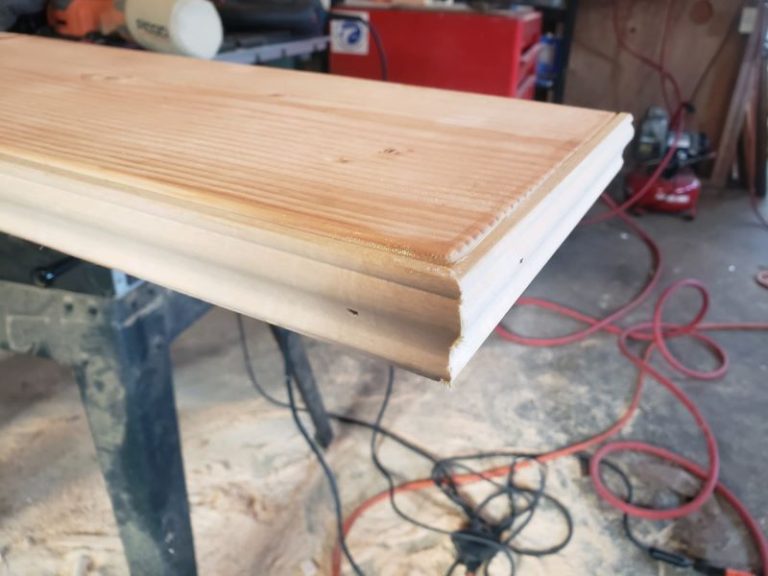
After cutting to size, wrap the face of the mantel shelf with 2″ baseboard molding.
Attach the top shelf to the columns using wood screws.
Step 5: Attach Crown Molding
Install crown molding under the top mantel shelf. It is easier to install the molding when the mantel is turned upside down.
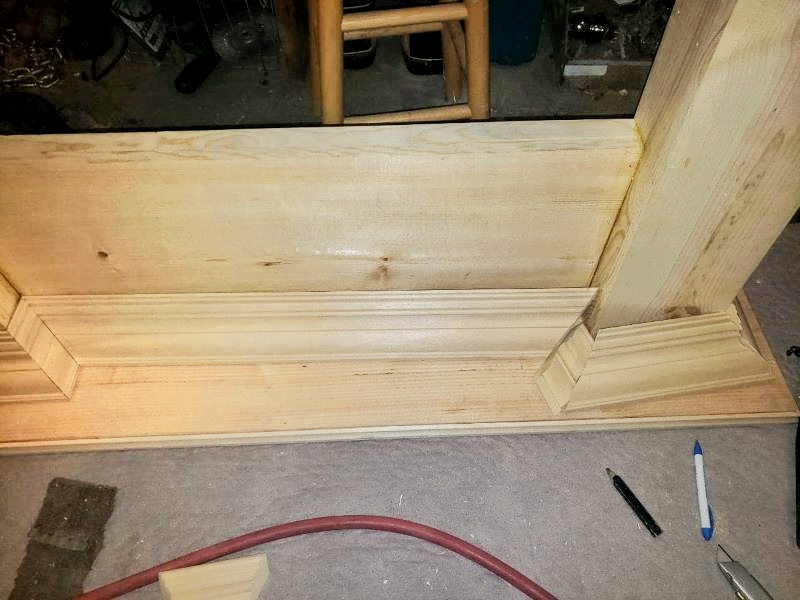
Step 6: Add Decorative Molding
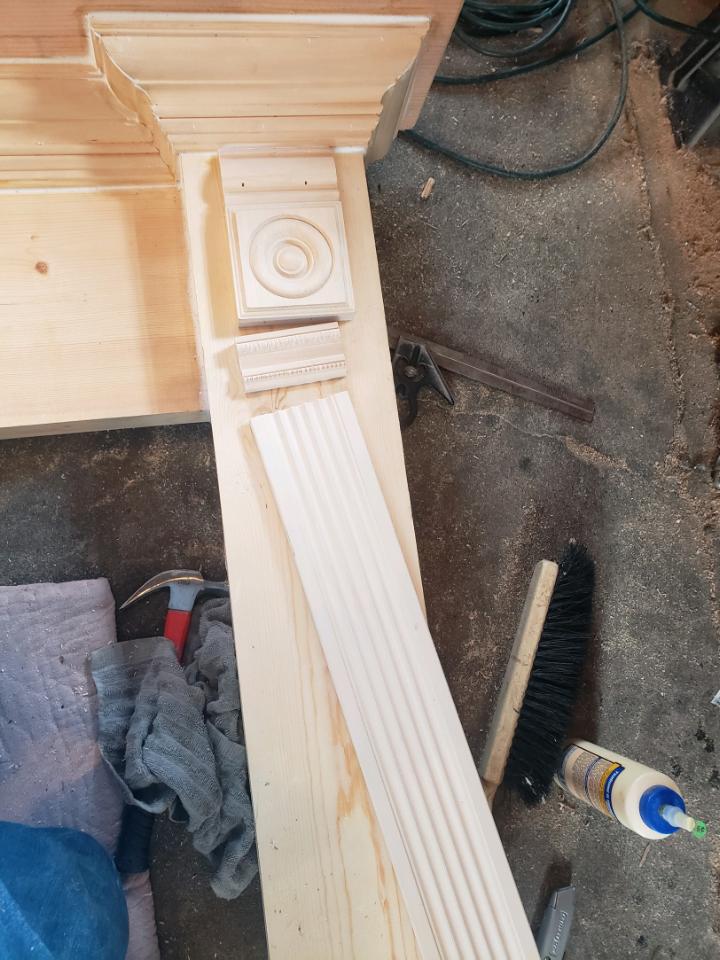
Install decorative molding above the column wrap at the base.

Attach the hardwood fluted door casing moldings on the columns themselves.
Step 7: Install Applique
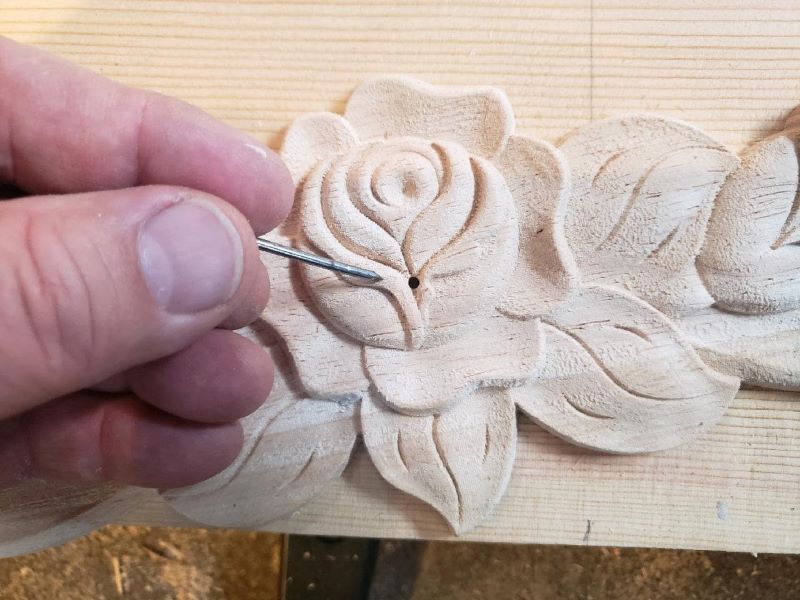
Drill a small hole in the center of the applique.
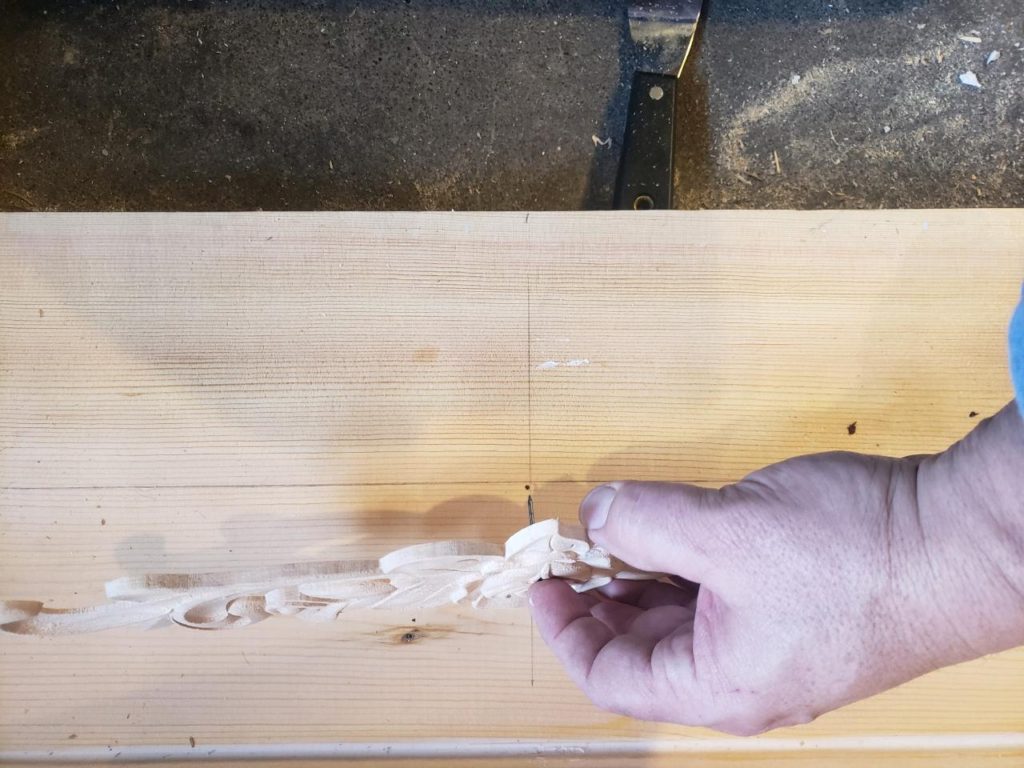
Find the center of the apron board. Use a nail, tapping gently, to hold the applique in place. Apply glue, and hold it in place with masking tape until dry. At that time, remove the nail.
Step 8: Finishing the Fireplace Mantel Surround
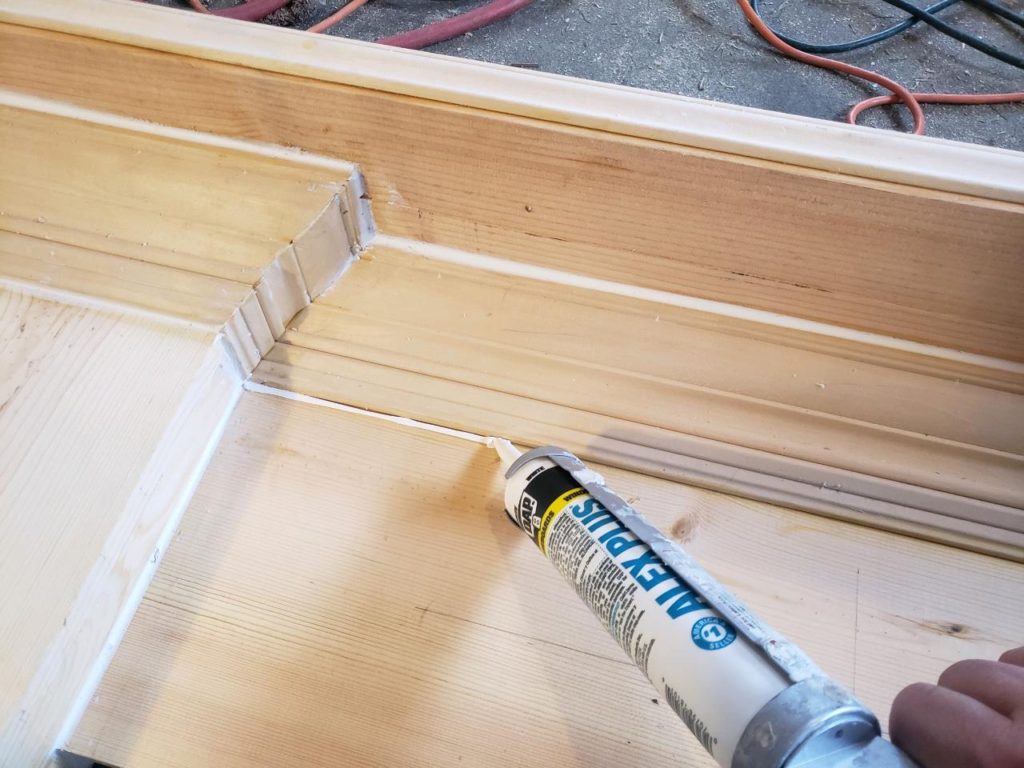
Caulk the joints and fill the nail holes with wood putty.
Step 9: Filling the Fireplace Opening
You can leave the firebox opening as it is or follow these optional steps to create a decorative piece to cover the opening.
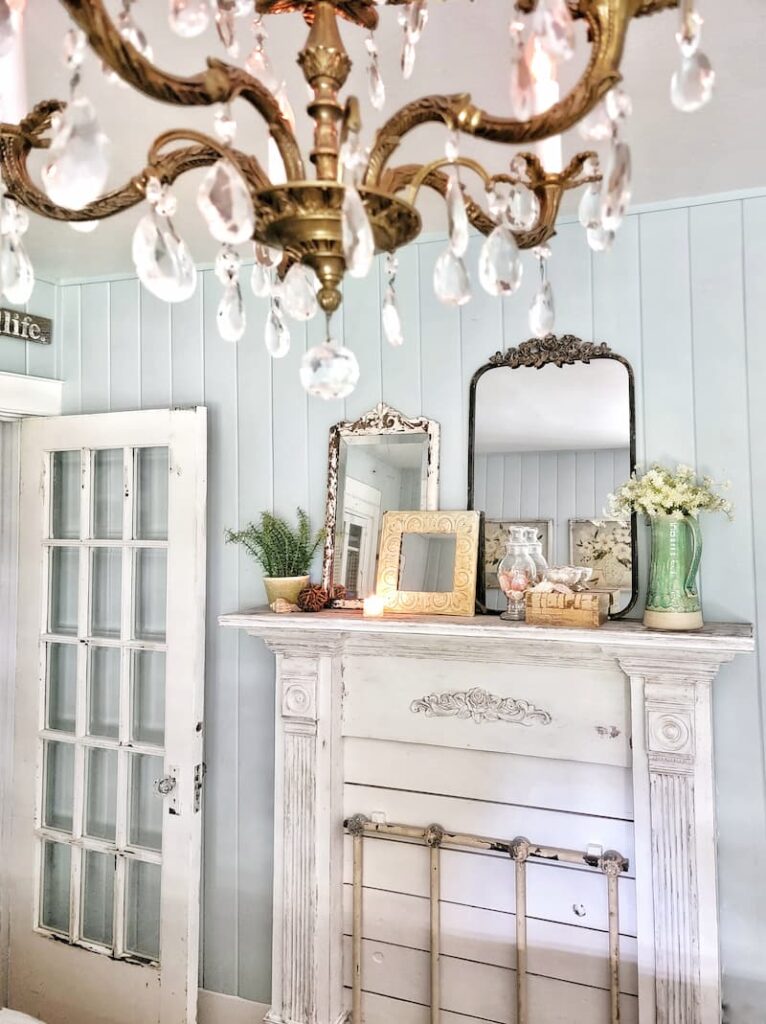
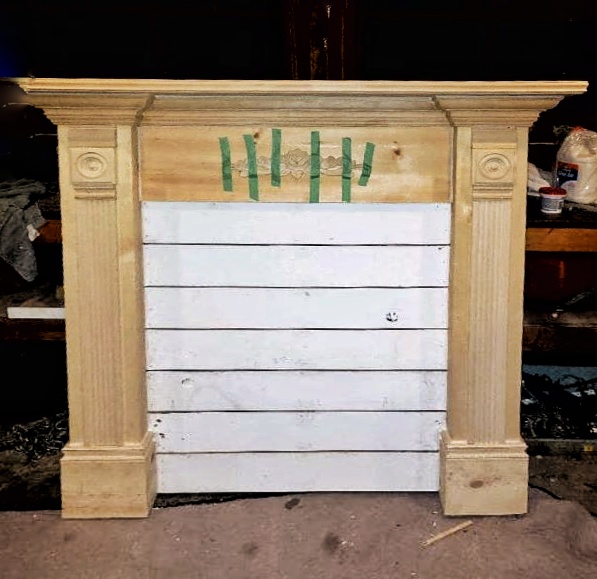
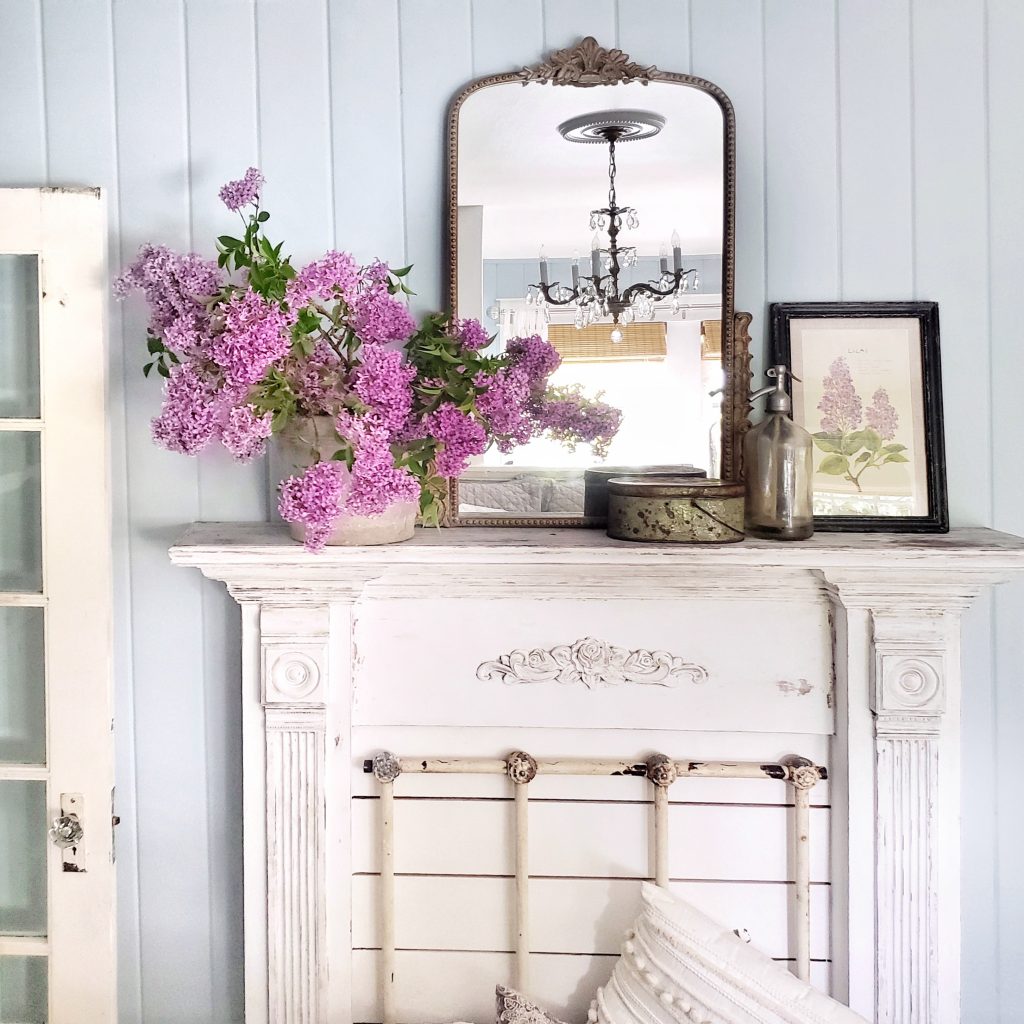
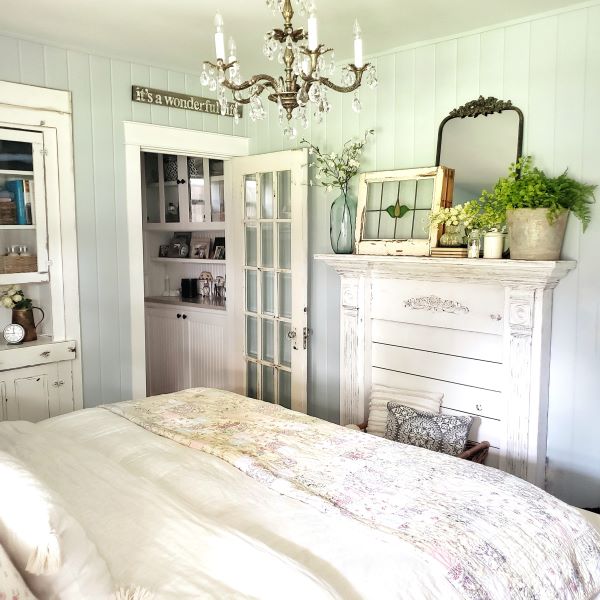
We were putting this in our bedroom, where our wall color was a shade of blue. I wanted to make the faux fireplace mantel surround look more complete, so we added white shiplap so the blue walls wouldn’t be seen through the opening.
We attached 1/4″ plywood for a backer board and painted it white. As an alternative to buying a sheet of 1/4″ plywood, you could add strips of 1″x 2″ pine nailed to the inside of the columns. You would then attach the shiplap to it. This is the same method we used to install the apron board.
Step 10: Installing a Faux Fireplace Mantle and Surround
After finishing our project, we brought the fireplace surround from the garage to the bedroom.
Locate the Studs
Find your desired location and mark it. You will have placed the mantel over one or more wall studs if you’re lucky. If not, you will have to use wall anchors to secure your faux mantel to the wall. It’s impractical to relocate the mantel over the top of a stud in my opinion.
Measure and Mark
Decide on the height and position of your mantel. Use a measuring tape and pencil to mark where the mantel will go, ensuring it’s level.
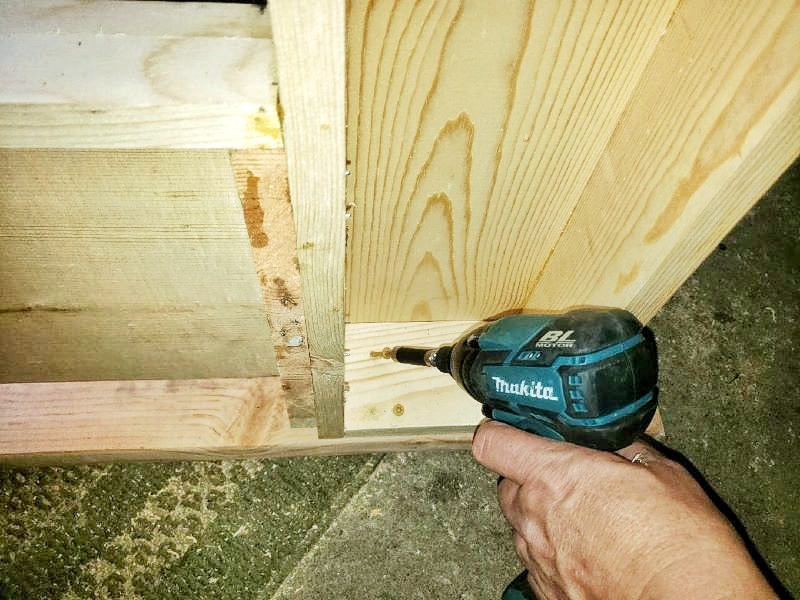
The Mounting Method
The method we used to mount the mantle surround to the wall was very simple.
We drilled four holes, two at the top and two at the bottom, on the mantel legs on the inside portion of the mantel legs on the mantel wall. These holes were at a 45° angle, and we used 3-inch long wood screws that are 1/4 inch by 3/4 inch wood screws.
This method gives the faux fireplace mantel surround more security, especially in homes with children or pets.
Final Checks
Double-check that the mantel is secure and level. Make any necessary adjustments.
Safety Tips
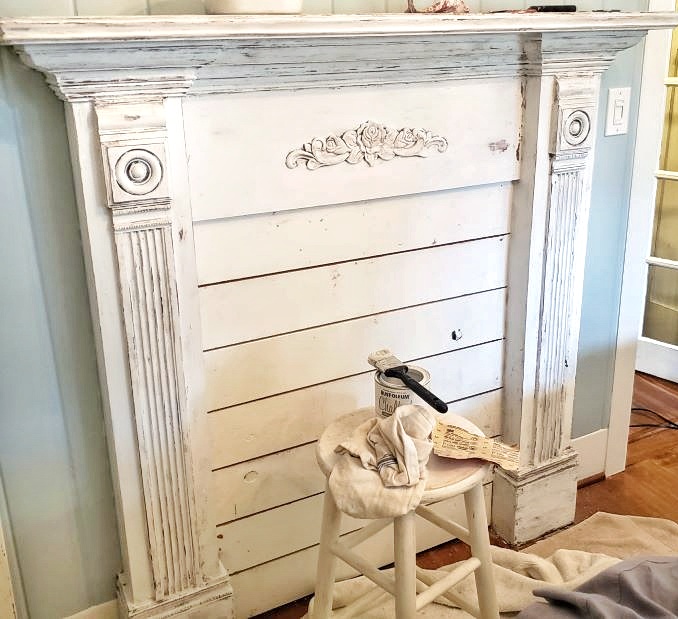
Painting a Faux Fireplace Mantle
I didn’t add a painting step to this post because you can use so many painting techniques. We used white paint and a layered chippy paint method on our fireplace mantel surround.
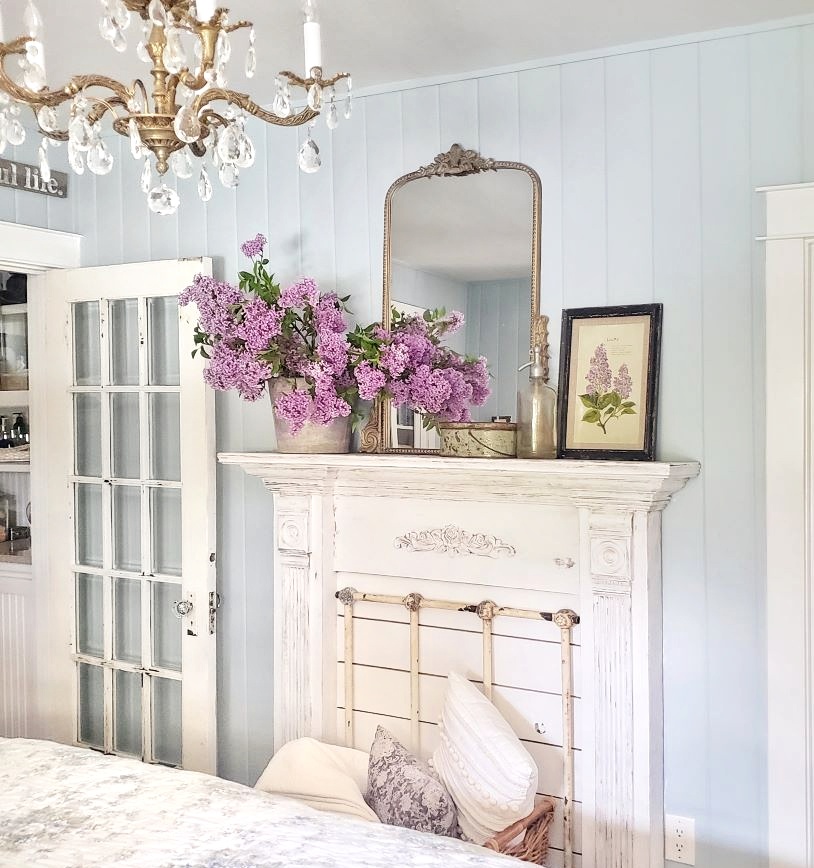
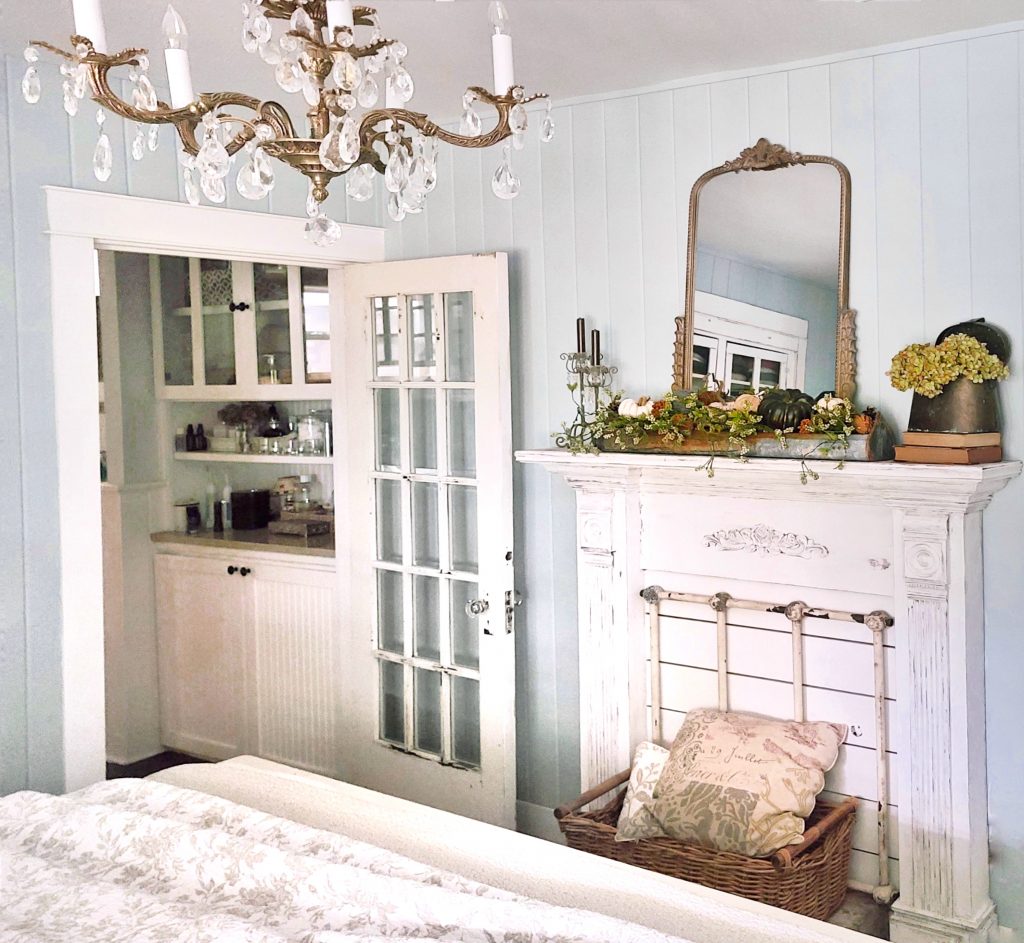
Styling Your Faux Fireplace Surround
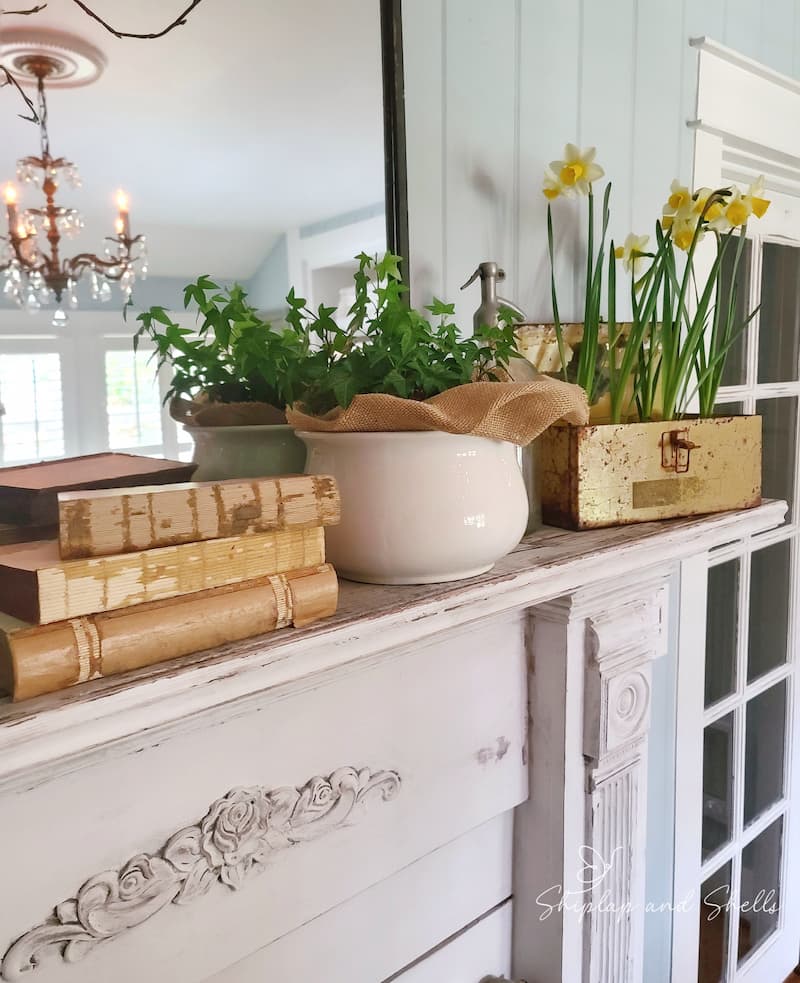
Styling your faux fireplace mantel surround is the best part of the process and is where you can let your creativity shine. Here are some tips and ideas to help you style your fabulous mantel.
Choose a Theme or Color Scheme
Decide on a theme or color palette that complements your room’s decor. This could range from modern minimalism to rustic charm or seasonal themes.
Create a Focal Point
Place a large decor item in the center of the mantel. This could be a mirror, a piece of artwork, or a large clock. The focal point sets the tone for the rest of the styling.
Layering and Depth
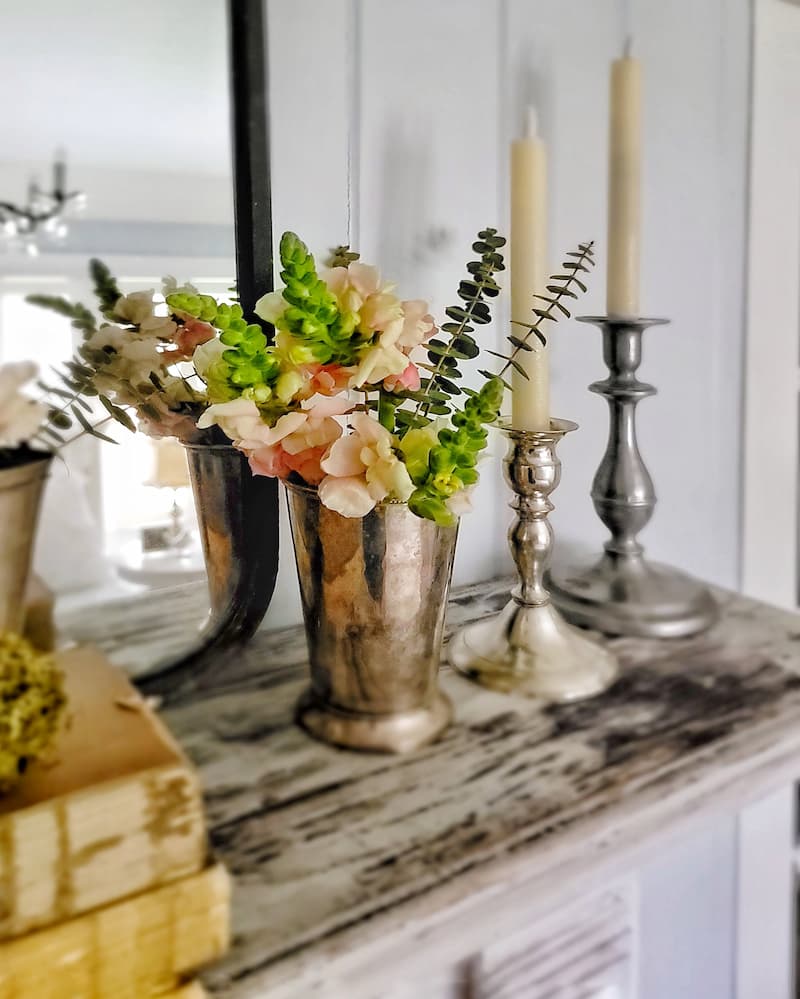
Use various-sized objects to create depth. Place taller items like vases or candlesticks at the back and smaller items in front. Layering adds visual interest and dimension.
Incorporate Nature
Add natural elements like branches, flowers, or potted plants. These decor items can also be faux options and easily swapped out to reflect the current season.
Lighting
String lights, lanterns, or candles provide a warm, inviting glow.
Personal Touch
Include items that have personal meaning, like family photos, heirlooms, or collected keepsakes.
Seasonal Decor
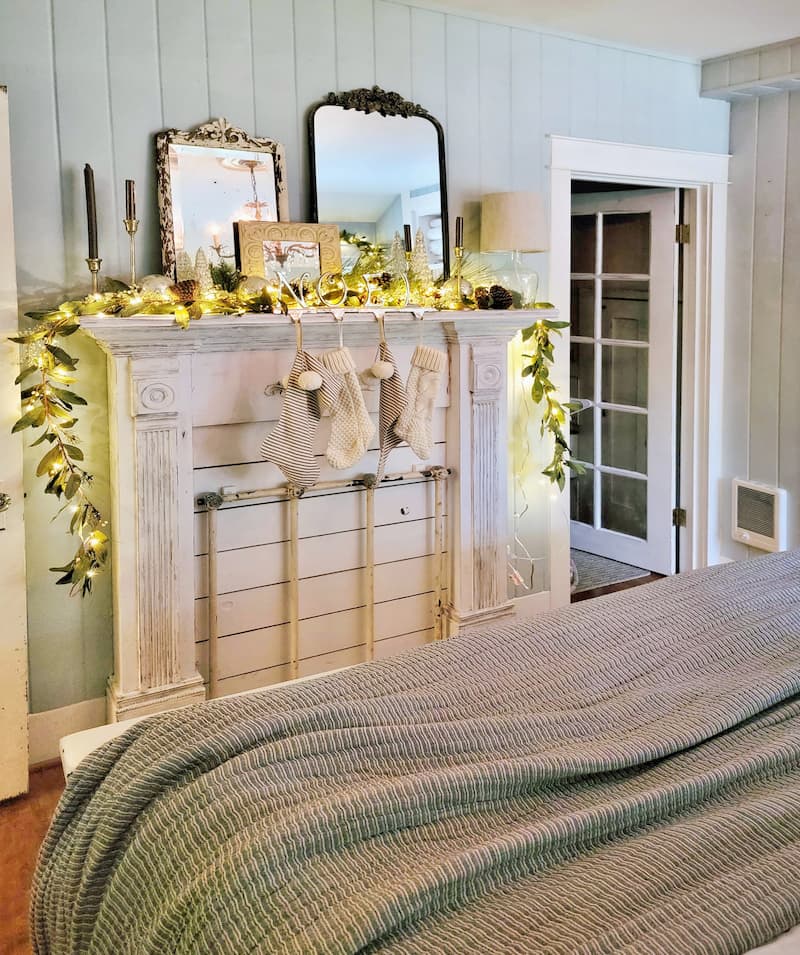
Update your decor throughout the year by embracing the seasons. Add holiday-themed decorations or seasonal colors and textures.
Textural Contrast
Mix different textures such as metal, wood, glass, and fabric, adding depth and keeping the eye moving across the mantel.
Most Common Questions About DIY Faux Fireplace Mantel and Surrounds
How Do You Attach a Faux Mantel to the Wall?
Attaching a faux mantel to the wall is crucial in ensuring its stability and safety. The exact method can vary depending on the design of your mantel and the type of your walls.
Always consider the mantel’s weight and the wall’s strength when choosing your attachment method.
What Can Be Used as a Mantel?
When it comes to choosing a mantel for your faux fireplace, there are numerous options, each offering its own unique style and character. Here are some creative ideas for what can be used as a mantel:
Are Fake Fireplaces Worth It?
Fake fireplaces are worth it if you prioritize aesthetics, safety, and cost-effectiveness over authenticity and heat output.
They are an excellent choice for creating a cozy space without the expense of a real fireplace. However, if a real fire’s sensory experience and heating capabilities are important to you, a fake fireplace might not meet your expectations.
Final Thoughts on Building a Faux Fireplace Mantel Surround
Building a faux fireplace mantel surround can make a huge impact on any living space. It’s not just about adding a decorative element; it’s about creating a cozy and warm vibe.
The best thing about this project? You don’t need to break the bank to make it happen. Whether you’re a homeowner looking to add some character or a renter wanting to create a removable focal point, this project is doable. Plus, it’s the kind of DIY that keeps on giving. Just think of all the seasonal decorating possibilities!
If you have any questions or additional suggestions, please share them in the comments below. And be sure to share this blog post link with anyone who may find this DIY idea helpful.
Until next time,
Happy DIYing!
MORE POSTS
For You To Enjoy
Follow Me for More Inspiration
Shop my Amazon Storefront, LTK sources, and my favorite home decor, garden, and lifestyle products. When you purchase from one of my links, I earn a small commission, which helps me continue sharing all the content you expect on my blog.
Follow me on Pinterest, Instagram, Facebook, TikTok and LIKEtoKNOW.it. Do you like gardening? Join my Facebook Gardening Tips & Tricks group.

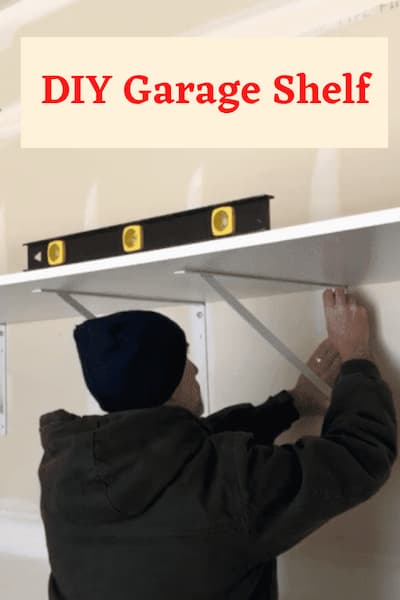
Chas’ Crazy Creations | Easy Heavy-Duty DIY Garage Shelf
Grandma’s’ House DIY | Building a Hallway and Closet into a Storage Room
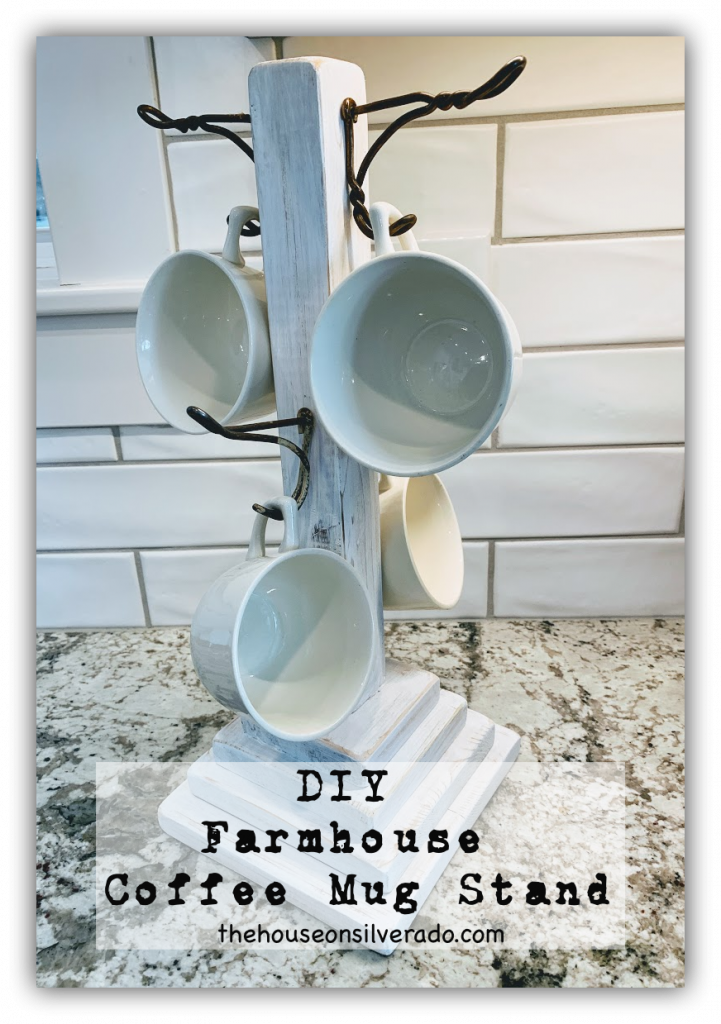
The House on Silverado | DIY Farmhouse Coffee Cup Stand
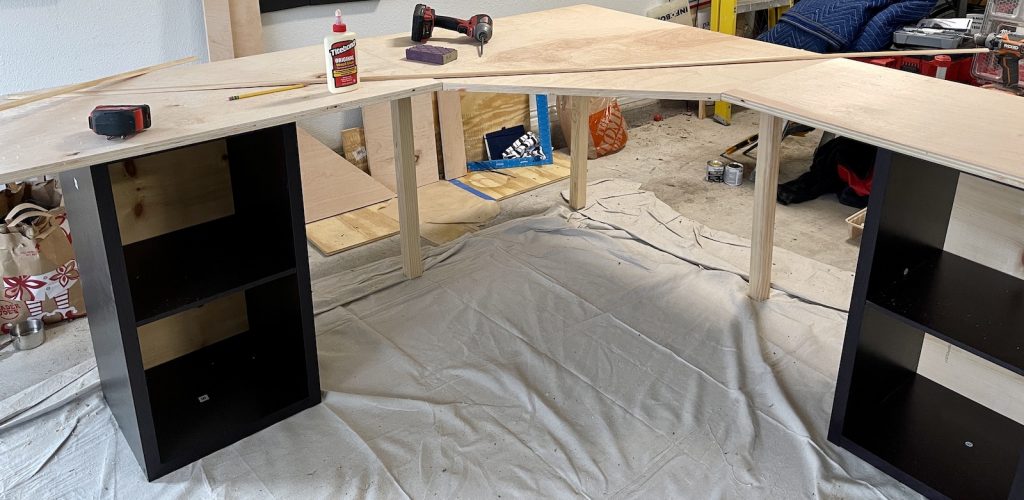
Design Morsels | DIY Corner Desk
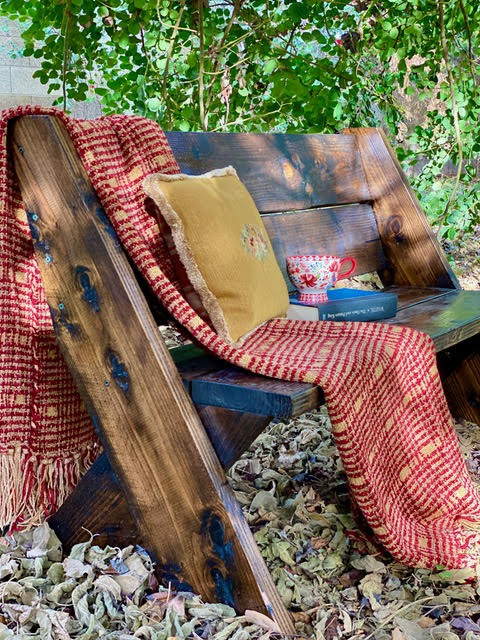
Life at Bella Terra | DIY Outdoor Bench
Health Home and Heart | How to Install a Wood Trim Accent Wall
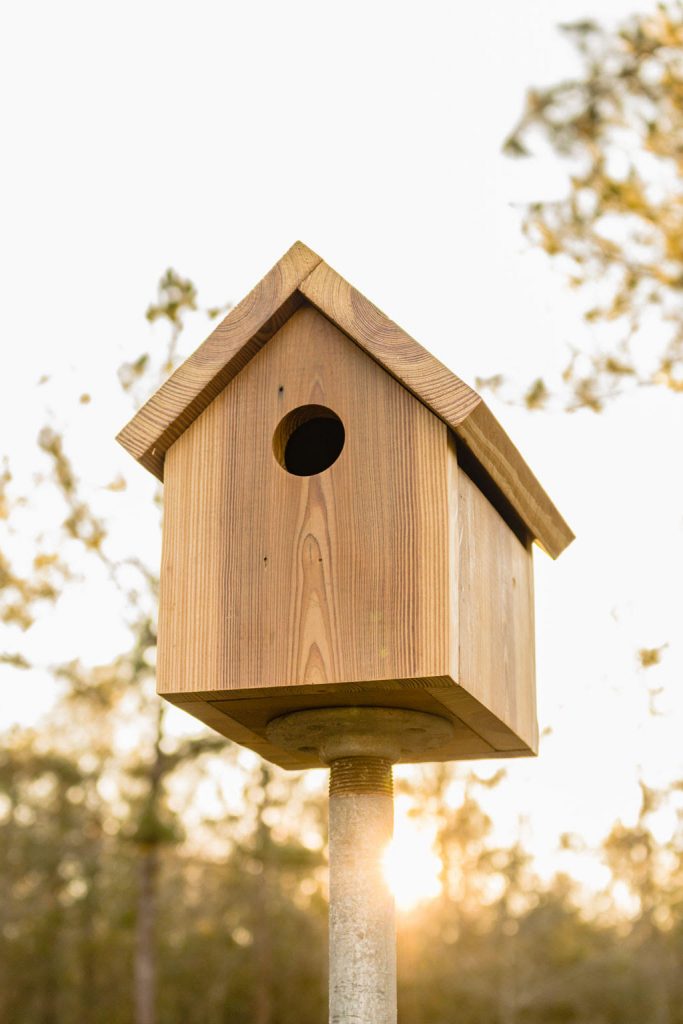
Kippi at Home | How to Build a Birdhouse

How much did this cost to make?
I would estimate the cost to be about $150 in wood with the most expensive part being the trim and moldings.
Looking to do something similar in my bedroom. I love how yours turned out — totally thought it was an old mantel you redid. Where did you get that metal piece inside the fireplace in front of the shiplap? I love that detail!
Idk if maybe I missed it. But how much was everything? Looking to make something similar. Great work!!
This fireplace mantel is beautiful. I thought you were going to say you found this piece.
You created a beautiful piece.
Cindy
Thank you for the kind words Cindy!
This is gorgeous! It looks absolutely perfect in your bedroom. I might have to add this project to my own list of “master bedroom projects.” 😉 I often look at fireplace surrounds when I go to antique stores. I never considered just making one myself! I’m also glad you included a link to the paint method you used. I love it!
I have always wanted to buy one, so much easier. But they can be so expensive. This was actually a lot of fun to make.
Gorgeous DIY faux fireplace mantel surround. Your attention to every detail is what made this project perfect in every way. I love the finish you used on it.
Have a great week,
Kippi
Thank you so much for the compliment Kippi. It means so much!
What a great idea Kim! So great that you could pay tribute to you lovely home and create such fun ambiance to it at the same time . Love it friend
Thank you so much Chas! It turned out better than I thought it would. so fun to be hopping with you ladies.
Kim, when I first saw the picture I thought you have found a vintage one and repaired it. I cannot believe you were able to achieve this vintage look with new wood! Just amazing! And I love the rose molding as well. But what made this so special is your use of the shiplap and staging it with the metal piece and the basket. What a charming focal point! Thank you so much for sharing and I am happy to hop with you.
That’s the best compliment of all Mary, the fact that you thought it was already made. I was so nervous to see how it was going to turn out, we had no plan to go off of. My husband is seriously such a sport. I didn’t want to spend a ton of money. I always love hopping with you ladies.
This turned out so adorable I can’t wait to try one. If only I could think of a blank wall. Your drawing of the project is so helpful. Great tutorial. It is fun hopping with you. Your home is so cozy in every photo, I love to get the chance to see it.
You are so sweet Andrea. I’m so glad you like it. I hear exactly what you’re saying about finding a blank wall. This was literally the only wall I had that was open, and it was even a tight space. It’s always fun hopping with you.
Oh, I love this! I’ve been wanting to do something similar in my bedroom. We currently have an electric fireplace, but it doesn’t fit my style. You’ve give me some ideas about how I might create a surround to jazz it up! Thanks so much for the inspiration!
Oh, and your mirror above it! I’ve been looking hard for something similar at thrift and antique stores! It’s beautiful!
Niky @ The Hosue on Silverado
PS. I’d love it if you’d share at Sundays on Silverado Link Party, too!
Thank you so much Niky! I’m so glad you like it, and I can’t wait to see what you end up doing. I will definitely go over and share at your link party. Thanks for the invite.