
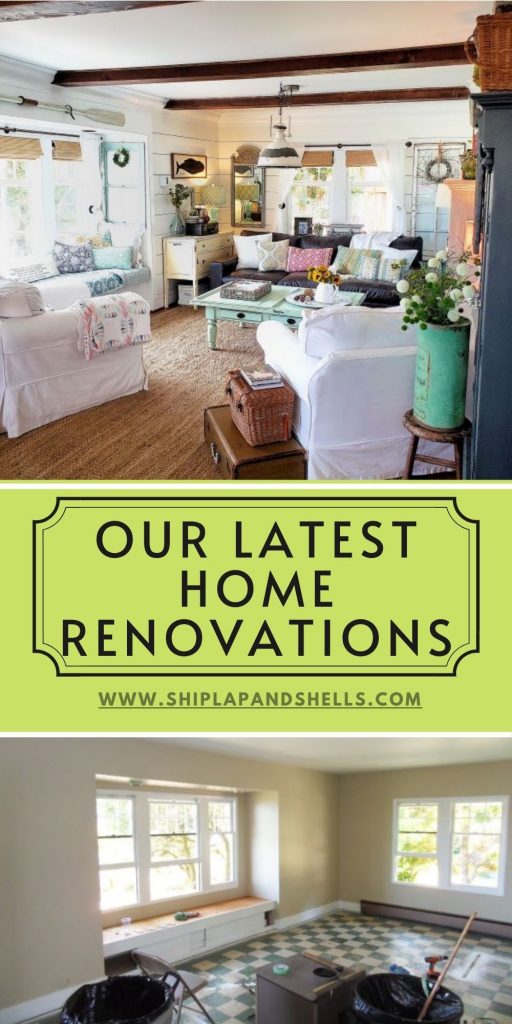
2019 Home Renovations
Don’t you just love a good home renovation? I do too. That is…after all the projects are completed, and the house is clean and put back together. Let me take you on a tour and show you last year’s home renovations.
2019 went quickly, and now looking back on all the projects we did, I can see why. We were busy! Some of the home renovations we made were in the living room, kitchen, master bathroom, and bedroom. We even put on a metal roof!
As an Amazon affiliate, I earn from qualifying purchases at no extra cost to you. My blog contains other affiliate links as well for your convenience. Click here to read my privacy policy.
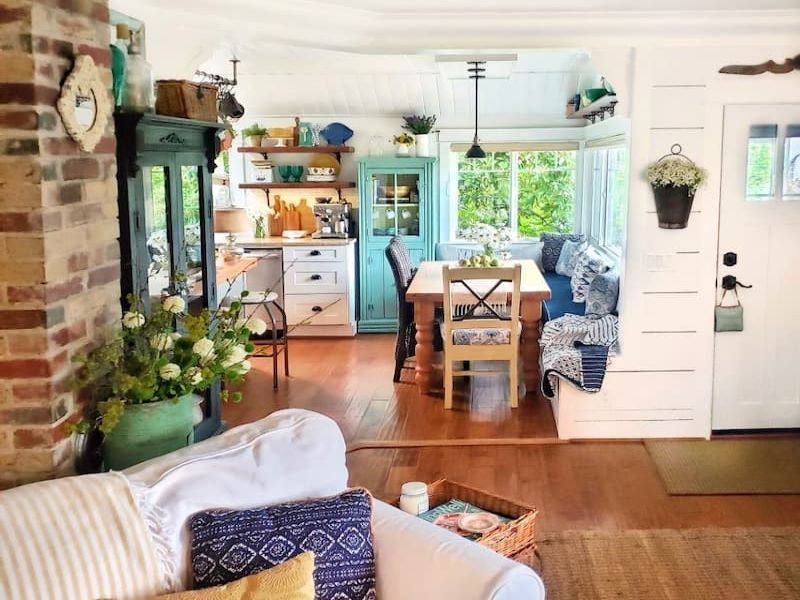
A Wall Was Taken Out For an Open Concept
This is one of my favorite projects we’ve ever completed! Here is the view from our living room looking into the kitchen. Before the wall was taken out, you would never have been able to see the kitchen table in this shot.
I cannot believe the difference a wall can make! It has changed our everyday lives, and it is so much easier to entertain with a more open concept.
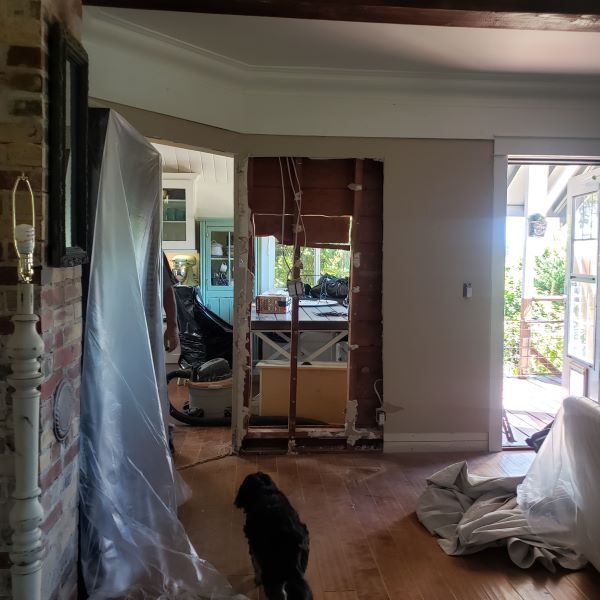
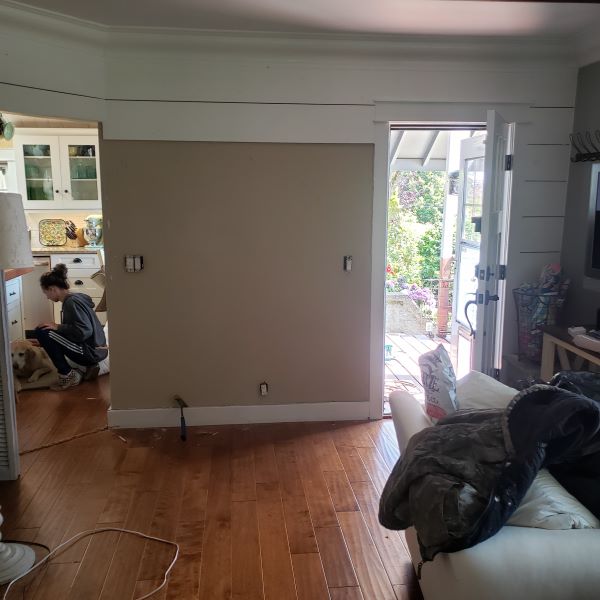
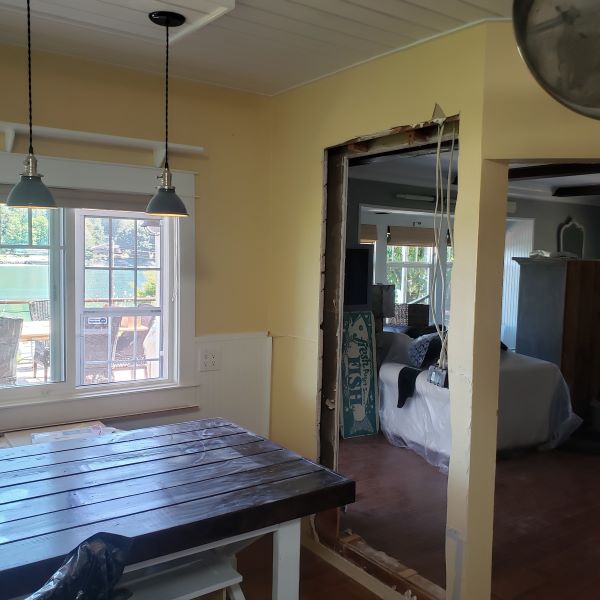
The renovations are just getting started here and the shiplap walls have been taken off.
Here’s a fun fact! During last year’s home renovation, when the wall was being taken out, we found the original shiplap they used when building the house in 1920! It was in pretty bad shape, so, unfortunately, we weren’t able to use any of it.
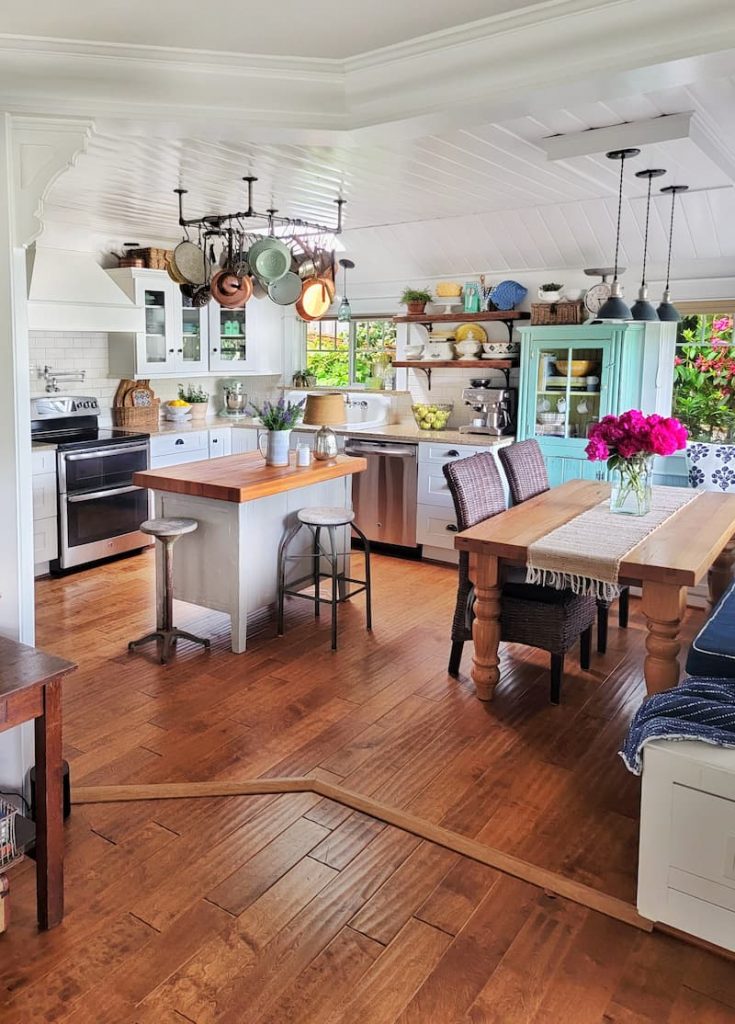
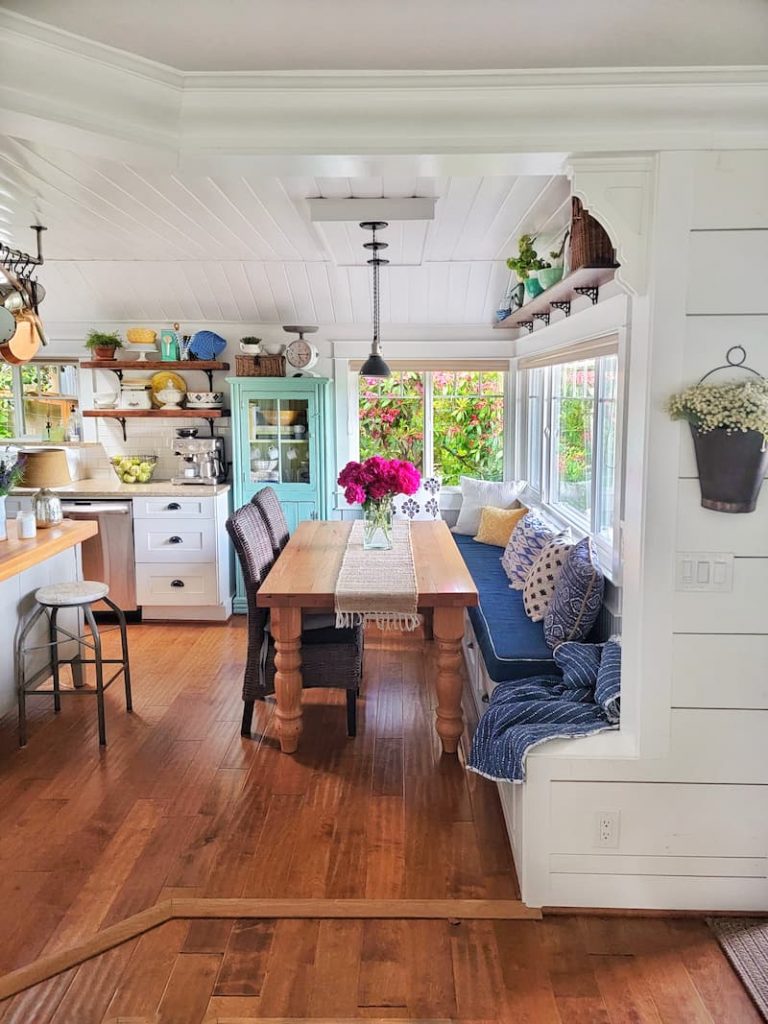
Many people have asked why we put the strip on the floor between the living room and kitchen. The rooms were not level, so we weren’t able to have the hardwoods flow from room to room.
When we were making these home renovations, I also decided to paint the kitchen walls white. I’m not sure what I was thinking with this yellow. I didn’t realize how much this bold color took over the room and distracted from the view.
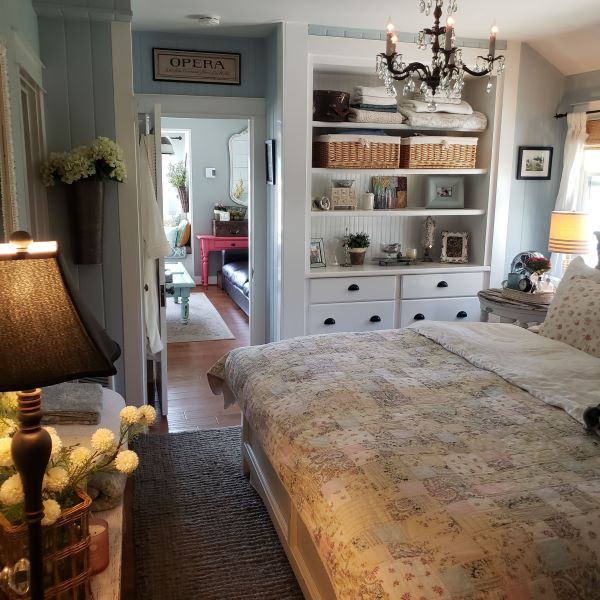
Closing Up the Door Between the Bedroom and Living Room
Our home is very small, only 1600 square feet, so wall space is sought after around here. Because of this, we had to come up with a plan as to where to put the armoire that no longer had a home, after knocking out the wall between the living room and the kitchen.
We decided the best option was to take the door out between the living room and bedroom to add wall space there.
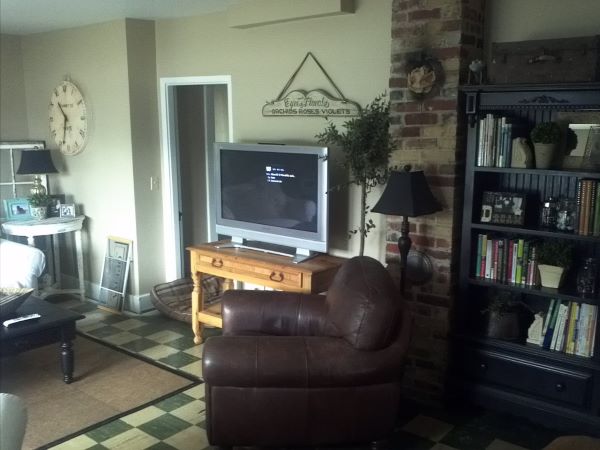
This view of the living room was from when we first moved in. Yes! I painted the walls that color! I want to say that taupe was a color trend back then. Please, please don’t judge me!
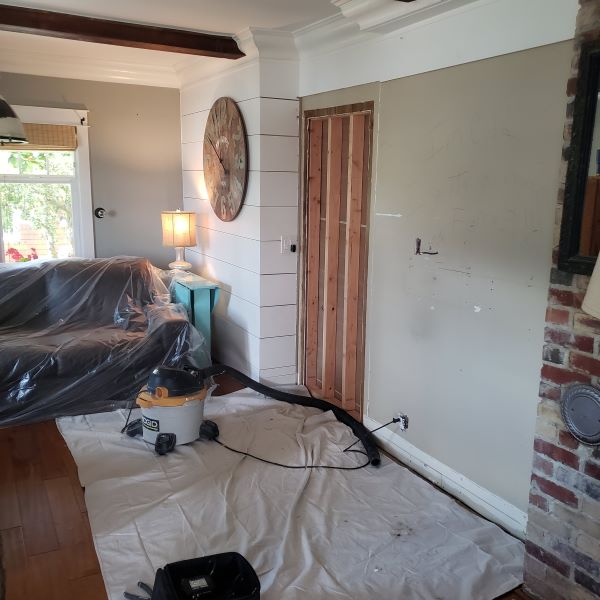
The shiplap was taken down and the door was boarded up.
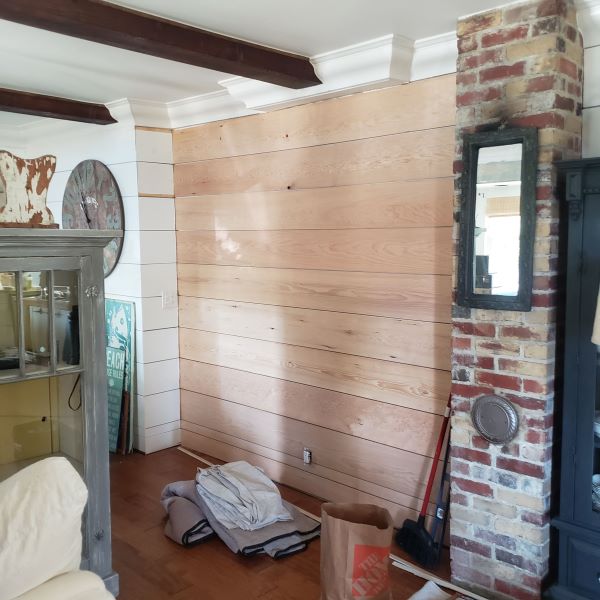
The shiplap was reinstalled and ready to paint.
I can’t even remember having the bedroom door in the living room anymore. It looks like it was this way all along.
One of last year’s home renovation projects that we did in the living room, also affected the bedroom. You can see the previous doorway between the bedroom and living room in the picture below.
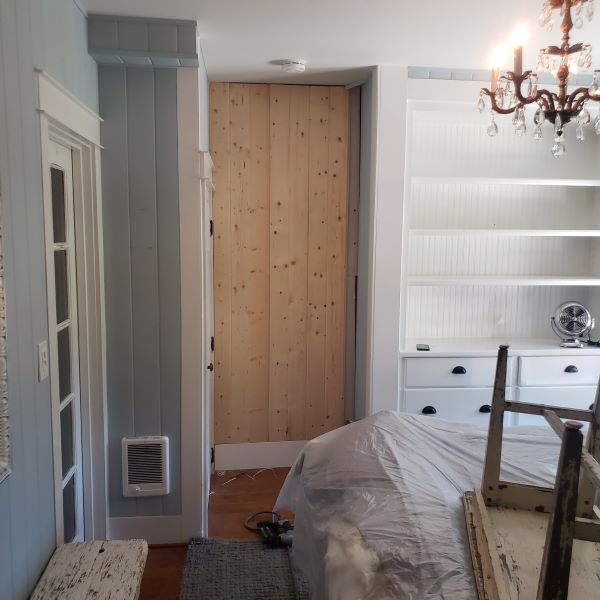
The door was sealed, and the tongue and groove were added.
A newly created space was made for a small table or chair in the bedroom, after adding the wall between the living room and bedroom.
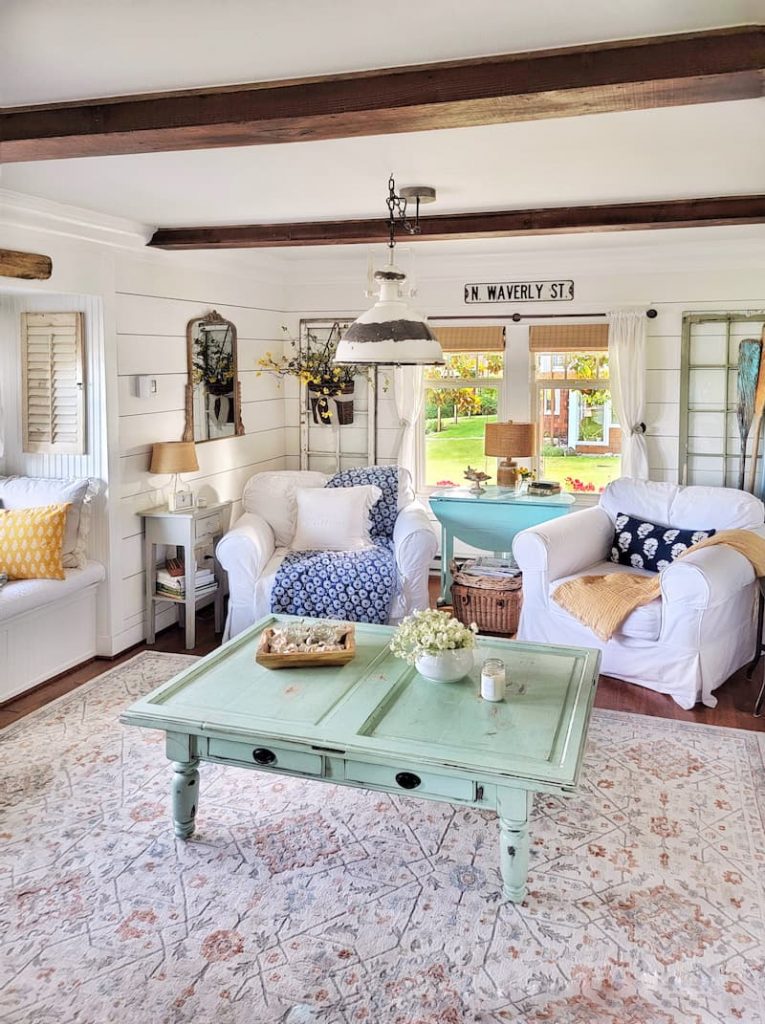
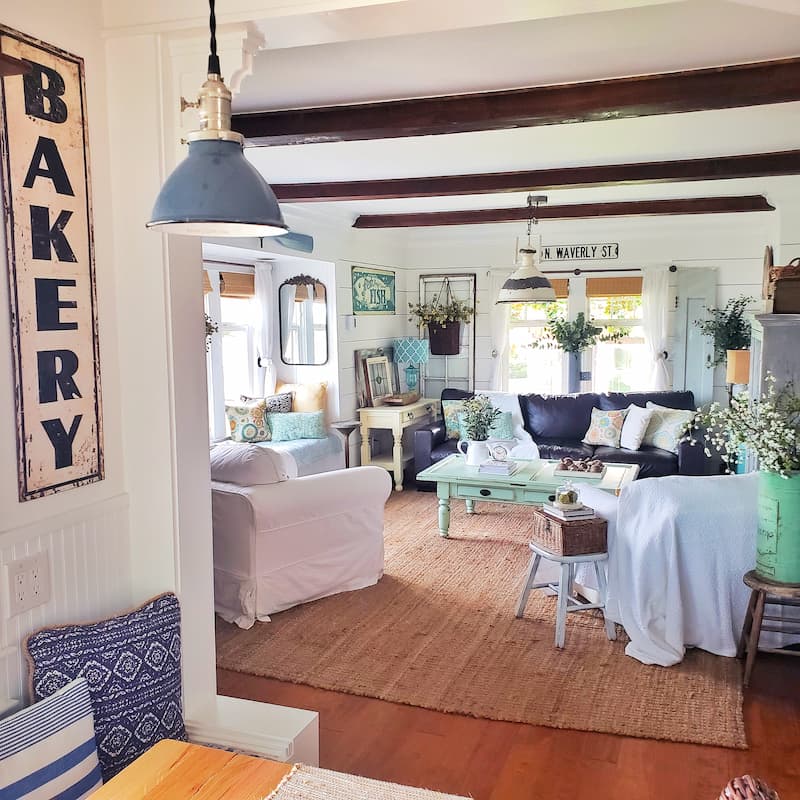
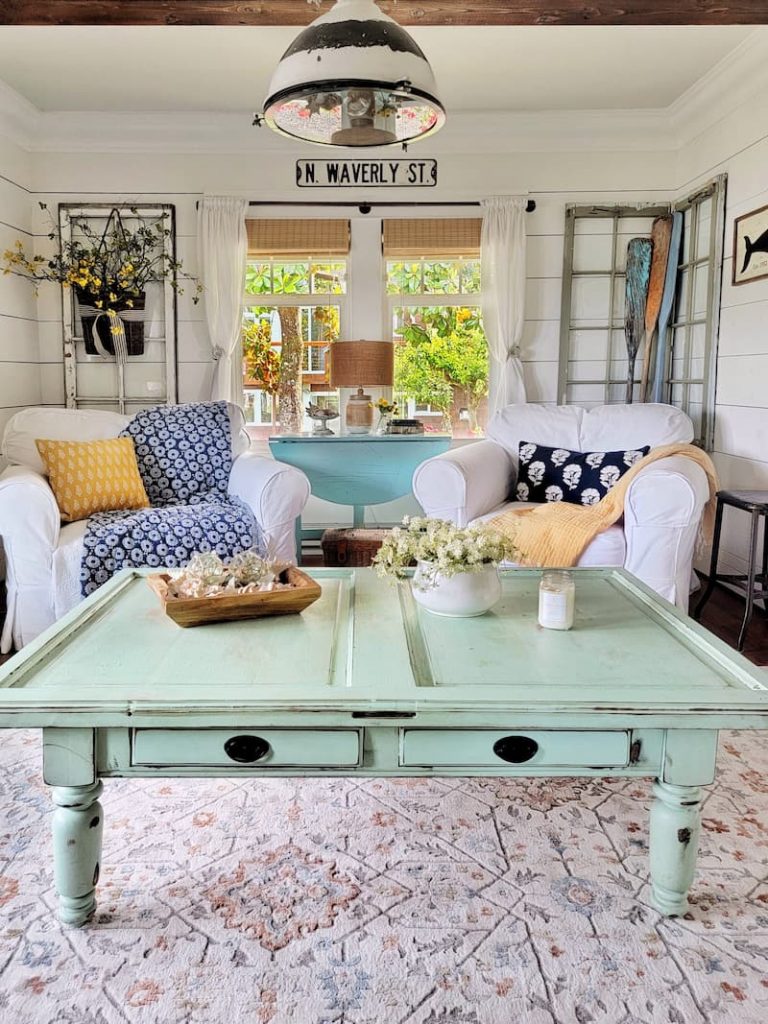
Ceiling Beam Addition – Living Room Renovation
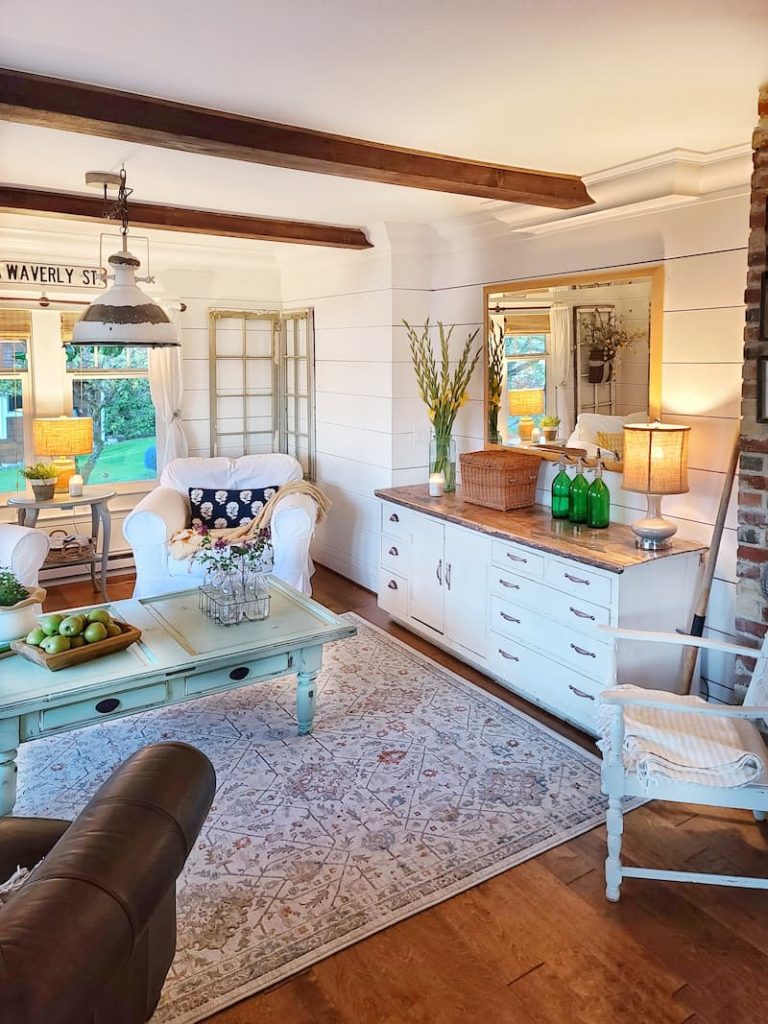
These faux ceiling beams make such an impact on this room. I’ve always loved the appearance of wood and white together.

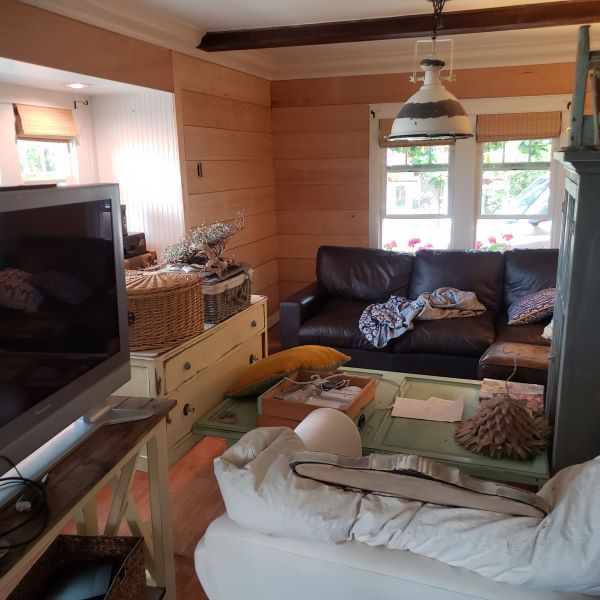
This could be my very favorite “before” picture of my living room, taken right after we moved into our house 8 years ago. At the time, the only thing we had done, was paint the window trim and baseboards white.
Over the years, the renovations to our house include: adding ceiling beams, hardwood floors, crown molding, and shiplap walls. Making all of these changes was a slow process, mostly in stages. It always amazes me when I look at this picture, to see how much we have done to add character back to our 100-year-old home.
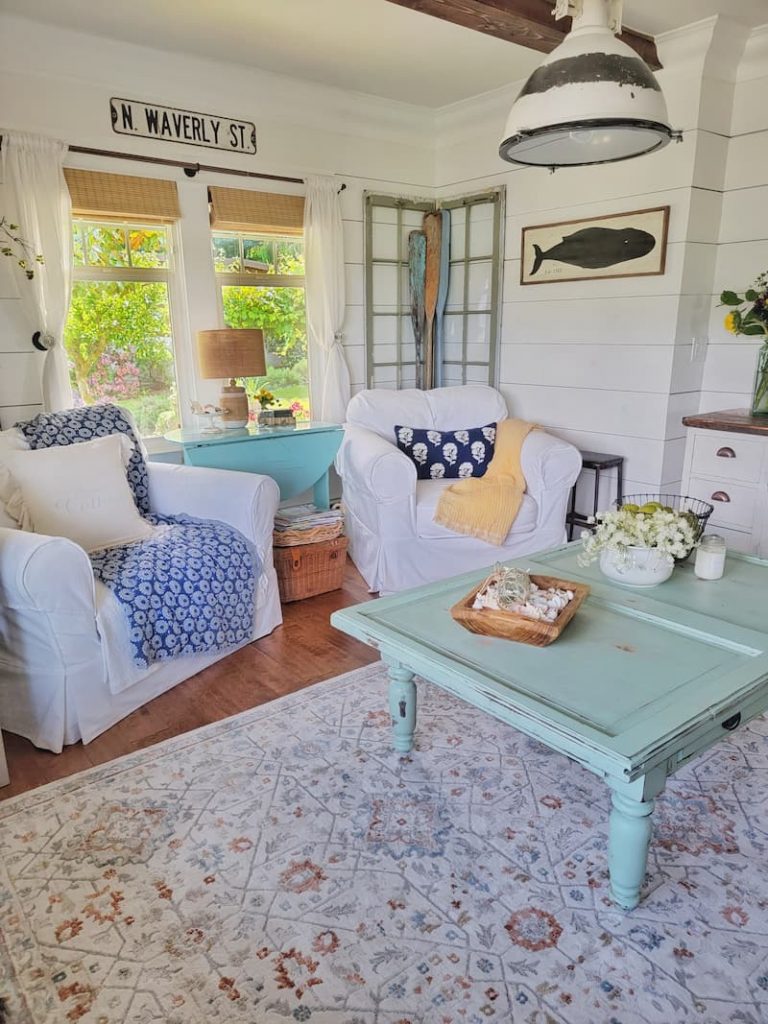
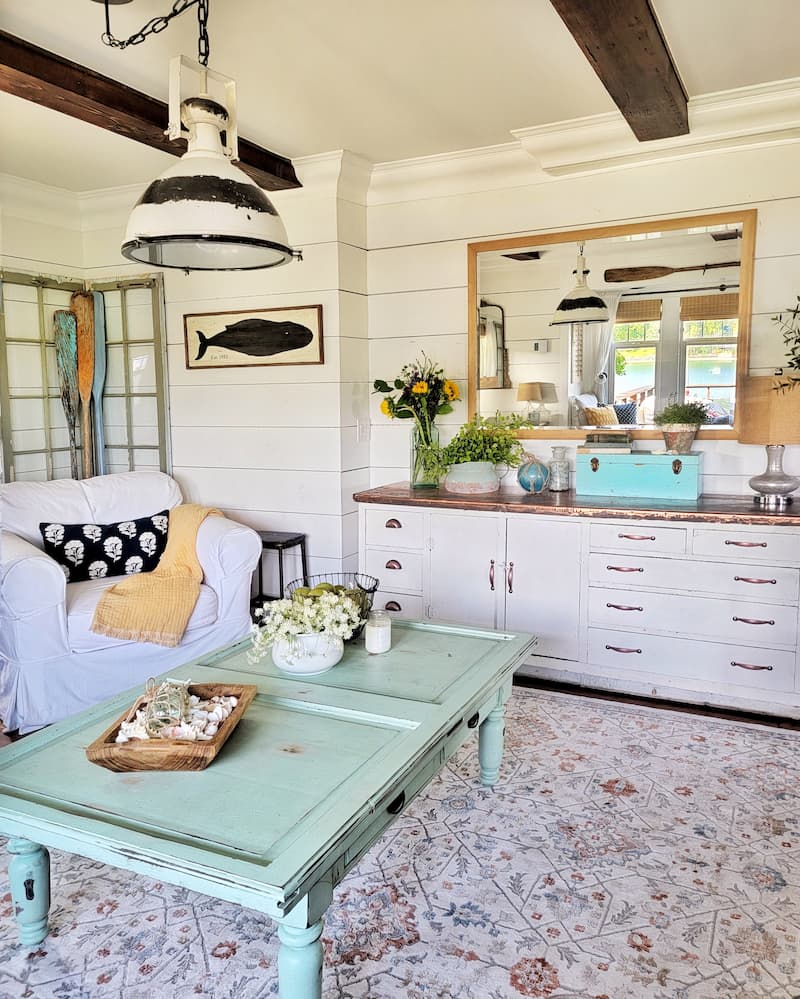
Shiplap for Much Needed Texture – Living Room Renovation
Adding white shiplap to the living room walls was such a game-changer! My hubby and I had several conversations about painting the dark gray walls many times. He was afraid we would lose a lot of color in the room, and it would be too stark.
But because we have the bright-colored furniture, the white makes a nice backdrop for those pieces, and pops even more!
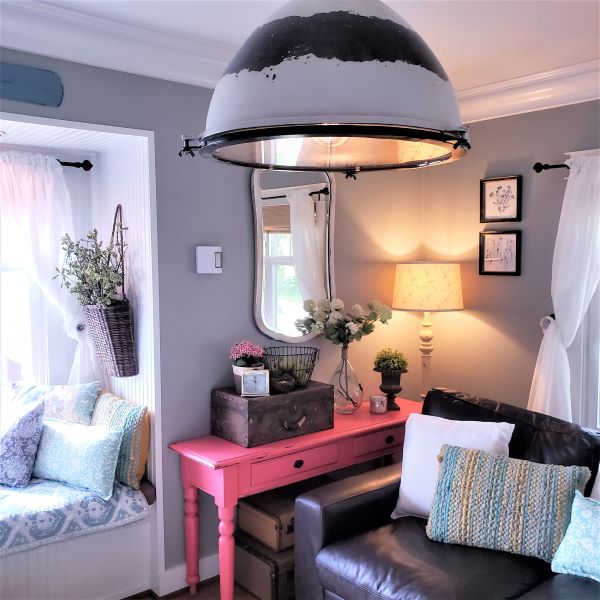
I went through a “gray” stage, and when I painted two of the living room walls, I didn’t realize how dark it made the room until after I added shiplap to them.
My style has evolved through the years. I go back and look at old pictures of the house and shake my head. Dark gray walls and bright pink…hmmm!
The shiplap has been put up, and now it’s time for some paint.
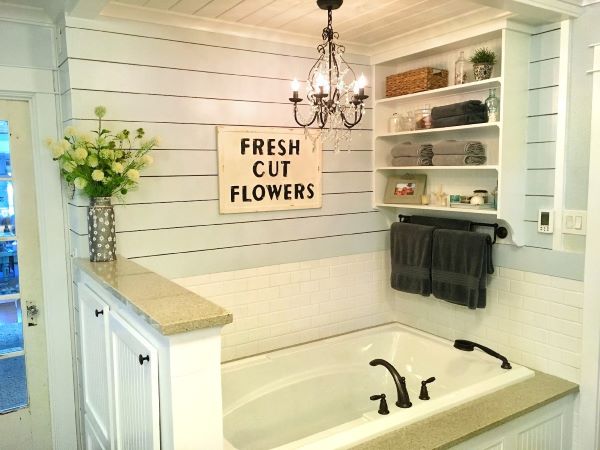
Bathtub Addition – Master Bathroom Renovation
One of the first renovation projects we did last year was to add a bathtub. I’ve had a lot of arthritic issues the last few years, and we felt that soaking in a tub at the end of the day would help.
My “decor brain” wanted a cute stand-alone tub, but this was the most realistic option for me. (It’s a jetted tub, but I had edited the jets out for an IG post because it looked better!!!)
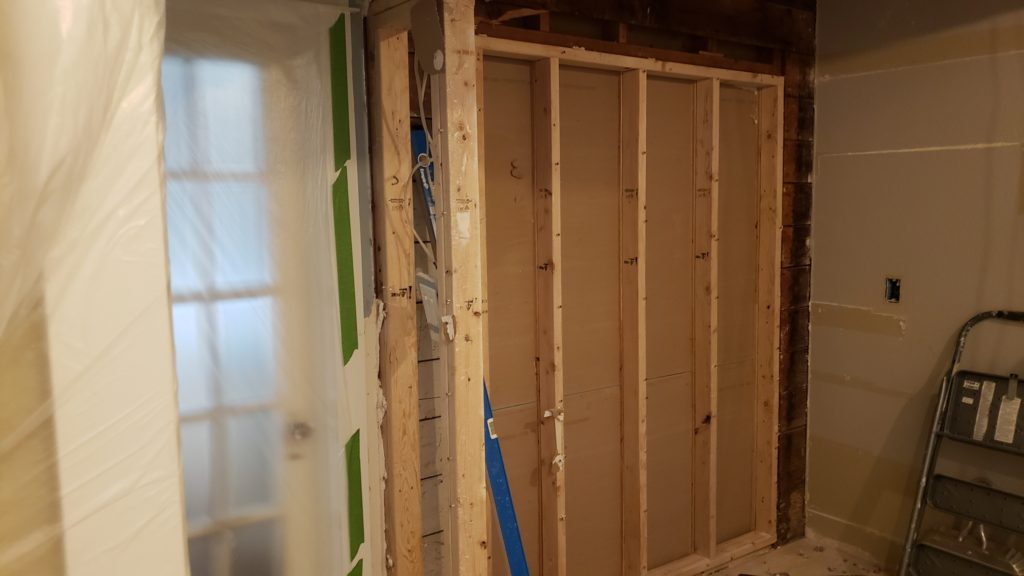
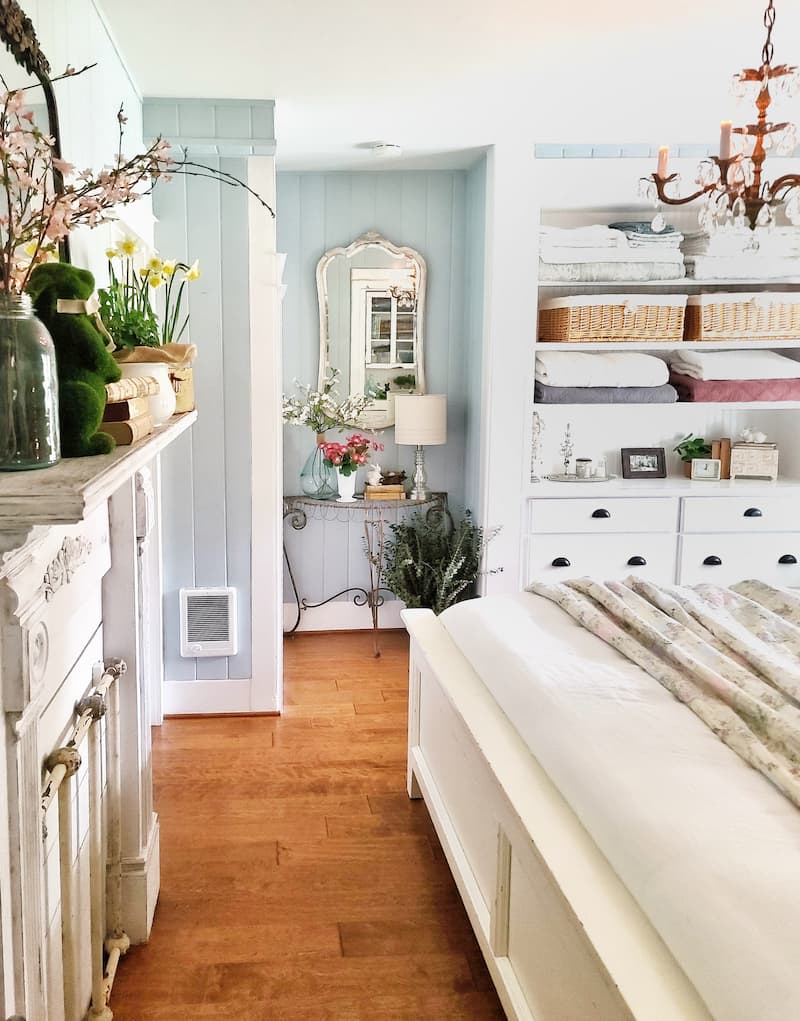
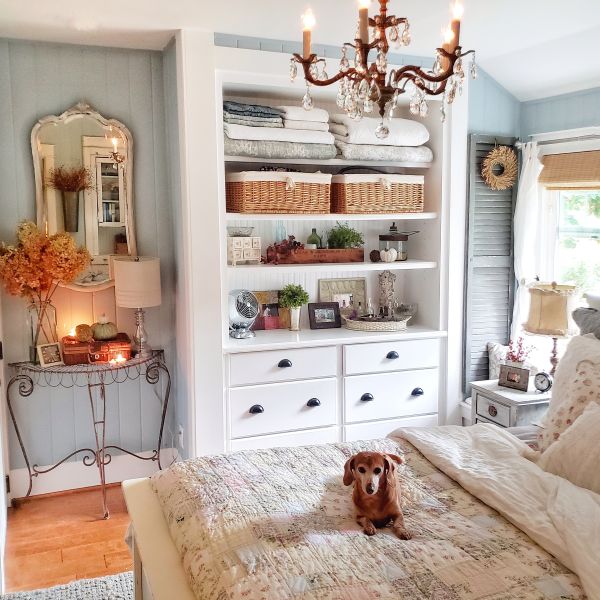
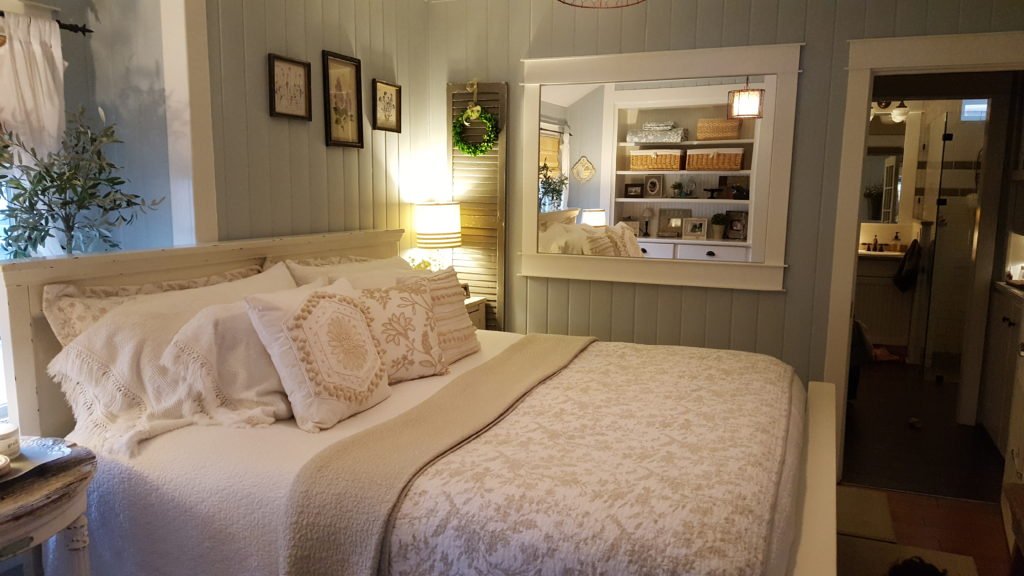
This is where the original bedroom walk-in closet was. We moved the wall away from the bedroom a bit, so we could add a built-in cabinet to the bedroom on the other side.
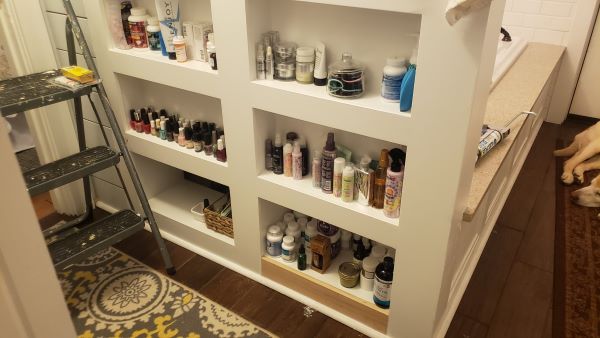
I know I mentioned that our house is really small, so we were so excited to have this extra room for some much-needed storage space!
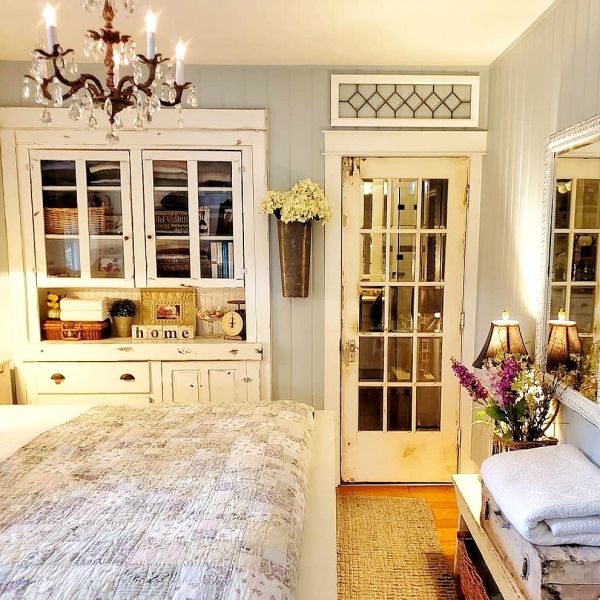
Built-in Cabinet Addition – Bedroom Renovation
This 100-year-old vintage cabinet was a stand-alone piece that we wanted to have in the bedroom, but it wouldn’t fit. We had the perfect opportunity while opening up the wall on the other side, to add a tub. Doesn’t it look like it’s been there all along?
From what we’ve been told, this chippy cabinet was built at the same time as the house. Each of the previous homeowners left it when they moved out. Now the cabinet will stay here forever!
Here’s a look at it before adding the built-in. We had a large mirror here to make the room look larger.
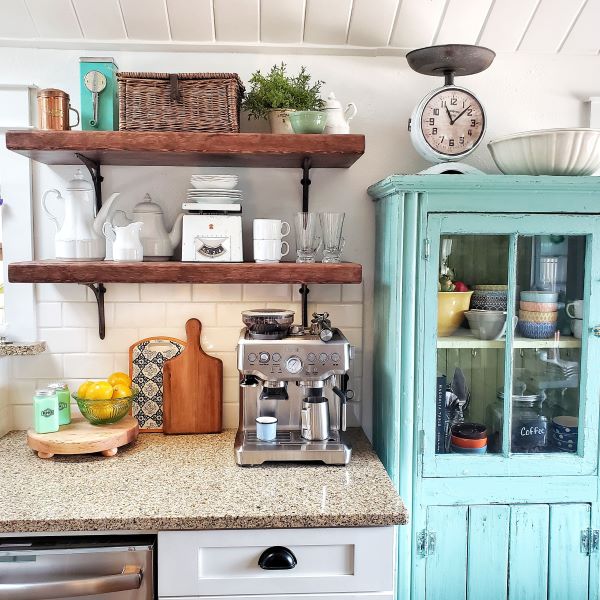
Open Shelving – Kitchen Renovation
I felt like the kitchen needed more warmth, and that this corner was lacking something. So we took out the white glass cabinet and added open shelving.
I was hesitant about shelving in the past because of how dusty the dishes would get from being out in the open. But everything I put on them is for decorative purposes and used very rarely.

Here’s the before picture with the white cabinet still in place.

I also painted the glass cabinet turquoise for an extra pop.
More kitchen renovations: 100-Year-Old Kitchen – Before, After, and Everything in Between

Pantry Update
I can never get the perfect picture in the pantry because it is so dark, but here it is. One of the first projects we did after moving in, was to gut the previous bathroom that was in this space.
We needed the extra storage space (are you sensing a theme?) and this gave us so much of that.
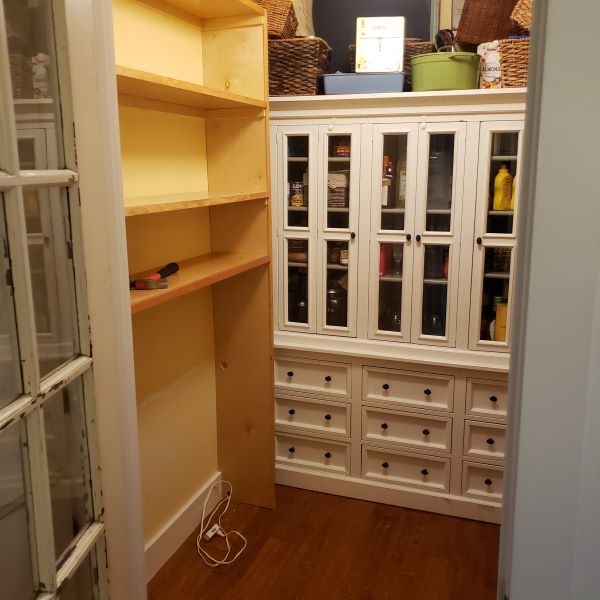
During last year’s kitchen renovation, we decided to upgrade the shelving. And of course, we painted over the yellow walls. For a fresh look, the shelves were taken out, to make room for newer ones with dark stained wood and beadboard.
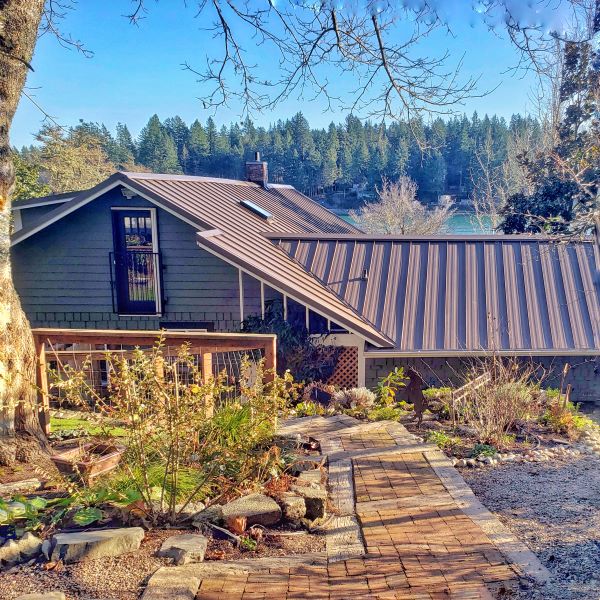
Adding a Metal Roof
It was time for a new roof, so we decided to go with a metal roof. We’ve lived with it for a few months and love it! The rain does sound a bit like a water feature upstairs when it is pouring rain, but I like that.
This picture was taken from the backyard, which rarely gets shown.
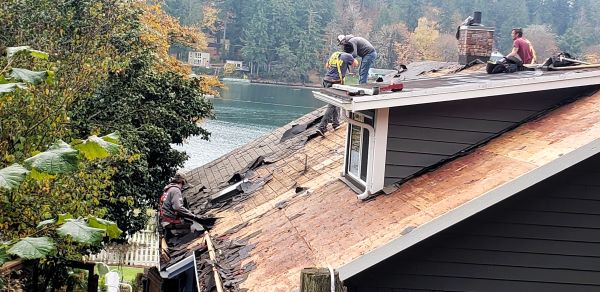
Here they are, taking off the existing roof.
2019 was the year when we were able to check off all of our large home renovation projects from our 8-year-old list.
And it’s a good thing! The amazing person who renovated our entire home, built our greenhouse, raised garden beds, and deck, has now moved to Lake Havasu to pursue new opportunities. We will miss him dearly! All the projects we decide to do going forward will be much smaller in comparison!
If you have any questions or additional suggestions, feel free to share them in the comments below. And be sure to share this blog post link with anyone who may find these renovations useful.
Follow Me for More Inspiration
Shop my Amazon Storefront, my LTK sources, and my favorite home decor, garden, and lifestyle products. When you purchase from one of my links, I earn a small commission which helps me to continue sharing all the content you expect on my blog.
Be sure to follow me on Pinterest, Instagram, Facebook, TikTok and LIKEtoKNOW.it. Do you like gardening? Join my Facebook Gardening Tips & Tricks group.

Excellent work, thanks for taking the time to write this, ill give it
a share on my facebook.
Thank you so much for visiting! And for the kind words.
It’s so much fun to walk down memory lane with you and your house, Kim! You guys have made some major changes and they all look amazing. It seriously doesn’t even look like the same house inside which is a true testament to your vision. I can’t wait to continue to follow along on your many adventures! Love this so much, CoCo
Kim, I love how your home turned out! So much more open and inviting. Thank you for sharing your beautiful home with us! Now I just wish my renovations were done 🙂
Thank you Kelly! It will happen! It took almost 8 years to finally finish up here. I can’t wait to see your renovations as they are being worked on!
Kim, Your blog is amazing! And so are the renovations! I’ve had the best time reading this post. I am left wondering how you get into your
bedroom now, since you covered up the doorway. Congrats on your new venture – wishing the blog much success!
Thanks so much Lori! As you can tell, I’m new, so I forget to share things like how do I get into the bedroom without a door!!! I could say we go through the window for a few laughs. We have another door off the laundry room that goes to the bathroom and bedroom. I’m going to do a tour of my home soon, on IG and hopefully on my blog if I can figure out how! Thanks for your comment!