
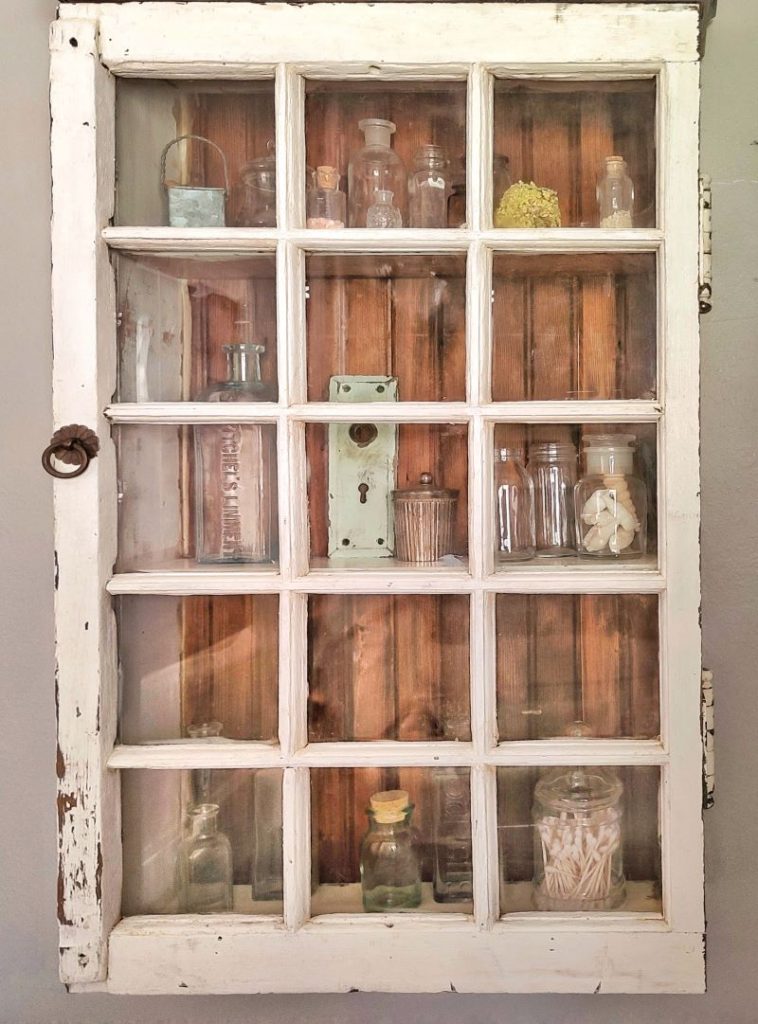
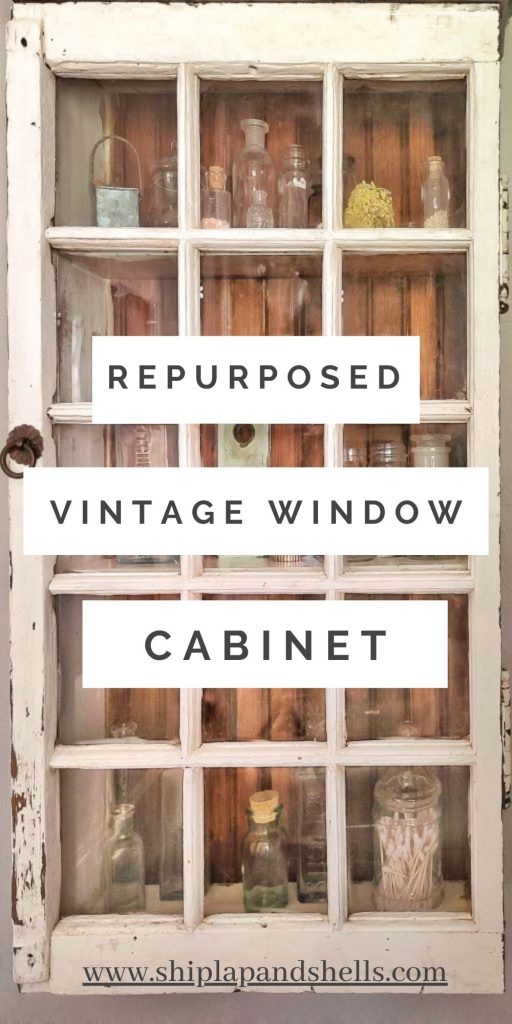
How to Repurpose a Vintage Window Into a Cabinet
Are you looking for a way to repurpose an old chippy window? In this post, I’ll share how I repurposed a vintage window into a cabinet in one afternoon.
Repurposing vintage items into new, functional pieces is a wonderful way to add unique charm to your home while also embracing sustainability.
Transforming a vintage window into a cabinet not only provides you with a custom piece of furniture but also preserves a bit of history.
As an Amazon affiliate, I earn from qualifying purchases at no extra cost to you. My blog contains other affiliate links as well for your convenience. Click here to read my privacy policy.

The Inspiration Piece
While my husband and I were on a boat trip in Port Townsend, Washington, we went to my favorite place in town to shop, the antique mall.
We spotted this cabinet and snapped a picture, knowing that we would one day use it as inspiration to recreate something similar, using one of our vintage windows at home.
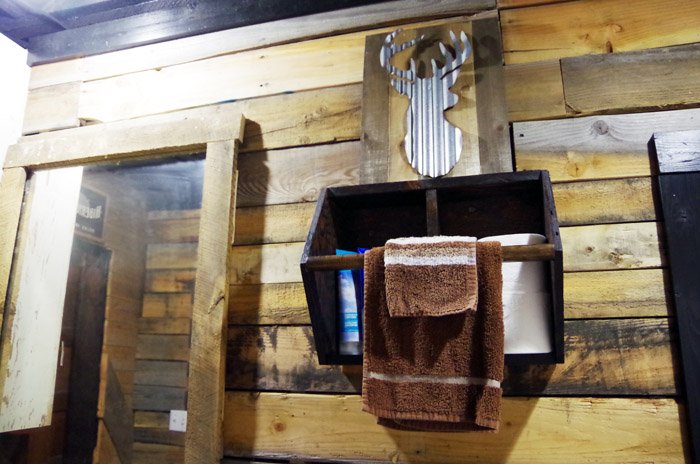
I knew mine would be more beaten up and chippy. We originally had crown molding on top, but it was too much for the wall space above our toilet in our powder room.
The Materials Used for Our Cabinet Project
There’s some crown molding in the picture above that we had left over from another project.
We originally added it to the cabinet but decided to take it off at the end due to the size of the space we were installing the cabinet in.
Steps to Repurposing a Vintage Window Into a Cabinet
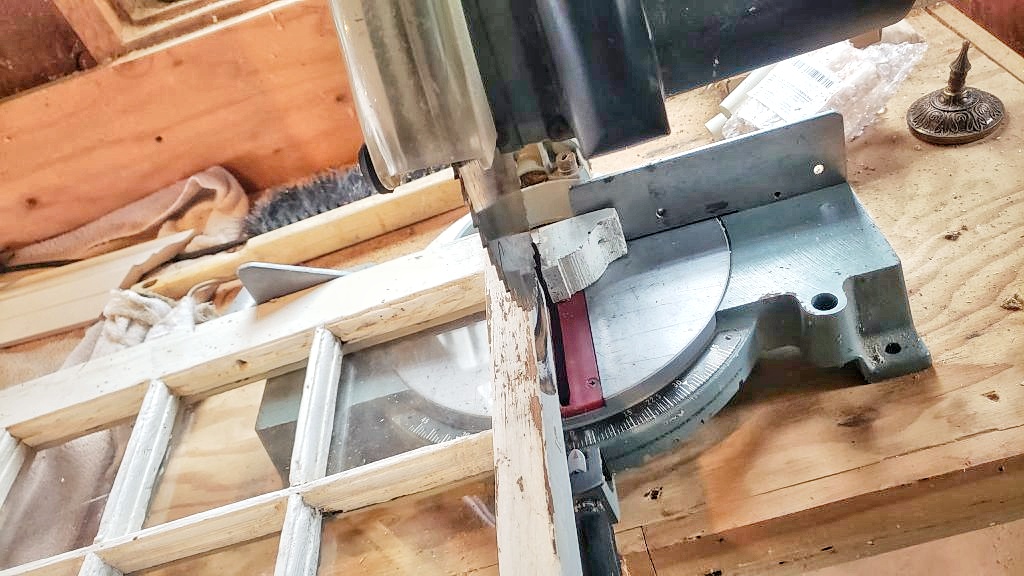
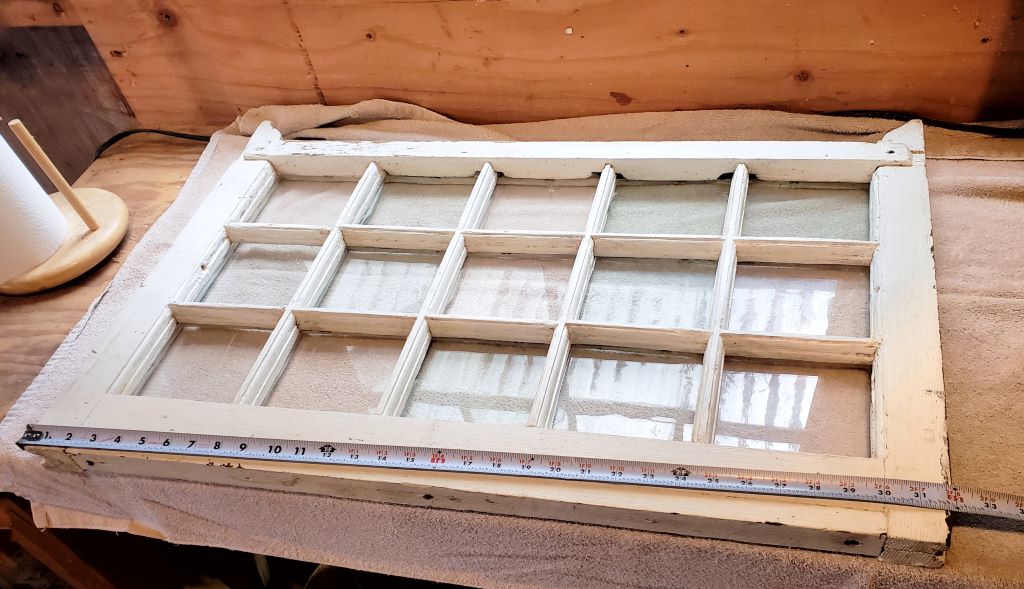
Most windows won’t need this step, but ours had little “dog ears” that needed to be removed with a chop saw before we could move forward with the project.
Constructing a Frame Box
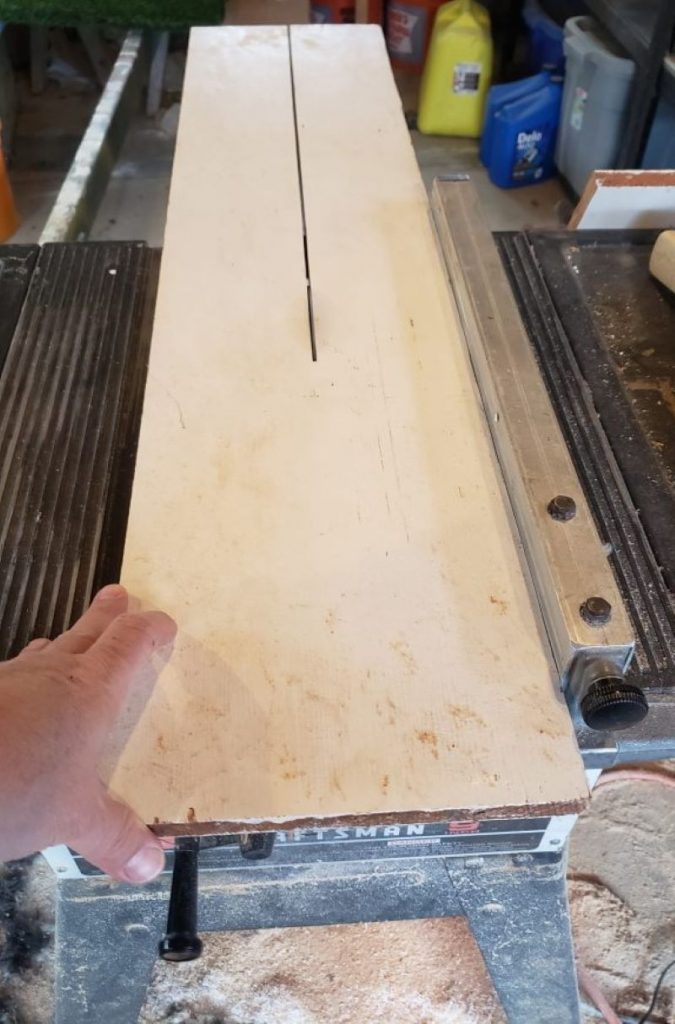
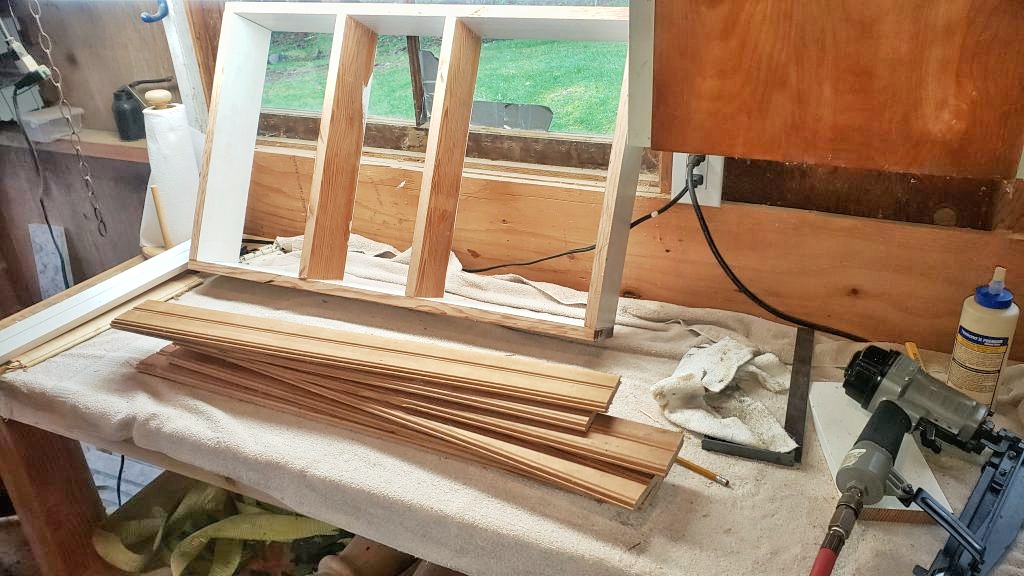
We used reclaimed pine boards, originally installed in our home for shelving, to make a box for our cabinet. Using a table saw, the boards were ripped to 5″ wide for both shelving and the frame.
The boards for the shelving, top, and bottom of the cabinet were cut to 18.5″ long. The boards for the sides were cut to 32″ long.
Here are the pieces we cut to create the cabinet frame and the shelves that go into the cabinet.
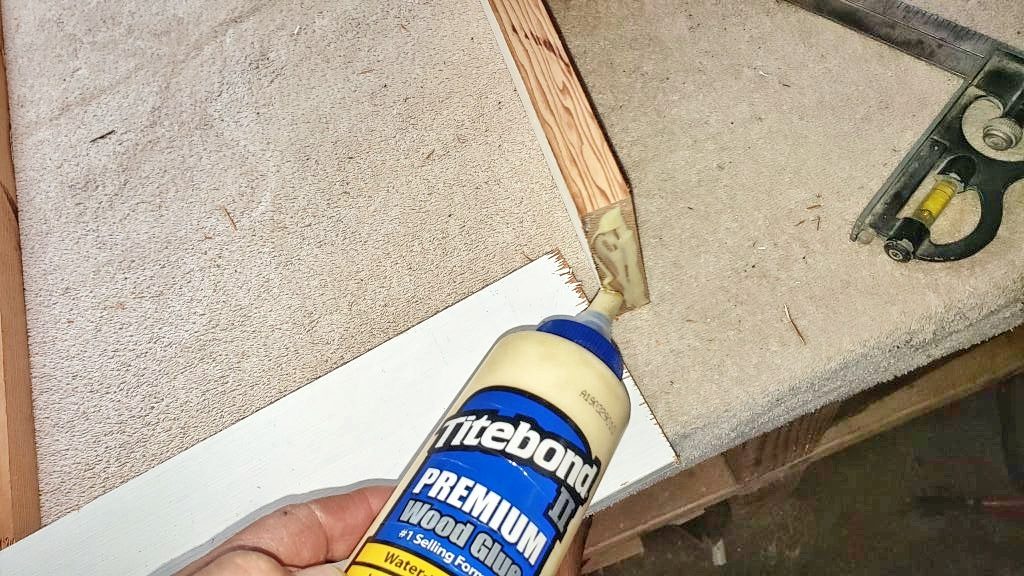
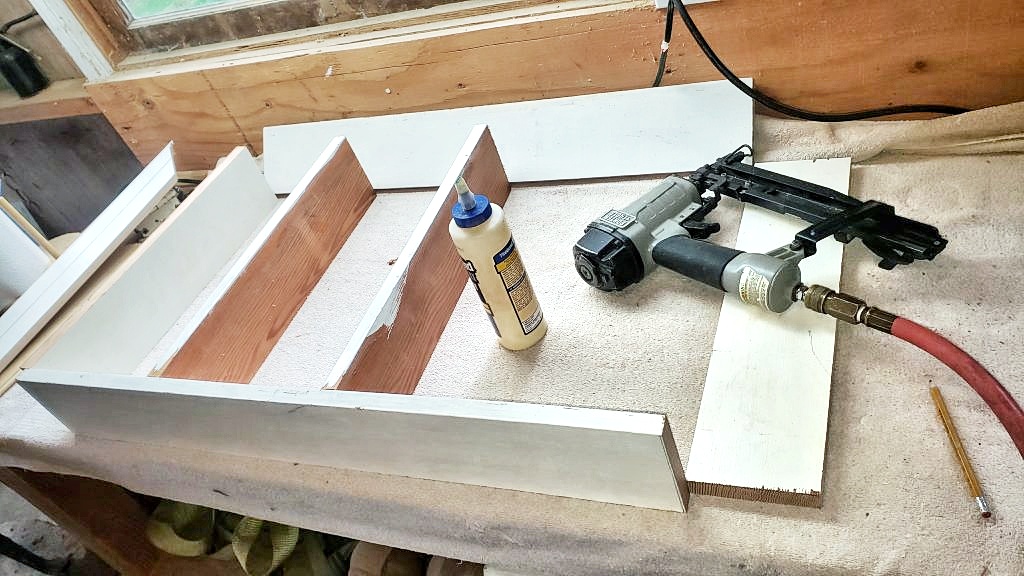
We used wood glue on all joints to increase the strength of the cabinet.
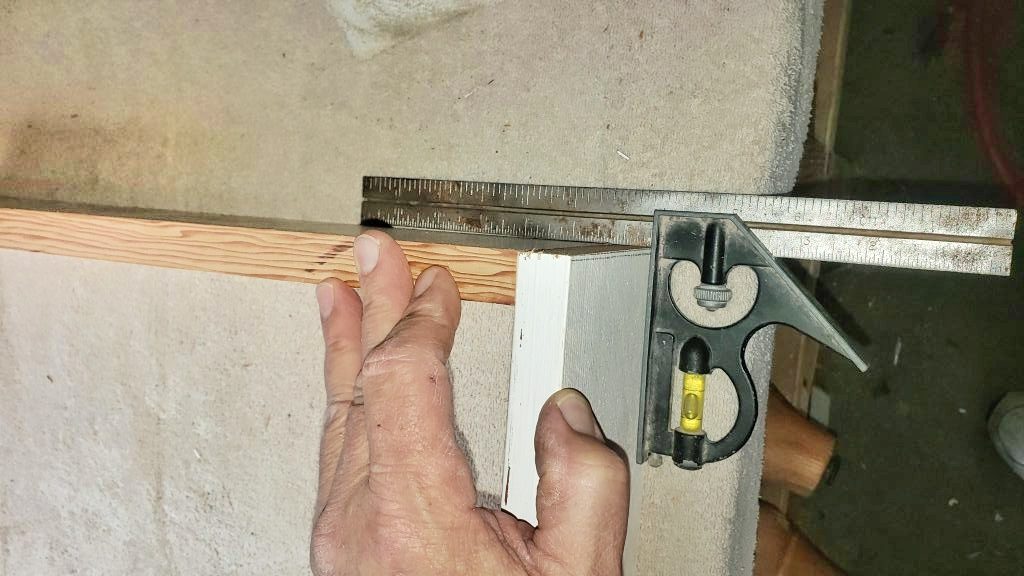
After applying the glue, and before nailing, make sure the corner is square.
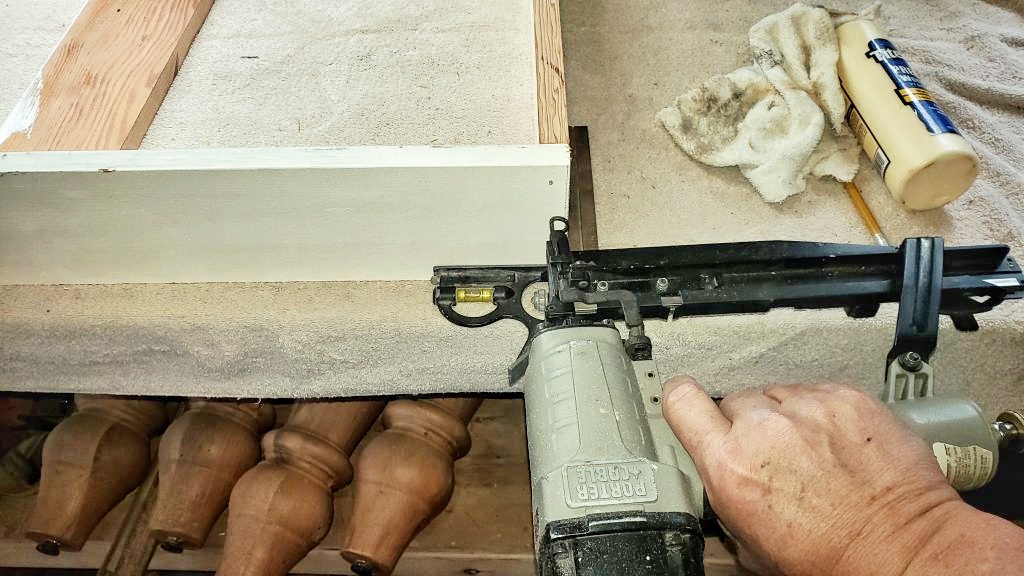
Then we used a nail gun to secure the joints in place while the glue dried.
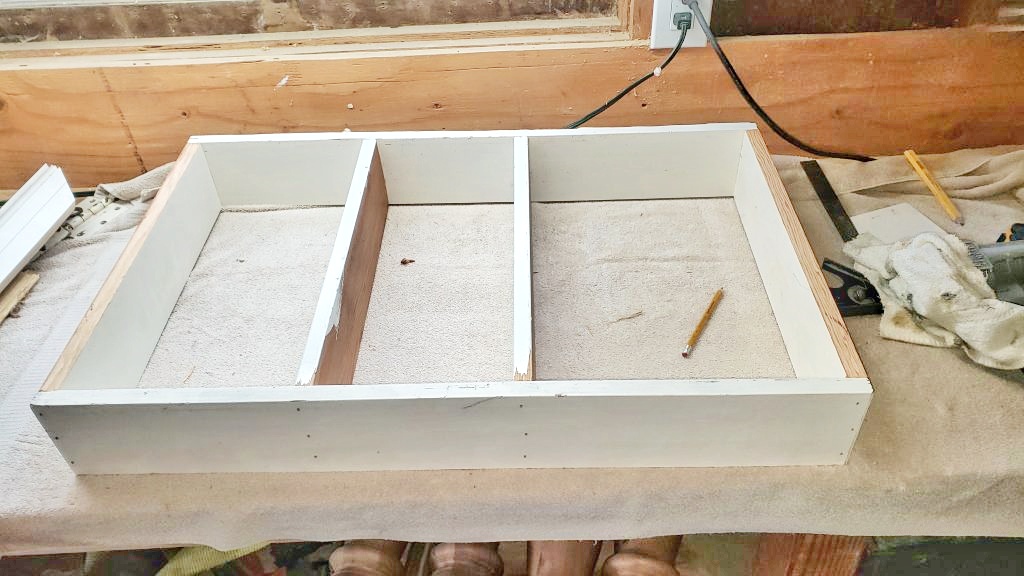
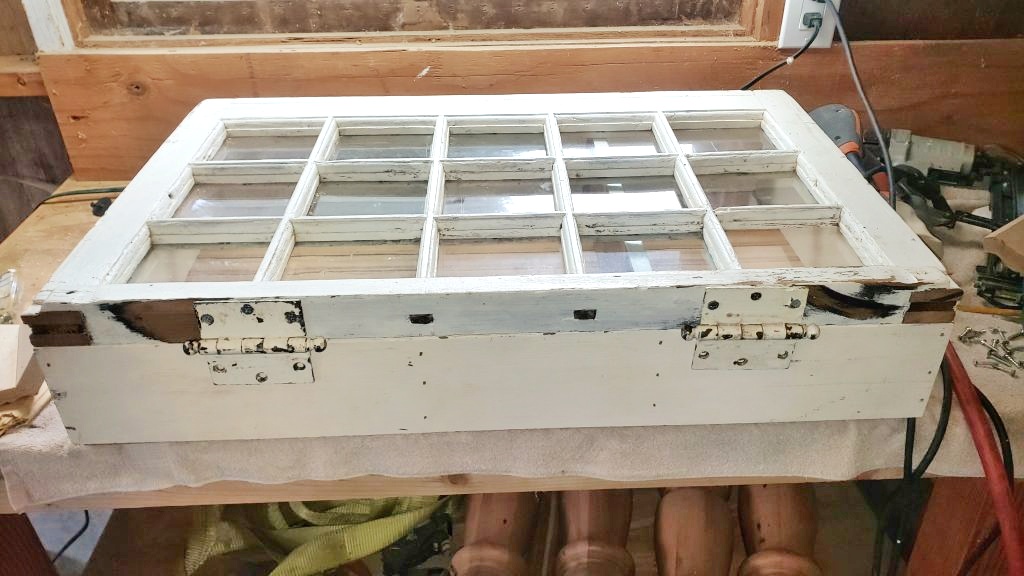
And here is our framed box for the cabinet.
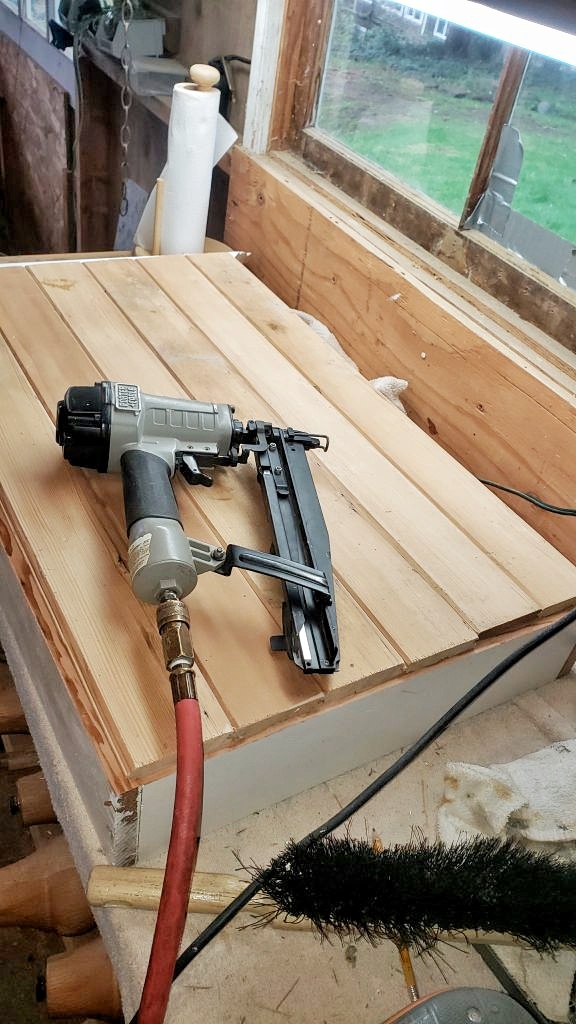
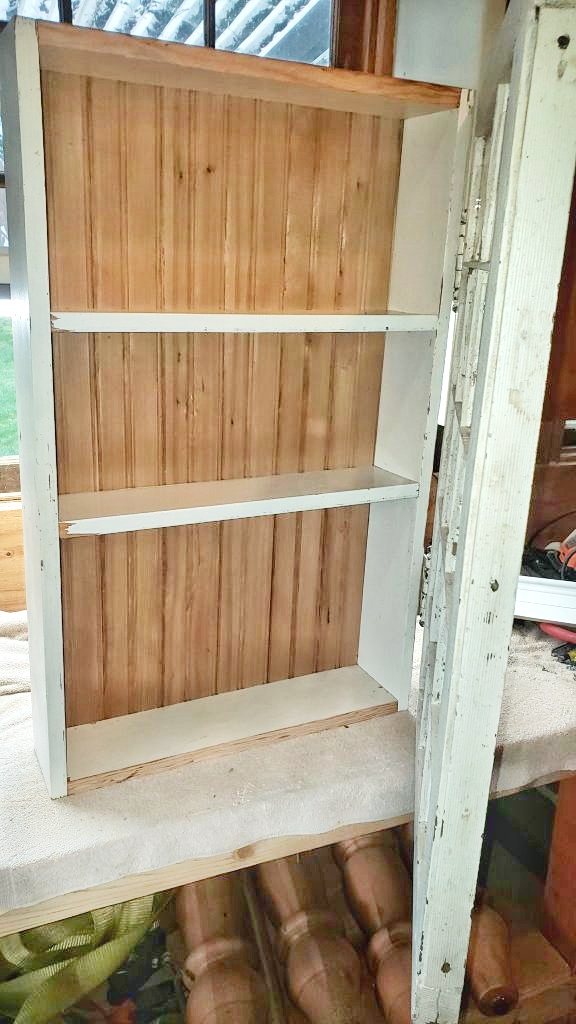
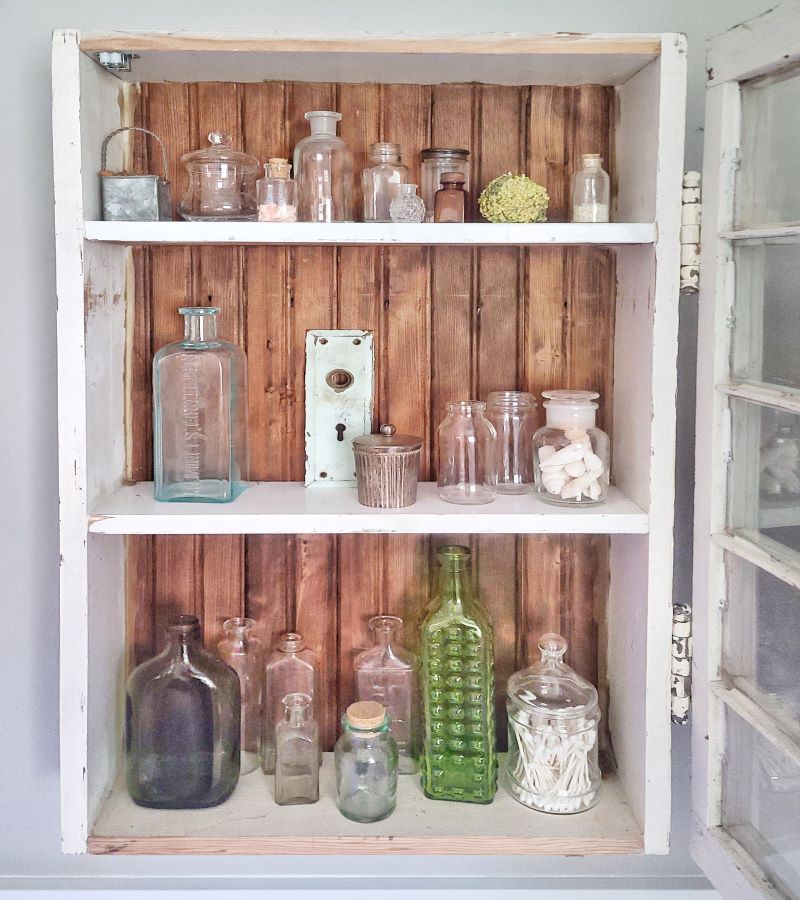
Add a Tongue and Groove Back to the Cabinet
After cutting the tongue and groove to the proper length of 32″ with a chop saw (any saw will do), we installed it to the back of the cabinet. Again, I glued and nailed this in place around all the edges.
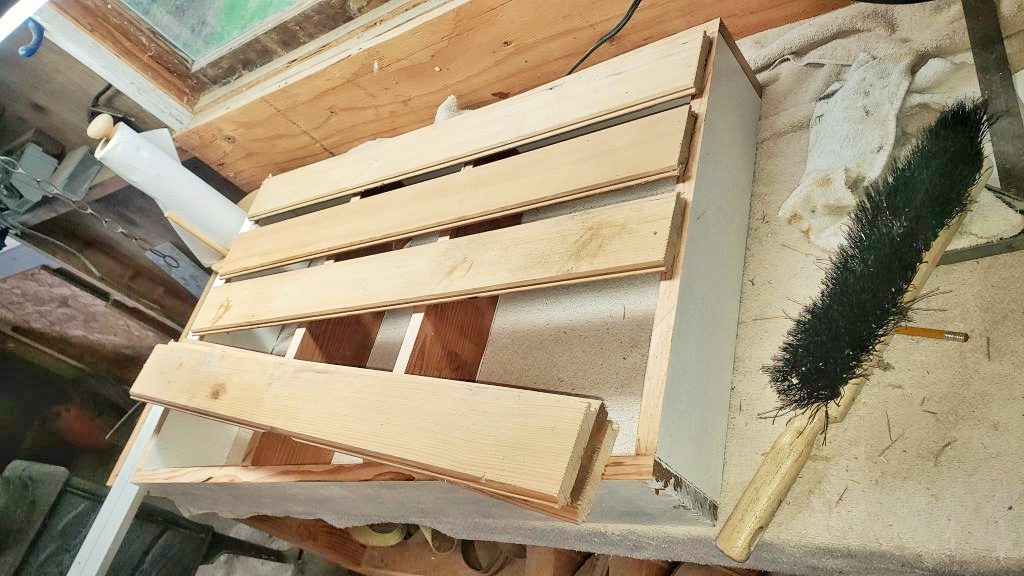
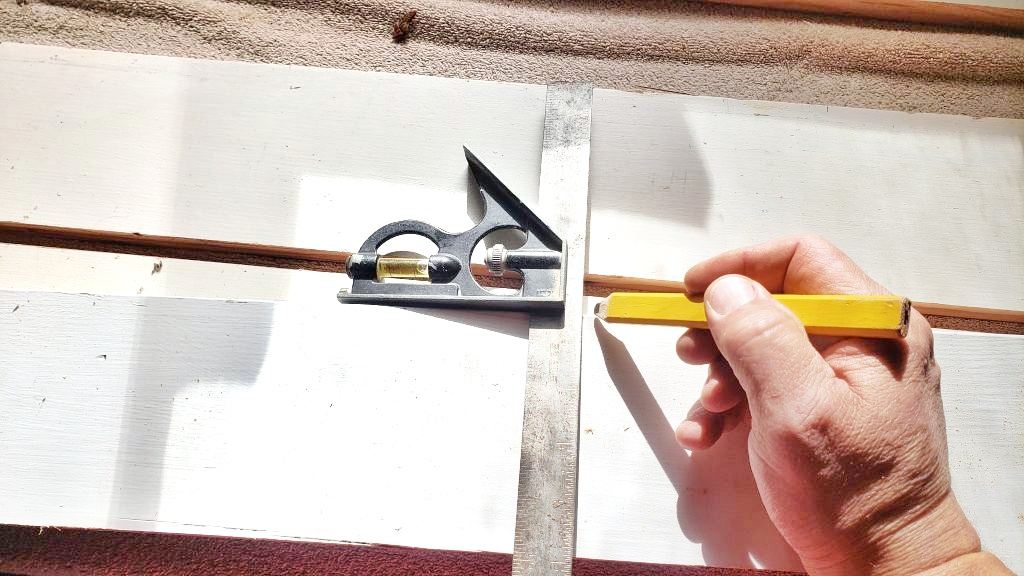
I drew a line with my carpenter’s pencil to show where I should place my nails to secure the shelves.
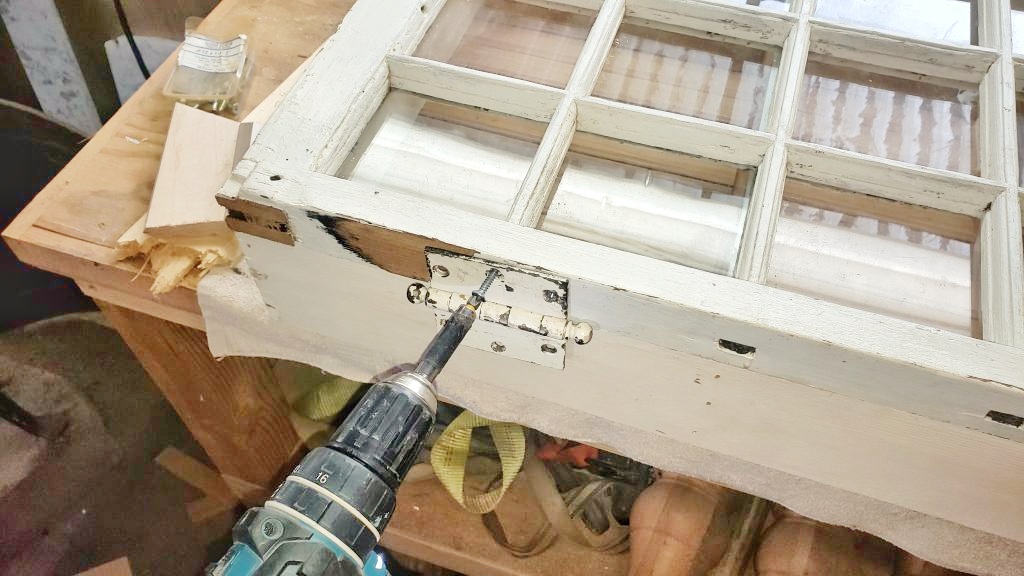
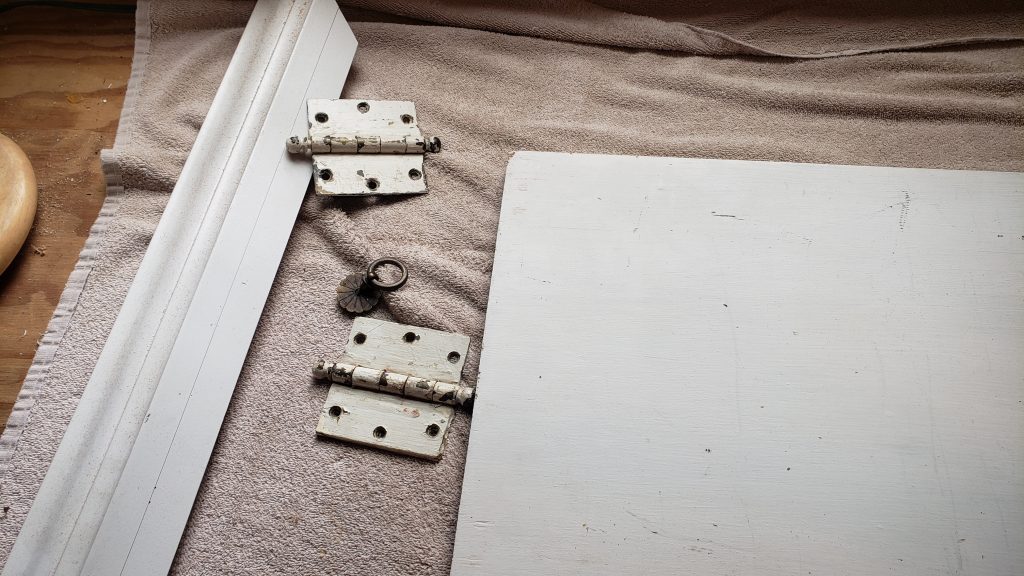
Install Hinges and Cabinet Latch
Install the hinges, and the cabinet latch by predrilling holes and using wood screws.
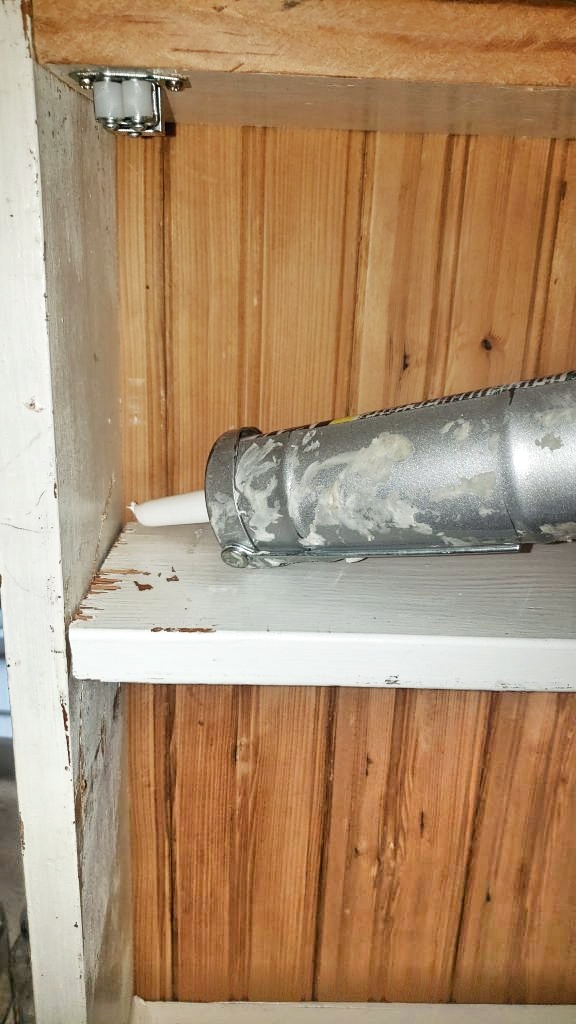
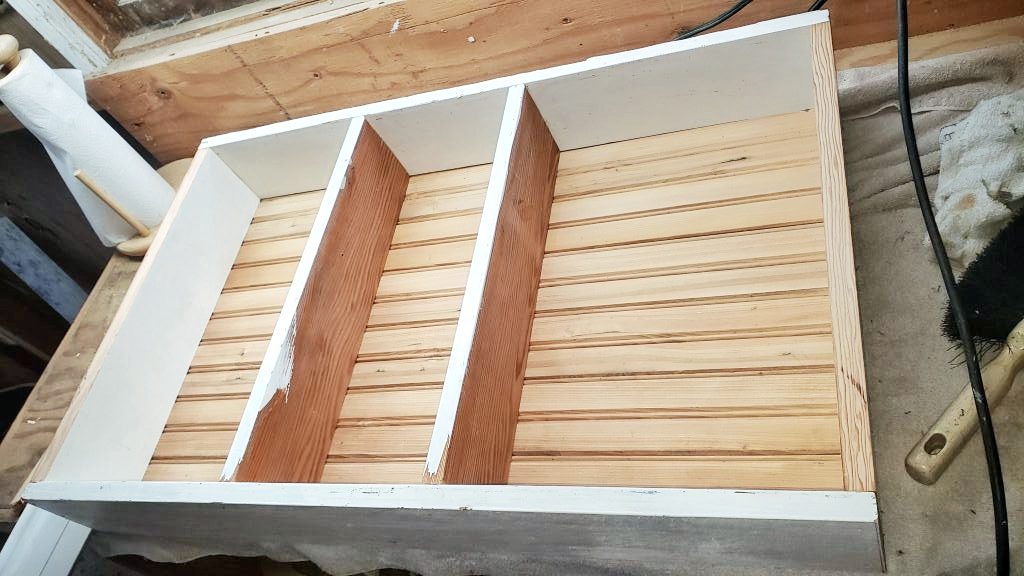
Caulk, Putty, and Paint
Now it’s time to caulk the corners and fill the nail holes. Because we chose to leave the crown molding off in the end, we didn’t need to paint the cabinet. We just left it chippy and beaten up.
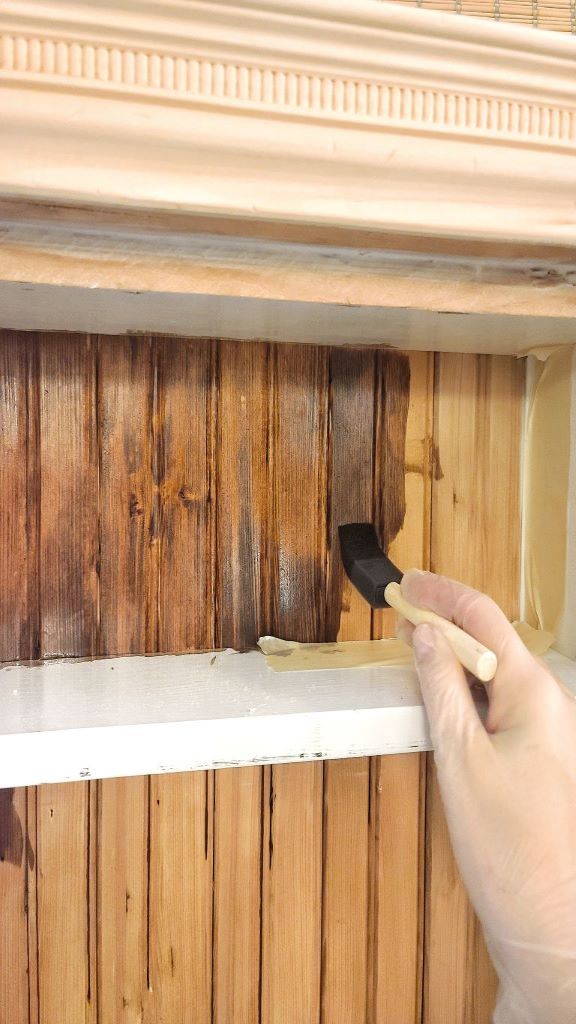
I wanted the tongue and groove to have more of a dark, rustic look, so I applied the stain with a foam brush.
If you look closely, you will see that I did a terrible job taping the shelves off, and I got stain on some of them. I’m just going to pretend that I did it that way on purpose and it gives it more of a vintage feel!
What did I learn from this DIY project?
I wish we would have had the crown molding attached to the top as the inspiration picture did, but then we would have had to hang it somewhere else in the house. And we do not have the luxury of free wall space.
I’ll be switching out the pull for something bigger and chunkier. For the next project, I will do a much better job taping the shelves when I stain.
But I think you can get the idea here, and make adjustments as needed. I know you’ll agree that a cabinet is a great way to repurpose a vintage window.
Until next time,
Follow Me for More Inspiration
Shop my Amazon Storefront, my LTK sources, and my favorite home decor, garden, and lifestyle products. When you purchase from one of my links, I earn a small commission which helps me to continue sharing all the content you expect on my blog.
Be sure to follow me on Pinterest, Instagram, Facebook, TikTok and LIKEtoKNOW.it. Do you like gardening? Join my Facebook Gardening Tips & Tricks group.

CHAS’ CRAZY CREATIONS | EASY FLOWER BASKET TO SOLAR CHANDELIER
GRANDMA’S HOUSE DIY | OLD GARDENER’S TOOLBOX UPCYCLE
THE HOUSE ON SILVERADO | 4 EASY UPCYCLES USING PAINT
KIPPI AT HOME | DIY HANGING PLANTER
DESIGN MORSELS | UPCYCLE SHEETS INTO LINED DRAPES
Great creatice project! Also appreciated the tutorial.
Thank you so much for the compliment. I wish I could have shot a better picture, but it was a tight squeeze in that tiny spot above the toilet!
This is such a fun project!! Thanks for sharing the process!!
I love the imperfections! Great job!!
Thank you! I am so glad that you do.
This upcycle cabinet is amazing! Everything you create is gorgeous.
Happy Spring.
Hugs,
Kippi
Ps. Pinned
That is such a sweet thing to say Kippi. I really enjoy your DIY projects, you inspire me so much.
What a great project! You make it look so easy! I love how it turned out. Pinned for inspiration later!
Niky @ Tthe House on Silverado
Thank you, Niky! Thank goodness for my husband!
This is so lovely! I love how it turned out – great hopping with you!
Thank you, Tarah!
This is so charming! I passed up an old window on the roadside the other day and sort of regretted it, but wow, I just don’t have the skills or the workshop you have! You did such a great job on this little shelf and have an adorable place to showcase treasures now!
Thank you, Chloe! You are so kind. But I’ll let you in on the secret. My husband is the guy with all the skills, and he even helped me with the blog. Bless his heart.
This is an amazing upcycle Kim! I love how you made it into something useful and it looks stunning friend. Thank you so much for sharing and wonderful hopping with you!
Thank you my friend. I wish I could have made the crown molding work, but life happens. Always love this blog hop!
This turned out so great. I love the tongue and groove back and I also love that you didn’t apply the stain perfectly. You’re right. That makes it look more vintage. It was fun hopping with you today!
Thank you Andrea. I am always trying to find excuses for my lack of preparation when I am working on a project!